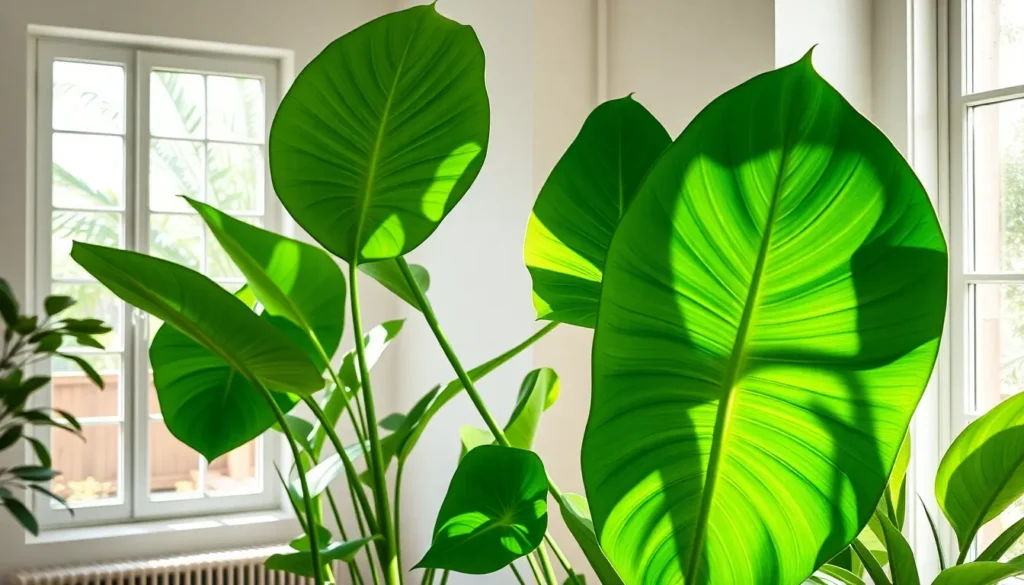
Elephant ears plants are taking the indoor gardening industry by storm and it’s easy to see why. These magnificent tropical beauties bring dramatic flair to any living space with their oversized heart-shaped leaves that can span up to three feet wide. We’ve seen countless plant enthusiasts transform their homes into lush jungle retreats using these stunning specimens.
What makes elephant ears particularly appealing for indoor cultivation is their remarkable adaptability and relatively low-maintenance nature. Unlike many tropical plants that struggle indoors we’ve found that elephant ears actually thrive in the controlled environment of our homes when given proper care.
Whether you’re a seasoned plant parent or just starting your indoor garden journey elephant ears offer the perfect combination of visual impact and manageable care requirements. We’re excited to share everything you need to know about successfully growing these show-stopping plants indoors and creating your own tropical paradise at home.
Choose the Right Elephant Ears Variety for Indoor Growing
Selecting the perfect elephant ears variety determines your indoor growing success and matches your space requirements. We’ll explore three main genus options that thrive in different indoor environments and room sizes.
Alocasia Species for Compact Spaces
Alocasia varieties excel in smaller indoor spaces with their upright growth habit and manageable size requirements. These compact elephant ears typically reach 2-3 feet in height, making them perfect for apartments, offices, and cozy living rooms.
Alocasia ‘Polly’ (African Mask Plant) stands out as our top recommendation for beginners, featuring glossy dark green leaves with prominent white veining that grows 12-18 inches tall. This variety tolerates lower humidity levels better than most elephant ears and adapts well to indoor lighting conditions.
Alocasia ‘Bambino’ offers even smaller dimensions at just 12 inches in height, perfect for desks, shelves, and tabletop displays. Its heart shaped leaves display beautiful metallic sheens that catch indoor light beautifully.
Alocasia zebrina provides unique visual interest with its striking zebra striped stems and arrow shaped leaves that reach 18-24 inches tall. This variety requires slightly more humidity but rewards growers with exceptional foliage patterns.
Colocasia Varieties for Larger Rooms
Colocasia species thrive in spacious indoor areas where their impressive size can make a dramatic statement. These varieties can reach 4-6 feet indoors with proper care and adequate space.
Colocasia ‘Black Magic’ creates stunning focal points with its deep purple, almost black leaves that can span 2-3 feet wide. This variety needs bright indirect light and consistent moisture to maintain its dramatic coloring.
Colocasia ‘Blue Hawaii’ offers tropical appeal with blue-green leaves featuring prominent veining that adds texture to large living spaces. We recommend placing this variety near large windows or in sunrooms for optimal growth.
Colocasia ‘Coffee Cups’ provides unique leaf structure with cupped shaped foliage that holds water naturally, creating an interesting architectural element in spacious rooms. This variety grows 3-4 feet tall and spreads 2-3 feet wide.
Xanthosoma Options for Low Light Areas
Xanthosoma varieties adapt exceptionally well to lower light conditions, making them ideal for rooms with limited natural light or interior spaces away from windows.
Xanthosoma sagittifolium (White Taro) tolerates shade conditions that would stress other elephant ears varieties. Its large arrowhead shaped leaves maintain their green color even in dimmer indoor environments.
Xanthosoma ‘Lime Zinger’ brightens darker spaces with its chartreuse colored foliage that seems to glow in low light conditions. This variety reaches 3-4 feet tall and creates vibrant accents in shadier corners.
Xanthosoma violaceum displays purple tinged leaves that develop deeper coloration in lower light, making it perfect for bathrooms, bedrooms, or north facing rooms. We find this variety particularly forgiving for indoor growers still learning proper elephant ears care.
Select the Perfect Location in Your Home

Now that you’ve chosen your ideal elephant ears variety, we need to find the perfect spot where your plant will truly flourish indoors.
Bright, Indirect Light Requirements
Bright, indirect light serves as the foundation for healthy elephant ears growth. We recommend positioning your plant near south, west, or east facing windows where it can receive 6 to 8 hours of filtered sunlight daily. Direct sunlight will scorch those magnificent leaves, so placing sheer curtains between your plant and the window creates the perfect lighting conditions.
Insufficient light causes immediate problems we can easily spot. Leaves begin to pale and droop when your elephant ears isn’t getting enough brightness. Rooms with good natural ambient light work exceptionally well, especially spaces with large windows that provide consistent filtered illumination throughout the day.
Temperature and Humidity Considerations
Temperature control between 60°F and 80°F keeps your elephant ears comfortable year round. We’ve found this range mimics their tropical origins and promotes steady growth. Consistent temperatures prevent stress that can damage those impressive leaves.
High humidity becomes crucial for replicating their natural environment. Mist the leaves once or twice weekly to boost moisture levels around your plant. Alternatively, we recommend placing your pot on a pebble tray filled with water for continuous humidity elevation.
Soil moisture requires careful attention without creating waterlogged conditions. Water when the top 1 to 2 inches of soil feel dry to your touch. This approach prevents root rot while ensuring your plant receives adequate hydration.
Space Planning for Large Foliage
Ample space accommodates the dramatic size these plants can achieve. We suggest choosing spacious rooms where those broad leaves can spread without crowding nearby furniture or other plants. Large containers with excellent drainage become essential for supporting their extensive root systems.
Weekly leaf maintenance keeps your elephant ears looking pristine. Wiping leaves with a damp cloth removes dust buildup that can block pores and weaken your plant’s ability to breathe properly. This simple care routine ensures maximum light absorption and healthy respiration.
Prepare the Ideal Potting Setup

Now that we’ve selected our elephant ears variety and understand the growing conditions, let’s focus on creating the perfect foundation for these magnificent plants.
Container Size and Drainage Needs
Large containers between 14 to 20 inches are essential for accommodating elephant ears’ extensive root systems and their impressive growth potential. These plants start from tubers but quickly develop into substantial specimens that need ample space to thrive indoors.
Proper drainage prevents the root rot that can quickly kill these tropical beauties. We recommend choosing pots with multiple drainage holes that allow excess water to escape freely. Avoid containers without drainage or those with only single small holes.
Spacing considerations matter significantly when selecting your container size. Don’t overcrowd your elephant ears by choosing pots that are too small, as this restricts their natural growth pattern and can stress the plant.
Best Soil Mix for Indoor Elephant Ears
Rich, well draining potting soil provides the foundation your elephant ears need for healthy indoor growth. We suggest using a standard indoor potting medium that you can enhance with compost for added nutrients.
Moisture retention without saturation creates optimal growing conditions for these plants. The soil should hold enough water to keep roots hydrated while allowing excess moisture to drain away, preventing waterlogged conditions that damage root systems.
Planting depth affects tuber development when you’re starting from bulbs. Fill your container about three quarters full with soil, then place the tuber approximately 1 inch below the surface for proper establishment.
Repotting Schedule and Techniques
Spring timing offers the best opportunity for successful elephant ears repotting when plants are entering their active growing season. This timing allows the plant to recover quickly and establish itself in fresh soil.
Container sizing should increase gradually rather than jumping to much larger pots. We recommend selecting a new container that’s only 3 to 5 inches larger in diameter than the current pot to prevent soil from staying too wet.
Gentle root handling preserves plant health during the repotting process. Carefully remove your elephant ears from its current container, then gently loosen the root ball without damaging the delicate root structure.
Fresh soil placement maintains proper growing levels when transferring to the new container. Spread the roots in the new pot, add fresh soil around them, and keep the soil level consistent with the previous planting depth. Water thoroughly after completing the repotting process to help settle the soil and reduce transplant shock.
Master the Watering Requirements

Now that we’ve established the perfect potting setup, let’s jump into the most critical aspect of elephant ear care: proper watering techniques. These tropical beauties require consistent moisture management to thrive indoors.
Soil Moisture Monitoring Methods
Check the soil surface regularly by inserting your finger into the top 1-2 inches of potting mix. We recommend testing moisture levels every few days to establish a watering routine that works for your exact environment. Touch becomes your most reliable tool for determining when elephant ears need water.
Feel for dryness at the surface level before adding more water to prevent oversaturation. We find that elephant ears prefer their soil to dry slightly between waterings rather than remaining constantly wet. Well-draining potting mix helps maintain this ideal moisture balance.
Monitor the soil’s texture to understand your plant’s hydration needs throughout the week. We notice that properly moistened soil feels slightly damp but not soggy when pressed between fingers. This tactile method provides immediate feedback about your elephant ear’s watering requirements.
Seasonal Watering Adjustments
Increase watering frequency during warmer growing months when elephant ears actively use more moisture for growth. We typically water our plants every 3-4 days during spring and summer when temperatures stay between 60-80°F. Higher temperatures accelerate water uptake and evaporation rates.
Reduce watering sessions in cooler months or during dormancy periods when plant growth naturally slows down. We allow soil to dry more thoroughly between waterings during fall and winter months. This adjustment prevents root rot while supporting the plant’s natural seasonal cycle.
Adjust based on indoor heating and air conditioning systems that can affect soil moisture levels year-round. We’ve observed that forced air systems tend to dry out elephant ear soil faster than expected. Environmental factors like humidity and airflow influence how often we need to water these plants.
Signs of Overwatering and Underwatering
Overwatering symptoms include water droplets dripping from leaf tips, yellowing foliage, and soggy soil conditions around the roots. We watch for these “weeping” leaves as the first indicator that our elephant ears have received too much water. Root rot develops quickly when soil remains constantly saturated.
Underwatering indicators show up as droopy, wilting leaves with dry, crispy edges that feel brittle to touch. We notice that severely dehydrated elephant ears develop hard, compacted soil surfaces that resist water absorption. These plants will appear limp and lifeless when they need immediate hydration.
Leaf condition changes provide the clearest signals about watering accuracy for elephant ear plants indoors. We examine foliage regularly to catch moisture imbalances before they become serious problems affecting plant health.
Maintain Proper Humidity Levels

Elephant ears thrive in humidity levels between 60-80%, significantly higher than most indoor environments. We need to replicate their natural tropical conditions to prevent leaf drooping, browning edges, and stunted growth.
Creating a Humid Microclimate
Misting remains one of the most effective ways to boost humidity around our elephant ears. We should mist the leaves once or twice weekly, focusing on the undersides where stomata are located. This technique not only raises moisture levels but also keeps leaves clean and dust-free.
Humidity trays offer a consistent solution for maintaining moisture without the risk of overwatering. We place our pots on trays filled with water and pebbles, allowing evaporation to create a humid microclimate around the plant. The stones prevent roots from sitting in standing water while providing steady moisture through natural evaporation.
Strategic placement near naturally humid areas like bathrooms or kitchens can supplement our humidity efforts. We position our elephant ears in these spaces when they receive adequate light, taking advantage of steam and moisture from daily activities.
Using Humidifiers and Humidity Trays
Electric humidifiers provide the most reliable method for maintaining ideal moisture levels throughout the year. We place humidifiers within 3-6 feet of our elephant ears to ensure consistent humidity, especially during dry winter months when indoor heating reduces air moisture.
Pebble tray systems work exceptionally well for multiple plants or larger specimens. We create these trays using shallow dishes filled with decorative stones and water, ensuring the water level stays below the pot’s bottom. This method provides gentle, continuous humidity through evaporation without requiring electricity.
Water level monitoring becomes crucial for tray-based systems to maintain effectiveness. We refill trays weekly or when water levels drop significantly, cleaning pebbles monthly to prevent algae buildup and maintain proper air circulation.
Grouping Plants for Natural Humidity
Plant clustering creates beneficial microclimates through natural transpiration processes. We group our elephant ears with other humidity-loving plants like ferns, calatheas, or peace lilies to encourage collective moisture release into the surrounding air.
Spacing considerations ensure adequate air circulation while maximizing humidity benefits. We maintain 12-18 inches between grouped plants, allowing each specimen enough room to grow while benefiting from shared moisture levels.
Complementary plant selection enhances the overall humidity strategy for our indoor garden. We choose plants with similar care requirements that naturally release moisture, creating a self-sustaining humid environment that benefits all grouped specimens.
Provide Adequate Indoor Lighting

We’ve established the perfect humidity environment for our elephant ears, but lighting remains equally crucial for their success. These tropical beauties require 6 to 8 hours of filtered sunlight daily to maintain their vibrant, oversized foliage and prevent leaves from becoming pale and limp.
Natural Light Positioning Strategies
Positioning our elephant ears near south or east facing windows delivers the ideal bright, indirect light they crave. We recommend placing these plants where they’ll receive ample brightness without harsh direct rays that can damage their impressive leaves. Sheer curtains create excellent filtered lighting conditions while protecting the foliage from intense sun exposure. Maintaining a few feet distance from the window allows us to provide sufficient brightness without risking leaf burn. Windows with morning sun exposure work particularly well since the gentler rays won’t overwhelm the sensitive foliage.
Supplemental Grow Light Options
Full spectrum LED grow lights become essential when natural lighting falls short of our elephant ears’ needs. We position these lights 12 to 18 inches above the plant to ensure adequate light intensity without causing heat damage to the leaves. Winter months often require supplemental lighting since shorter days can’t provide the necessary 6 to 8 hours of brightness our plants demand. Balanced light spectrum options that mimic natural sunlight work best for maintaining healthy growth patterns. Running grow lights for several hours daily helps compensate for insufficient window light in darker rooms or during cloudy periods.
Avoiding Direct Sun Damage
Direct sunlight poses a serious threat to our elephant ears’ large, delicate leaves even though their need for bright conditions. We must watch for signs of leaf scorch including brown spots, yellowing edges, or bleached areas that indicate excessive sun exposure. Gradual acclimation becomes necessary if we need to move plants to brighter locations, slowly increasing exposure over several days. Monitoring leaf condition daily helps us catch sun damage early and adjust placement accordingly. Filtering methods such as translucent window films or strategic plant positioning protect our elephant ears while still delivering the brightness they require for optimal growth.
Feed Your Elephant Ears Plants Properly

Proper nutrition becomes essential once we’ve established optimal lighting conditions for our elephant ears. These tropical beauties are heavy feeders that require consistent nutrient support to maintain their spectacular foliage.
Fertilizer Types and Schedules
Balanced water-soluble fertilizers work best for elephant ears during their active growing season from spring through summer. We recommend using formulations with equal parts nitrogen, phosphorus, and potassium such as 10-10-10 or 20-20-20 ratios.
Feeding frequency should occur every 2-4 weeks throughout the growing season to encourage robust leaf development. Regular applications ensure our plants receive consistent nutrition without overwhelming their root systems.
Slow-release fertilizers offer an excellent alternative for steady nutrient delivery over extended periods. These granular options reduce feeding frequency while maintaining consistent plant nutrition.
Seasonal adjustments become crucial as temperatures drop and growth slows. We should reduce or completely stop fertilization during the dormant season from fall to winter when our elephant ears naturally decrease their nutrient uptake.
Nutrient Deficiency Signs
Nitrogen deficiency manifests as yellowing older leaves and noticeably poor growth patterns. Lower leaves typically show symptoms first as the plant redirects available nitrogen to newer growth.
Potassium deficiency creates brown leaf edges or scorched tips that gradually spread inward. This browning often appears crispy and dry compared to other leaf damage.
Phosphorus deficiency results in stunted overall growth and dark, dull foliage that lacks the vibrant green color of healthy plants. Root development also becomes compromised with insufficient phosphorus.
Magnesium deficiency causes distinctive interveinal yellowing or chlorosis between leaf veins while the veins themselves remain green. This creates a striking striped appearance on affected leaves.
Regular monitoring of leaf color and growth patterns helps us spot deficiencies early and adjust our feeding program accordingly before damage becomes severe.
Organic vs. Synthetic Feeding Options
Organic fertilizers including compost tea, fish emulsion, and seaweed extracts provide gentle, slow-release nutrition while improving soil structure. These options enhance beneficial soil microbes but may contain variable nutrient content that makes precise feeding more challenging.
Synthetic fertilizers deliver precise nutrient ratios with quick absorption rates, making them ideal for immediately correcting exact deficiencies. But, overuse risks salt buildup and potential root stress if we don’t follow application directions carefully.
Combination approaches work exceptionally well for elephant ears by leveraging both immediate correction capabilities and long-term soil health benefits. Many successful growers alternate between organic and synthetic options throughout the growing season.
Application considerations matter regardless of fertilizer type. We should always water thoroughly after feeding and avoid fertilizing dry soil to prevent root burn and ensure proper nutrient uptake.
Handle Common Indoor Growing Problems

Even with proper care, elephant ears plants can face several challenges when grown indoors. We’ll guide you through identifying and resolving the most common issues to keep your plants thriving.
Pest Prevention and Treatment
Spider mites pose the greatest threat to indoor elephant ears, especially during dry winter months when humidity drops below optimal levels. We recommend inspecting leaf undersides weekly for tiny webs or stippled damage that indicates their presence. Aphids cluster on new growth and leaf stems, causing leaves to curl and yellow while secreting sticky honeydew that attracts other pests. Mealybugs appear as white, cotton-like masses in leaf joints and along stems, weakening plants by sucking plant juices.
Prevention starts with maintaining clean foliage through weekly wiping with a damp cloth to remove dust buildup that weakens plant defenses. We suggest quarantining new plants for two weeks before introducing them to your collection to prevent pest spread. Regular inspection during your weekly care routine helps catch infestations early when they’re easier to treat.
Treatment options include insecticidal soap spray applied every 3-5 days until pests disappear completely. We prefer neem oil for severe infestations because it disrupts pest life cycles and provides residual protection. Isolation of affected plants prevents pest migration to healthy specimens while treatment takes effect.
Disease Management Strategies
Root rot develops when soil stays waterlogged for extended periods, causing roots to turn black and mushy with a foul odor. We prevent this by ensuring pots have drainage holes and using well-draining potting mix enhanced with perlite or vermiculite. Fungal leaf spots appear as brown or black patches on leaves, often spreading rapidly in humid conditions with poor air circulation.
Overwatering prevention requires checking soil moisture levels before each watering session and allowing the top 1-2 inches to dry between waterings. We maintain adequate air circulation around plants by spacing them properly and using fans during humid weather to prevent fungal development. Prompt removal of yellowing, damaged, or diseased leaves reduces disease spread and redirects plant energy to healthy growth.
Soil drainage improvements include adding perlite or coarse sand to existing potting mix if water pools on the surface after watering. We recommend repotting immediately if root rot symptoms appear, trimming away affected roots with sterile scissors before replanting in fresh, well-draining soil.
Troubleshooting Growth Issues
Direct sunlight exposure causes leaf burn that appears as brown, crispy edges or bleached patches on leaf surfaces. We position elephant ears near bright windows with sheer curtains or move them 3-4 feet away from south-facing windows to provide filtered light. Insufficient light results in leggy growth, smaller leaves, and loss of vibrant coloration that makes these plants so attractive.
Inconsistent watering leads to leaf yellowing, drooping, or the characteristic “weeping” where water droplets form at leaf tips due to overwatering. We establish regular watering schedules based on soil moisture checks rather than calendar dates to maintain consistent soil conditions. Low humidity causes leaf edges to brown and curl, especially during winter months when indoor heating reduces moisture levels.
Temperature fluctuations below 60°F or above 80°F stress plants and slow growth significantly. We monitor room temperatures with digital thermometers and move plants away from heating vents, air conditioning units, or drafty windows that create temperature swings. Nutrient deficiencies manifest as pale or yellowing leaves, stunted growth, or poor leaf development even though adequate light and water conditions.
Propagate Your Elephant Ears Collection

Expanding your elephant ears collection becomes incredibly rewarding once you master these proven propagation techniques. We’ll guide you through three reliable methods that help you multiply your indoor tropical plants successfully.
Division Methods for Established Plants
Dividing established elephant ears works best when your plants have developed multiple growing points or crowns. We recommend checking for natural separation points around the base where individual plants have formed their own root systems. Spring timing proves most effective since plants enter their active growing season and recover quickly from division stress.
Remove your elephant ear from its container and gently brush away excess soil to expose the root structure clearly. Look for sections that have their own roots and at least one healthy growing point or emerging shoot. Sharp, sterilized pruning shears help make clean cuts between connected sections without damaging the parent plant.
Plant each divided section in fresh, well-draining potting mix immediately after separation. Water thoroughly but avoid overwatering during the first few weeks as the newly divided plants establish themselves. Place divisions in bright, indirect light and maintain humidity levels between 60-80% to encourage rapid root development.
Offset Separation Techniques
Offset separation targets the small “pups” or offshoots that naturally develop around the base of mature elephant ear plants. These baby plants typically appear when your main plant reaches maturity and has sufficient energy to produce new growth. We’ve found that offsets with their own root systems have the highest success rates for independent growth.
Carefully excavate around the base of your parent plant to locate offsets that have developed their own root networks. Gently separate these pups using your hands or a clean knife, ensuring each offset retains adequate roots for survival. Small offsets without established roots require more careful handling and may need additional time to develop before separation.
Transplant separated offsets into containers filled with the same rich, well-draining soil mixture you use for adult plants. Start with smaller pots since young plants don’t require extensive root space initially. Monitor moisture levels closely during the first month as developing root systems can’t tolerate drought stress or waterlogged conditions.
Root and Bulb Propagation
Root and bulb propagation offers the most reliable method for starting new elephant ear plants from scratch. Elephant ear bulbs or tubers contain stored energy that supports initial growth until plants develop sufficient foliage for photosynthesis. We prefer purchasing bulbs from reputable suppliers to ensure healthy, disease-free starting material.
Plant bulbs with the pointed end facing upward, covering them with approximately one inch of soil above the top surface. Choose containers at least 12 inches wide to accommodate the expanding root system as bulbs develop into full plants. Maintain soil temperature between 70-75°F to encourage faster sprouting, which typically occurs within 2-4 weeks under optimal conditions.
Keep soil consistently moist but not waterlogged during the sprouting period since excessive moisture can cause bulb rot. Place containers in bright, indirect light and increase humidity around emerging shoots using the same techniques we discussed for established plants. Young plants benefit from weekly applications of diluted fertilizer once they develop their second or third leaf.
Manage Dormancy Periods Indoors

After successfully propagating our elephant ears, we must understand their natural cycles to maintain healthy plants year-round. Indoor elephant ears often enter dormancy during winter months, requiring adjusted care routines to support this essential resting period.
Recognizing Natural Dormancy Signs
Leaves turning brown and falling off signal that our elephant ears are entering their natural dormancy phase. This occurs most commonly when indoor temperatures drop or daylight hours decrease during winter months. Our plants conserve energy by slowing growth and redirecting focus to root development rather than maintaining existing foliage.
Reduced water uptake becomes noticeable as dormant plants require less moisture than actively growing specimens. Yellowing leaves may appear before browning, indicating the plant’s preparation for its resting period. New leaf production stops completely during dormancy, with no fresh growth emerging from the central growing point.
Winter Care and Storage Options
Watering frequency decreases significantly once we notice dormancy signs, keeping soil slightly moist but never saturated to prevent bulb rot. Fertilization stops entirely during this period since dormant plants cannot use additional nutrients effectively. We maintain temperatures between 60-80°F and provide bright indirect sunlight to minimize plant stress.
Dead or yellowing leaves require removal to reduce fungal risks and help our plants focus energy on root systems. Misting or placing pots on pebble trays with water maintains necessary humidity levels without oversaturating the soil. Space-limited situations allow for bulb storage in cool, dry locations after removing them from containers, mimicking their natural outdoor resting conditions.
Encouraging Spring Regrowth
Gradually increasing watering as daylight hours extend helps our elephant ears transition out of dormancy successfully. Soil moisture levels should remain evenly moist but never waterlogged as new growth begins to emerge. Monthly fertilizing at half strength resumes once we observe fresh leaf development starting.
Bright indirect lighting near south or east-facing windows stimulates new leaf emergence as spring approaches. Weekly leaf wiping keeps pores clear and enhances photosynthesis once active growth returns. Our plants typically show first signs of spring awakening through small shoots appearing at the soil surface or from the central growing point.
Conclusion
Growing elephant ears indoors transforms any space into a lush tropical paradise. We’ve shown you that with proper care techniques these magnificent plants can thrive in your home year-round.
Success comes from understanding their needs: bright indirect light adequate humidity and consistent moisture. When you master these fundamentals your elephant ears will reward you with stunning foliage that commands attention.
Remember that each variety offers unique benefits for different indoor environments. Whether you choose compact Alocasia varieties or dramatic Colocasia specimens there’s an elephant ears plant perfect for your space.
With our comprehensive guide you’re equipped to tackle any challenge from pest management to dormancy care. Start your indoor elephant ears journey today and watch your home transform into a tropical oasis.
Frequently Asked Questions
What are elephant ears plants and why are they popular for indoor growing?
Elephant ears are tropical plants known for their striking oversized heart-shaped leaves that can reach up to three feet wide. They’re popular for indoor growing because of their dramatic foliage, adaptability to indoor conditions, and relatively low-maintenance nature. These plants create an impressive tropical atmosphere in homes while being suitable for both experienced gardeners and beginners.
Which elephant ears varieties are best for indoor cultivation?
The three main varieties for indoor growing are Alocasia (ideal for compact spaces with varieties like ‘Polly’ and ‘Bambino’), Colocasia (perfect for larger rooms with dramatic options like ‘Black Magic’ and ‘Blue Hawaii’), and Xanthosoma (excellent for low-light conditions and shadier indoor spaces). Choose based on your available space and lighting conditions.
What lighting conditions do elephant ears need indoors?
Elephant ears require 6-8 hours of bright, indirect light daily. Position them near south, west, or east-facing windows with sheer curtains to filter harsh direct sunlight. For insufficient natural light, use full-spectrum LED grow lights positioned 12-18 inches above the plants, especially during winter months. Avoid direct sun exposure to prevent leaf damage.
How often should I water my indoor elephant ears?
Water when the top 1-2 inches of soil feel dry to the touch. Elephant ears prefer slightly moist but not waterlogged soil. Increase watering frequency during warmer months and reduce it in cooler months. Watch for yellowing leaves (overwatering) or droopy, wilting leaves (underwatering) to adjust your watering schedule accordingly.
What humidity levels do elephant ears require indoors?
Elephant ears thrive in humidity levels between 60-80%. Create a humid microclimate by misting leaves regularly, using humidity trays filled with water and pebbles, or running an electric humidifier. Group elephant ears with other humidity-loving plants to enhance moisture levels through natural transpiration, especially during dry winter months.
What type of soil and containers work best for elephant ears?
Use large containers (14-20 inches) with excellent drainage holes to accommodate extensive root systems. Plant in rich, well-draining potting mix enhanced with compost for added nutrients. Ensure proper planting depth and repot in spring when plants outgrow their containers, gradually increasing pot size while handling roots gently.
How should I fertilize my indoor elephant ears?
Feed elephant ears every 2-4 weeks during the growing season with balanced water-soluble fertilizer, as they are heavy feeders. Consider slow-release fertilizers for steady nutrient delivery. Reduce or stop fertilizing during fall and winter dormancy periods. Monitor for signs of nutrient deficiency like yellowing leaves or stunted growth.
What common problems affect indoor elephant ears?
Common issues include pest infestations (spider mites, aphids, mealybugs), root rot from overwatering, and fungal leaf spots from poor air circulation. Maintain clean foliage, ensure proper watering practices, provide adequate ventilation, and treat pest problems early with insecticidal soap or neem oil. Isolate affected plants to prevent spread.
How can I propagate my elephant ears plants?
Three reliable propagation methods include: division of established plants in spring, separation of offset “pups” with their own root systems, and root/bulb propagation. Division requires ensuring each section has roots and a growing point. Root and bulb propagation is the most reliable method, involving planting bulbs in optimal sprouting conditions.
Do elephant ears go dormant indoors and how should I care for them?
Yes, elephant ears typically enter dormancy during winter months, showing signs like browning leaves and reduced water uptake. Adjust care by decreasing watering frequency, stopping fertilization, maintaining appropriate temperature and humidity, and removing dead foliage. Gradually increase watering and fertilization as spring approaches to encourage new growth.