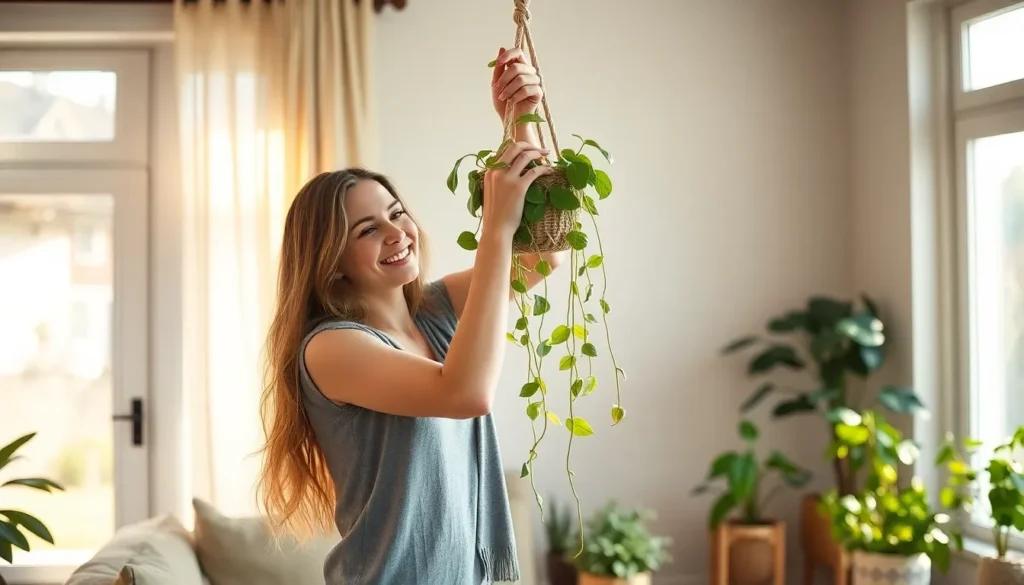
Transform your living space into a lush paradise with the simple art of hanging plants. We’ve all admired those Instagram-worthy rooms where cascading greenery creates stunning visual drama and makes every corner feel alive. The secret? It’s not just about buying beautiful plants – it’s about mastering the technique of hanging them properly.
Whether you’re working with a tiny apartment or a spacious home, hanging plants offer the perfect solution for adding greenery without sacrificing floor space. We’ll show you how to choose the right plants, select proper hanging systems, and avoid the common mistakes that lead to damaged ceilings or unhappy plants.
From macramé hangers to modern ceiling hooks, we’ve tested every method to bring you foolproof techniques that work for renters and homeowners alike. Get ready to elevate your plant game and create the botanical oasis you’ve been dreaming of.
Choose the Right Location for Your Hanging Plants
Selecting the perfect spot for your hanging plants determines their health and your home’s overall aesthetic appeal. We’ll help you identify the ideal location by evaluating three critical factors that impact plant success.
Consider Natural Light Requirements
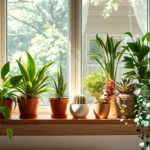
Different plants thrive in varying light conditions, so we must match each species to its optimal lighting environment. Most hanging plants like pothos, spider plants, and philodendrons flourish in bright, indirect light near east or north-facing windows.
Direct sunlight can scorch delicate foliage, particularly for tropical varieties commonly used in hanging displays. We recommend positioning sun-loving plants such as string of pearls or burro’s tail within 3-4 feet of south-facing windows where they receive filtered morning light.
Low light areas work perfectly for certain hanging varieties including ZZ plants, snake plants, and peace lilies. These resilient species adapt well to corners, hallways, or rooms with minimal natural light exposure.
Rotating your hanging plants weekly ensures even growth and prevents them from leaning toward light sources. We suggest turning each plant 90 degrees to maintain balanced foliage distribution.
Evaluate Ceiling Height and Space
Standard ceiling heights of 8-10 feet provide optimal hanging plant placement when you position plants 6-7 feet above floor level. This height prevents head bumps while allowing easy access for watering and maintenance.
Vaulted ceilings offer dramatic hanging opportunities but require longer chains or ropes to bring plants into viewing range. We recommend hanging plants at varying heights to create visual depth and interest.
Consider the mature size of your chosen plants before finalizing placement locations. Trailing varieties like English ivy or string of hearts can extend 2-4 feet below their containers when fully grown.
Maintain adequate clearance around each hanging plant to prevent overcrowding and ensure proper air circulation. We suggest spacing multiple hanging plants at least 18-24 inches apart.
Factor in furniture placement and foot traffic patterns when selecting hanging locations. Plants shouldn’t obstruct walkways or interfere with daily activities in your living space.
Check for Proper Ventilation
Good air circulation prevents fungal diseases and pest infestations that commonly affect hanging plants in stagnant environments. We recommend avoiding corners or enclosed spaces where air doesn’t move freely.
Ceiling fans enhance air movement but shouldn’t blow directly on hanging plants, as constant air currents can dry out foliage and stress the plants.
Humid areas like bathrooms work well for tropical hanging plants such as Boston ferns, air plants, and orchids that thrive in moisture-rich environments.
Avoid hanging plants directly above heat sources including radiators, fireplaces, or heating vents that create hot, dry conditions harmful to most species.
Open doorways and windows periodically to refresh indoor air quality and provide the gentle air movement that promotes healthy plant growth.
Select Appropriate Hanging Hardware and Tools
 1")
Choosing the right hanging hardware makes all the difference between a successful plant display and a potential disaster. We’ll guide you through the essential considerations for selecting equipment that keeps your plants secure and your home undamaged.
Determine Weight Capacity Needs
Assess your plant’s total weight by calculating the combined mass of the pot, soil, and water content before selecting any hanging hardware. Plants become significantly heavier after watering, so we recommend choosing hooks or brackets rated for at least 25% more than your plant’s maximum weight.
Heavy plants require specialized mounting directly into ceiling joists or wall studs rather than relying on drywall anchors alone. Potted plants weighing over 10 pounds need heavy-duty ceiling hooks with load ratings of 15-20 pounds minimum to ensure long-term safety.
Multiple hanging plants in one area demand even greater weight considerations since the cumulative load affects your ceiling’s structural integrity. Calculate the total weight of all plants in a concentrated area and distribute them across multiple ceiling joists when possible.
Choose Between Hooks, Brackets, and Pulley Systems
Hooks offer the simplest installation method for small to medium plants weighing under 15 pounds and work best when mounted directly into ceiling joists or wall studs. Ceiling hooks provide excellent support for single plants and create clean, minimalist hanging displays.
Brackets excel for wall-mounted installations where ceiling mounting isn’t feasible due to structural limitations or aesthetic preferences. Wall brackets can support heavier plants when properly anchored and allow for creative positioning along walls or in corners.
Pulley systems provide unmatched convenience for plant maintenance by allowing easy raising and lowering for watering, pruning, or repositioning. These systems work exceptionally well for larger plants or multiple hanging arrangements where regular access is essential.
Gather Essential Installation Tools
Start with basic power tools including a drill with appropriate bits and a reliable screwdriver for secure hardware installation. We recommend having both Phillips head and flathead screwdrivers available to accommodate different screw types.
Measurement and marking tools ensure precision during installation, so gather a stud finder, measuring tape, and pencil for accurate placement. Proper marking prevents unnecessary holes and ensures your plants hang exactly where you want them.
Safety equipment protects you during installation and includes safety goggles to shield your eyes from debris and work gloves for better grip and hand protection. Additional hardware like screw anchors, toggle bolts, plant hangers, and suspension cords complete your installation kit for various mounting scenarios.
Pick the Perfect Planters for Hanging
 2")
Now that we’ve covered the essential hardware and tools, let’s focus on selecting planters that’ll support our hanging plants beautifully and safely.
Consider Drainage Requirements
Proper drainage stands as the most critical factor in planter selection for hanging displays. We need planters with drainage holes to prevent overwatering and root rot, which commonly destroy hanging plants due to their elevated position making water management more challenging.
Adding a layer of lightweight expandable clay aggregate (LECA) works perfectly when our chosen planter lacks drainage holes. Creating small holes in plastic liners offers another effective solution for controlling water flow in decorative containers without built-in drainage.
Selecting planters with removable rubber stoppers gives us the flexibility to retain water when needed while allowing proper drainage during regular care. We must monitor watering carefully since excess water from hanging pots can drip onto floors and furniture below, often requiring us to water less frequently or move plants over a sink during care.
Choose Between Lightweight and Decorative Options
Lightweight planters reduce strain on our hanging hardware significantly, minimizing the risk of accidents and hardware failure. Materials like macramé hangers and woven baskets provide excellent indoor options that combine functionality with visual appeal.
Decorative planters add substantial design impact to our space but typically weigh more than lightweight alternatives. Using sturdy ceiling hooks or wall mounts anchored directly into joists or studs becomes essential when we choose heavier decorative options.
Installing heavy-duty hooks with proper tools like drills ensures our decorative planters stay securely mounted. We should position hanging plants above eye level to maximize visibility and style without obstructing natural movement through our living spaces.
Match Planter Size to Plant Type
Choosing planters at least 1-2 inches larger in diameter than our plant’s root ball provides adequate room for healthy growth. This sizing approach promotes proper root development while ensuring our plants develop lush, vibrant foliage.
Avoiding oversized planters prevents moisture retention issues that can lead to root problems and plant decline. Selecting planters that are too small forces us to water more frequently as the limited soil volume dries out quickly.
Matching our planter size precisely to each plant type creates optimal growing conditions that support long-term plant health and visual appeal in our hanging displays.
Install Ceiling Hooks and Mounting Hardware Safely
 3")
Installing your ceiling hooks correctly is the foundation of a secure hanging plant display. We’ll walk through the essential steps that ensure your plants stay safely suspended while protecting your ceiling from damage.
Locate Ceiling Joists for Maximum Support
Ceiling joists provide the strongest mounting points for heavy hanging plants. We recommend using a stud finder to locate these wooden structural supports that run parallel across your ceiling. Finding joists becomes crucial when you’re hanging plants that weigh more than 10 pounds when fully watered.
Wooden beams can reliably bear important weight compared to drywall alone. We position our hooks directly into these joists whenever possible for maximum security. Electronic stud finders work most effectively for this task, though you can also tap along the ceiling to listen for the solid sound that indicates a joist location.
Joists typically run 16 or 24 inches apart in most homes. We mark multiple joist locations to give ourselves options for the best plant placement while maintaining structural integrity.
Mark and Drill Pilot Holes Precisely
Precise measurements prevent crooked installations and ceiling damage. We use a pencil to clearly mark our desired hook locations after measuring the space and confirming our plants will hang at the optimal height of 6-7 feet from the floor.
Pilot holes make installation easier and prevent wood splitting or ceiling cracking. We select drill bits that are slightly smaller than our screw diameter to create clean entry points. A 1/8 inch bit works well for most standard ceiling hooks and swag hooks.
Drilling straight into the ceiling requires steady hands and the right technique. We hold our drill perpendicular to the ceiling surface and apply gentle, consistent pressure to avoid wandering or oversized holes.
Secure Hardware with Appropriate Fasteners
Screw eyes and swag hooks require different installation techniques based on your ceiling type. We twist these hooks clockwise into our pilot holes until they’re flush and secure. The threading should bite firmly into the wood or anchor material.
Toggle bolts and wall anchors become necessary when joists aren’t available in your desired location. We use spring loaded anchors rated for at least 25% more weight than our plant’s total mass. Heavy duty toggle screws can support plants up to 50 pounds in standard drywall when properly installed.
S hooks offer an alternative mounting method for exposed ceiling beams. We simply hang these hooks over the beam without any drilling required, making them perfect for renters or temporary installations. Each S hook should be rated for your exact plant weight to ensure safe support.
Prepare Your Plants for Hanging Display
 4")
Now that we’ve secured our hardware and chosen our planters, it’s time to prepare our plants for their new hanging home. Proper preparation ensures our plants will thrive in their elevated position while creating the stunning display we’re after.
Select Plants That Thrive in Hanging Conditions
Trailing plants make excellent choices for hanging displays. Popular options include pothos, spider plants, and ivy, which naturally cascade downward and create beautiful flowing lines. Certain ferns and succulents also tolerate the air circulation and light levels found in hanging positions particularly well.
We need to match our plant selection to the available light conditions. Bright indirect light suits most trailing houseplants, while some varieties can adapt to lower light areas indoors. Hanging planters free up valuable floor space and keep plants safely out of reach of pets and children, making them both decorative and practical answers for our homes.
Air circulation requirements differ between plant types. Plants in hanging positions experience better airflow than those on surfaces, which most trailing varieties actually prefer. This improved circulation helps prevent common issues like fungal diseases and pest infestations that can plague plants in stagnant air.
Ensure Proper Potting and Soil Preparation
High quality potting mix designed for our exact plant type provides the foundation for success. We should avoid using garden soil, which becomes too heavy when wet and doesn’t drain properly in containers. Specialized potting mixes offer the right balance of nutrients, drainage, and moisture retention for hanging plants.
Filling the basket properly starts with adding some potting soil to the bottom before placing our plant. We’ll gently remove the plant from its original pot and tease out any tangled roots to encourage healthy growth. After positioning the plant in the center, we’ll fill in soil around the roots to secure it without compacting too tightly.
Proper soil density maintains essential root aeration. We should press the soil down gently but avoid packing it firmly, as compacted soil restricts oxygen flow to the roots. Watering thoroughly after planting helps settle both the soil and roots into their new environment.
Add Drainage Materials to Prevent Root Rot
Root rot develops from excessive moisture, making proper drainage absolutely critical for hanging plants. We’ll use baskets with drainage holes and add a layer of materials like small stones or broken pottery shards at the bottom to improve water flow. These materials create space for excess water to collect and drain away from the root zone.
A plastic sheet with strategically placed holes helps balance moisture retention and drainage. We’ll place this liner at the bottom of the basket before adding our drainage materials and soil. The holes allow excess water to escape gradually while preventing water from draining out too quickly, which protects the roots from drying out between waterings.
Coconut coir liners provide excellent moisture retention and root support. These natural fibers help maintain consistent soil moisture while allowing proper drainage. We’ll ensure our hanging basket allows water to drain freely to prevent waterlogging, which can quickly kill even the hardiest plants.
Hang Your Plants at the Optimal Height
 5")
Finding the perfect height for your hanging plants makes all the difference in both their health and your home’s aesthetic appeal. We’ll show you exactly how to position your plants for maximum impact and easy care.
Position Plants for Easy Maintenance Access
Eye level placement transforms plant care from a chore into a pleasure. We recommend hanging most plants at eye level or just slightly above, which typically means 5-6 feet from the floor for most people. This strategic positioning allows you to easily water, prune, and inspect your plants without straining your back or needing a ladder.
Accessibility determines your plant’s long-term health. When plants hang too high, we often neglect routine maintenance tasks like checking soil moisture, removing dead leaves, or spotting early signs of pests. Standard hanging baskets feature hangers about 14 inches from the top of the hanger to the pot rim, so factor this measurement into your placement calculations.
Avoid overcrowded locations that complicate routine care. We’ve learned that plants positioned in tight corners or behind furniture become forgotten plants. Instead, choose spots where you can comfortably approach from multiple angles, making watering and fertilizing straightforward tasks.
Create Visual Balance and Layering
Layering plants at different heights creates stunning visual depth in any room. We suggest combining trailing plants like pothos at higher levels with medium-height options like spider plants, then adding floor plants below to establish a natural cascade effect. This arrangement mimics how plants grow in their natural forest environments.
Complementary colors and growth habits enhance your space’s overall design. Trailing succulents such as Donkey Tail (Sedum morganianum) paired with the vibrant Pink Panther (Tradescantia ‘Callisia repens Pink Panther’) create beautiful texture contrasts that soften harsh lines in modern interiors. These cascading forms provide the perfect counterbalance to upright architectural elements.
Visual weight distribution prevents your display from feeling lopsided. We arrange plants so that larger, fuller specimens balance smaller, more delicate varieties across the room. This principle applies whether you’re creating a single statement corner or designing a whole-room plant display.
Allow Room for Plant Growth and Spreading
Proper spacing prevents overcrowding and promotes healthy development. We always choose baskets sized appropriately for each plant’s mature size rather than its current dimensions. Plants need room to spread their trailing stems naturally without tangling with nearby fixtures or other plants.
Root development requires adequate container space for optimal growth. When transplanting hanging plants, we maintain the same soil depth as their original containers to minimize transplant shock. This practice encourages healthy root establishment and reduces stress on newly hung plants.
Strategic placement prevents growth restrictions that stunt plant development. We position hanging plants away from walls, ceiling fans, and high-traffic areas where their trailing stems might get damaged or tangled. This foresight ensures your plants can develop their full cascading potential while maintaining their decorative appeal.
Maintain Your Hanging Garden Successfully
 6")
Establishing proper care routines for your hanging plants ensures they’ll continue thriving in their elevated positions. Consistent maintenance prevents common issues while maximizing the beauty and health of your suspended garden display.
Establish a Consistent Watering Schedule
Hanging plants dry out much faster than their ground level counterparts, often requiring daily watering during warmer months or immediately after planting. We recommend checking soil moisture by feeling the basket’s weight or inserting your finger about an inch into the soil to determine watering needs.
Water thoroughly until you see drainage flowing from the bottom, ensuring the entire root system receives adequate moisture. Avoid overwatering since this leads to root rot, which can quickly kill your hanging plants.
Schedule watering during cooler parts of the day like early morning or evening to reduce evaporation rates. Morning and evening watering also prevents fertilizer burn that can occur when you water during peak heat hours.
Monitor your plants more frequently during hot weather since elevated positions expose them to increased air circulation and heat. Container plants in plastic pots retain moisture longer than those in wire baskets with coco liners, so adjust your watering frequency accordingly.
Monitor for Pests and Plant Health Issues
Regular inspection of your hanging plants helps catch problems before they become serious issues. Check weekly for signs of pests like aphids, spider mites, or whiteflies that commonly target hanging plants due to their elevated positions.
Look for yellowing leaves, brown spots, or unusual growth patterns that indicate disease or pest infestations. Prune dead or damaged foliage immediately to maintain plant health and prevent problems from spreading to healthy portions.
Examine the undersides of leaves where pests often hide, especially on plants like fuchsias that thrive in shadier conditions. Early detection allows for quick treatment with appropriate pest control methods before infestations become severe.
Remove spent flowers and trim overgrown branches to keep your hanging baskets looking tidy and encourage continued blooming. This maintenance also improves air circulation around the plant, reducing the risk of fungal diseases.
Rotate Plants for Even Growth
Rotate your hanging plants periodically to ensure all sides receive equal light exposure and promote balanced growth patterns. We suggest turning each plant a quarter turn every few weeks to prevent lopsided development.
Plants naturally grow toward their light source, creating uneven shapes if left in the same position too long. Regular rotation maintains the full, rounded appearance that makes hanging plants so attractive.
Consider the exact light requirements of each plant when establishing rotation schedules. Plants in full sun locations (requiring at least 6 hours daily) may need more frequent rotation than those in partial sun (4-6 hours) or shade positions.
Mark rotation dates on your calendar to maintain consistency, especially for plants that show rapid growth during their active growing seasons. This simple practice ensures your hanging garden maintains its visual appeal while supporting healthy plant development.
Conclusion
Transforming your space with hanging plants doesn’t have to be overwhelming when you follow the right approach. We’ve covered everything from selecting the perfect plants and hardware to proper installation techniques and ongoing maintenance routines.
Remember that success lies in the details – choosing appropriate drainage planters matching your plant’s mature size securing hardware to ceiling joists and establishing consistent care routines. These fundamentals will help you avoid common pitfalls that lead to plant failure or property damage.
Your hanging garden will become a stunning focal point that brings life and vibrancy to any room. With proper planning and execution you’ll enjoy a thriving botanical display that enhances your home’s atmosphere for years to come.
Frequently Asked Questions
What are the best plants for hanging displays?
Trailing plants like pothos, spider plants, and ivy are ideal for hanging displays. These species naturally cascade downward, creating beautiful flowing displays. Choose plants that match your available light conditions – some thrive in bright indirect light while others tolerate lower light levels. Always consider the mature size of the plant when selecting your hanging basket.
How high should I hang my plants from the floor?
The optimal height for hanging plants is 5-6 feet from the floor, which places them at eye level for easy maintenance and visual appeal. For areas with foot traffic, ensure plants hang at least 6-7 feet high to avoid obstruction. This height allows for proper care while preventing accidents and maintaining accessibility for watering and pruning.
What type of hanging hardware should I use for heavy plants?
For heavy plants, use hardware rated for at least 25% more than the total weight of your plant, pot, soil, and water. Install ceiling hooks directly into ceiling joists for maximum support. Consider toggle bolts for drywall installations or specialized mounting brackets for particularly heavy displays. Always prioritize safety over aesthetics when choosing hardware.
How do I ensure proper drainage in hanging planters?
Choose planters with drainage holes to prevent overwatering and root rot. If your decorative planter lacks drainage, add lightweight expandable clay aggregate (LECA) or drill holes in a plastic liner. Layer small stones at the bottom of baskets to improve water flow, and consider coconut coir liners for natural moisture retention while allowing excess water to drain.
How often should I water hanging plants?
Hanging plants typically dry out faster than ground plants and may require daily watering, especially during warmer months. Check soil moisture regularly by inserting your finger into the soil – water when the top inch feels dry. Establish a consistent watering schedule and monitor your plants closely, as environmental factors like heat and air circulation affect water needs.
What’s the best location for hanging plants in my home?
Choose locations with appropriate natural light for your specific plant species, good air circulation, and adequate ceiling height. Avoid stagnant areas and proximity to heat sources like vents or radiators. Ensure the space allows for plant growth without obstruction and provides easy access for maintenance. Consider the room’s overall aesthetic and how the plants will complement your existing decor.
Can renters safely install hanging plants?
Yes, renters can use temporary solutions like S hooks that attach to existing fixtures, tension rods, or removable adhesive hooks for lightweight plants. For heavier plants, consider floor-standing plant hangers or ask your landlord about installation permissions. Always prioritize safety and follow lease agreements regarding modifications to the property.
How do I prevent my hanging plants from getting diseases?
Ensure proper air circulation around your plants to prevent fungal diseases and pest issues. Avoid overcrowding plants and maintain appropriate spacing between hanging displays. Use high-quality potting mix with good drainage, water at soil level rather than on leaves, and regularly inspect plants for signs of pests or disease. Rotate plants periodically for even light exposure and healthy growth.