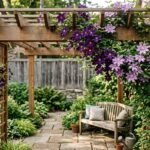
We’ve all walked past those stunning mailboxes that make entire neighborhoods look more inviting – and the secret isn’t just the mailbox itself. Strategic landscaping around your mailbox post transforms this functional necessity into a beautiful focal point that boosts your home’s curb appeal instantly.
Mailbox gardens offer the perfect opportunity to showcase your gardening skills while creating a welcoming first impression for visitors and mail carriers alike. Whether you’re working with a small corner plot or have generous space around your post, the right plant combinations can turn this often-overlooked area into a showstopper.
The best part? Mailbox landscaping doesn’t require a massive budget or extensive gardening experience. With smart plant choices that thrive in your exact conditions – from sun-loving perennials to shade-tolerant groundcovers – you can create a low-maintenance garden that looks professionally designed. We’ll show you exactly how to select plants that complement your home’s style while handling the unique challenges of roadside growing conditions.
Choose Low-Maintenance Perennials for Year-Round Appeal
Perennial plants around mailbox posts offer lasting value since they return each growing season without replanting. These hardy selections create a beautiful foundation that requires minimal ongoing maintenance while providing continuous visual interest throughout the year.

NATIVE BEAUTY – New England Aster, Smooth Blue Aster, Purple Coneflower, Narrow-Leaved Coneflower, Black-Eyed Susan, Dense Blazing Star (Gayfeather), Bee Balm (Wild Bergamot), Lanceleaf and Plains Coreopsis (Tickseed), Showy, Common, and Swamp Milkweed, Purple Prairie Clover, Joe Pye Weed, Spiderwort, Common, Prairie, and Maximilian Sunflowers, Little Bluestem, Switchgrass, Indian Grass, Blue Vervain, Canada Wild Rye, and White Yarrow.

Pack of California Wild Flower mix containing 10,000 seeds of 17 varieties of beautiful perennial and annual flowers.

SPECIFICALLY TAILORED FOR MIDWESTERN CLIMATES: Our Midwest Wild Flower Seed Mix is expertly crafted to thrive in the diverse weather conditions of Midwestern states. The blend includes hardy species selected for their resilience, ensuring a stunning display of vibrant colors throughout the growing season, even in the face of climate extremes.
Select Native Plants That Thrive in Your Climate Zone
Native plants excel in mailbox landscaping because they’ve adapted to local soil conditions and weather patterns over thousands of years. We recommend researching your exact USDA hardiness zone to identify indigenous species that naturally flourish in your area.
Black-eyed Susans (Rudbeckia) provide bright yellow blooms from summer through fall in zones 3-9, requiring minimal water once established. Purple Coneflowers (Echinacea) attract butterflies while delivering sturdy stems and drought resistance across zones 3-8. Native grasses like Little Bluestem or Buffalo Grass offer texture and movement while tolerating various soil types.
Local nurseries typically stock region-appropriate varieties and can provide exact recommendations based on your mailbox location’s sun exposure and drainage conditions. Native selections also support local wildlife populations including beneficial pollinators that enhance your entire garden network.
Consider Drought-Tolerant Varieties for Easy Care
Drought resistant perennials around mailbox areas reduce watering demands and maintenance time significantly. These resilient plants establish deep root systems that access moisture from lower soil levels, making them perfect for areas that receive irregular irrigation.
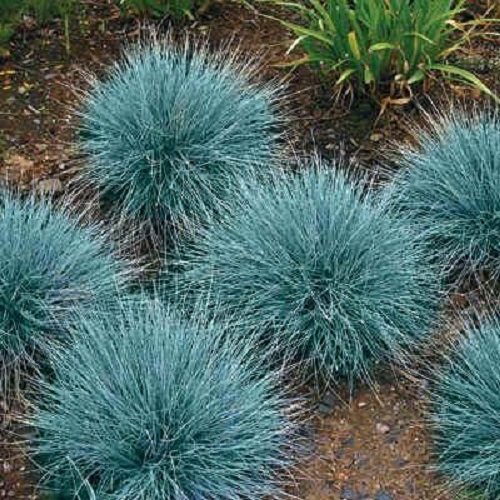
Lavender creates fragrant purple spikes while thriving in full sun with minimal water requirements in zones 5-9. Sedum varieties like Autumn Joy produce succulent foliage and late-season flowers that persist through winter, requiring almost no supplemental watering. Ornamental grasses such as Fountain Grass or Feather Reed Grass add height and texture while tolerating dry conditions exceptionally well.
Xerophytic plants also handle reflected heat from pavement and mailbox posts better than moisture-dependent species. Many drought tolerant options feature silver or gray foliage that complements metal mailbox hardware while providing year-round structural interest even during dormant seasons.
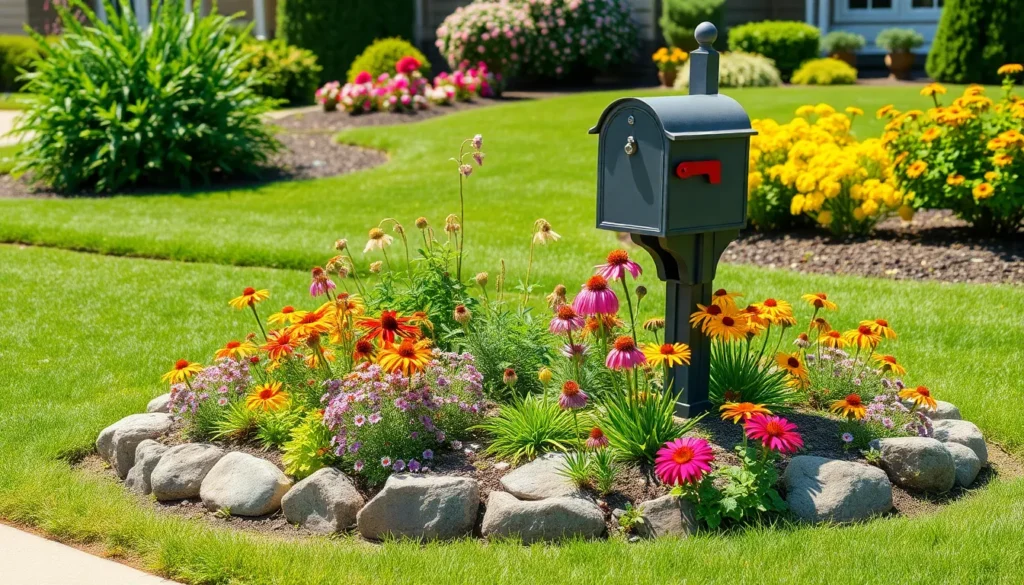
Plan Your Mailbox Garden Layout for Maximum Impact

We’ll create a stunning mailbox garden that transforms your front yard’s focal point into an eye-catching industry feature. Strategic planning ensures your garden complements your home’s style while maintaining practical functionality.

🌵 23 Heirloom Varieties – Annuals + Perennials: A curated mix of 23 drought‑tolerant species. Annuals provide fast first‑season color, while perennials return year after year – creating a low‑water wildflower meadow that thrives on neglect.

HEAT & DROUGHT READY CROPS - Selected vegetables that perform in hot weather and low-water conditions, ideal for southern gardens, dry climates, and challenging growing seasons
Easy to grow perennial, drought tolerant full sun or full shade
Measure the Space Around Your Mailbox Post
Accurately measuring the area around your mailbox post determines the size and scope of your planting bed. We recommend measuring a 3 to 4-foot radius from the post to create adequate space for plant growth and visual balance.
Consider the mature size of your chosen plants when measuring to prevent overcrowding. Document the dimensions of underground utilities like sprinkler lines or electrical cables before finalizing your garden boundaries.
Design a Circular or Curved Planting Bed
Circular or gently curved flower beds around mailbox posts create inviting and balanced visual appeal. We suggest using natural materials such as rock borders or brick edging to frame the bed and enhance the overall design.
Mix perennials like daylilies and alliums with ornamental grasses for year-round interest and texture variation. Choose plants that suit your climate and style preferences, such as nautical blues for coastal homes or classic boxwoods for European-inspired landscapes.
Layer plants by height with taller specimens toward the back and shorter ground covers in front. This arrangement creates depth and ensures all plants receive adequate sunlight while maintaining visual hierarchy.
Leave Adequate Access Space for Mail Delivery
Maintain clear access paths around your mailbox to help easy and safe mail delivery for postal workers. We recommend keeping a 2-foot clearance on the approach side of the mailbox to ensure unobstructed access.
Avoid planting tall or dense vegetation that could obstruct visibility or interfere with mail delivery operations. Low-growing borders and compact shrubs highlight the mailbox area without creating functional barriers.
Position thorny plants like roses away from high-traffic areas to prevent injury to mail carriers and visitors. Strategic placement of these plants adds beauty while maintaining safety and accessibility standards.
Select Plants Based on Sun and Shade Conditions

Successful mailbox gardens start with understanding your site’s lighting conditions. We’ll help you identify whether your mailbox receives full sun, partial sun, or shade throughout the day.

USDA Zones: 3-9 (Perennial)

TALL, VIBRANT BLOOMS: White Wild Indigo Baptisia Seeds grow up to 24 - 60 inches tall, adding vertical interest to your garden. Their upright growth habit is complemented by striking white blooms that create a stunning visual impact. These vibrant flowers provide seasonal beauty from late spring through summer, making this plant a focal point in any garden design.
![Greenwood Nursery: Live Perennial Plants - Black-Eyed Susan + Rudbeckia Fulgida 'Goldsturm' - [Qty: 10x Pint Pots] - (Click for Other Available Plants/Quantities)](https://m.media-amazon.com/images/I/51o1qiLgf7L._SL500_.jpg)
🌿 [INFO1] - A yellow flowering perennials that are true perennials, returning larger each year. Great for mass plantings & provides wonderful contrasting colors when paired with ornamental grasses, Shasta Daisies, Russian Sage & Dianthus. Deadhead regularly for continued blooms. A North American native wildflower plant as well as being deer proof & rabbit proof, yet attracts butterflies.
Identify Full Sun Areas Around Your Mailbox
Full sun locations receive at least 6 hours of direct sunlight daily around your mailbox post. These bright spots demand plants that can handle intense heat and drought conditions without wilting or burning.
Sedum varieties excel in these sunny mailbox gardens because they store water in their thick leaves and produce colorful blooms from summer through fall. Dwarf daylilies also thrive in full sun conditions, offering vibrant flowers in colors like yellow, orange, and red while requiring minimal maintenance once established.
Both plant types tolerate bright light and heat exceptionally well, making them perfect choices for mailboxes positioned in open areas without tree cover or building shade.
Choose Shade-Tolerant Plants for Covered Spots
Mailboxes located under trees or near structures create shaded environments that require different plant selections. These areas typically receive less than 3 hours of direct sunlight daily.
Hostas are our top recommendation for shady mailbox spots because they provide lush foliage in various sizes and leaf patterns throughout the growing season. Astilbe brings delicate red and white blooms to low light environments, though it requires consistent moisture to establish properly.
Ferns offer another excellent shade option with their graceful fronds and extremely low maintenance requirements. These plants create a woodland feel around your mailbox while thriving in completely shaded conditions.
Consider Partial Sun Options for Mixed Lighting
Partial sun areas receive 3 to 6 hours of sunlight daily, creating versatile growing conditions for many plant varieties. These mixed lighting situations occur when mailboxes receive morning sun but afternoon shade, or vice versa.
Various perennials designed for partial shade bring both interesting leaf textures and colorful flowers to enhance your home’s curb appeal. Plants in USDA Hardiness Zones 6A through 8B particularly benefit from partial shade conditions, as they can handle some direct sunlight without the stress of full sun exposure.
We recommend selecting plants that offer seasonal interest through different bloom times and foliage colors, ensuring your mailbox garden remains attractive throughout multiple growing seasons.
Install Proper Drainage to Prevent Root Rot

Water accumulation around your mailbox post can destroy both your plants and the structural integrity of your mailbox installation. We’ll guide you through establishing drainage systems that protect your investment and promote healthy plant growth.

Material:Premium grade magnetic pvc Features:Reusable,waterproof,fade-resistant,all-weather,durable Send warm holiday or season greetings to your neighbors with this colorful...
Assess Your Soil’s Natural Drainage Capacity
Check your soil’s drainage by digging a test hole 12 inches deep and filling it with water. Well-draining soil should absorb the water within 24 hours, while clay or compacted soils may retain water for several days. Areas with poor drainage create waterlogged conditions that suffocate plant roots and promote fungal diseases.
Walk around your mailbox area after heavy rainfall to identify spots where water pools or stands for extended periods. These problematic zones require immediate attention before any planting begins. Soil that feels squishy underfoot or has a musty odor indicates drainage issues that need correction.
Test different areas within your planned planting zone since drainage can vary significantly within just a few feet. Sandy soils typically drain too quickly, while clay soils hold water too long for most mailbox plants to thrive.
Add Organic Matter to Improve Soil Structure
Mix compost or enriched soil into your planting holes to create the ideal growing environment for mailbox plants. Dig holes 2-3 inches deeper and wider than your plant pots, then add a layer of organic matter at the bottom of each hole. This amendment improves both drainage in clay soils and water retention in sandy conditions.
Incorporate aged compost, leaf mold, or well-rotted manure into the existing soil at a ratio of one part organic matter to two parts native soil. These materials create air pockets that allow excess water to drain while maintaining enough moisture for healthy root development.
Apply a 2-inch layer of organic mulch around planted areas to continue improving soil structure over time. Decomposing organic matter feeds beneficial soil organisms that naturally enhance drainage and create healthier growing conditions for your mailbox garden.
Create Raised Beds if Necessary for Better Drainage
Build raised beds 6-8 inches high around your mailbox post when dealing with consistently wet or compacted soil conditions. Raised beds allow excess water to drain away quickly while providing better growing conditions for plants prone to root rot. Use natural materials like stone, brick, or treated lumber to frame your elevated planting area.
Install a gravel base when setting your mailbox post by digging 18-24 inches deep and adding 2-4 inches of gravel to the bottom of the hole. This drainage layer prevents water from collecting around the post base and extends the life of wooden mailbox installations.
Fill raised beds with a mixture of quality topsoil, compost, and coarse sand to create the perfect drainage balance for most mailbox plants. This custom soil blend drains excess water while retaining enough moisture for healthy plant growth throughout the growing season.
Choose Plants with Varying Heights for Visual Interest

Creating a layered industry around your mailbox post transforms a functional area into an eye-catching garden feature. We’ll show you how strategic height placement creates depth and visual drama that enhances your home’s curb appeal.

[Heart-Shaped Blooms] Produces iconic heart-shaped flowers dangling from arching stems in late spring. Each bloom features contrasting inner petals. Excellent for cut flower arrangements.

SPRING FLOWER: This classic perennial produces bright white blooms with sunny centers, bringing timeless beauty to spring and summer gardens.

TALL AND VIBRANT BLOOMS: Lupine seeds grow into 36-48" flower spikes covered in pea-like flowers blending purple, pink, and blue. These bold fall perennials bring vertical elegance to borders, meadows, and wildflower gardens
Use Tall Plants as Backdrop Elements
Tall plants serve as dramatic vertical anchors that frame your mailbox beautifully. Clematis vines climb gracefully up trellises or chicken wire placed behind the mailbox post, creating stunning backdrop elements that reach 6-8 feet in height.
Climbing roses offer seasonal blooms and year-round structure when trained on support systems. We recommend positioning these tall plants 2-3 feet behind the mailbox to avoid mail delivery interference while maximizing visual impact.
Ornamental grasses like fountain grass or feather reed grass provide movement and texture as backdrop plants. These tall varieties typically reach 4-6 feet and create natural privacy screens while requiring minimal maintenance throughout growing seasons.
Add Medium-Height Plants for Middle Layers
Medium-height perennials bridge the gap between tall backdrop plants and low ground covers effectively. Coneflowers and black-eyed Susans create colorful middle layers that bloom from summer through fall, adding vibrant hues without overshadowing your mailbox.
Daylilies provide reliable blooms and sturdy foliage that reaches 18-24 inches in height. We suggest planting these medium-height options in groups of three or five for maximum visual impact and natural clustering effects.
Ornamental alliums and Russian sage offer unique textures and purple tones in middle layer plantings. These perennials typically grow 2-3 feet tall and attract beneficial pollinators while maintaining neat, compact growth habits.
Include Low-Growing Ground Cover Plants
Low-growing ground covers prevent weeds from establishing while creating a polished foundation for taller plants. Creeping thyme spreads naturally to fill gaps and releases pleasant fragrance when stepped on, making it ideal for mailbox areas.
Vinca minor provides dense coverage with small purple or white flowers in spring. We recommend this ground cover for shaded mailbox locations where grass struggles to grow, as it tolerates various soil conditions.
Sedum varieties offer succulent foliage and late-season blooms that require virtually no maintenance. These low-growing plants typically reach 3-6 inches in height and provide year-round interest through their diverse textures and colors.
Incorporate Seasonal Blooms for Continuous Color

Creating a ever-changing mailbox garden that maintains visual appeal throughout the year requires strategic planning with seasonal blooms. We’ll achieve continuous color by layering different plants that peak at various times during the growing season.

Mixture of Wild Flowers Native to Texas and Oklahoma
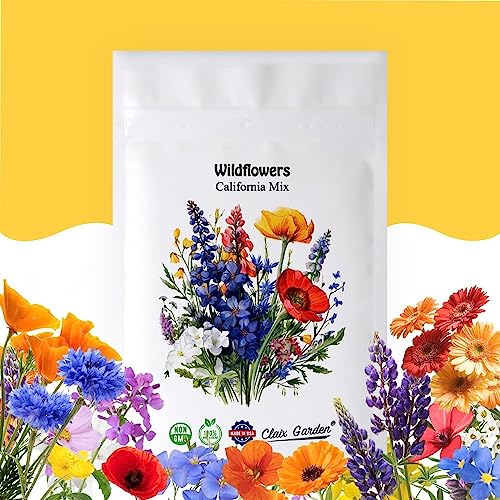
Pack of California Wild Flower mix containing 5,000 seeds of 17 varieties of beautiful perennial and annual flowers.

ADAPTED FOR SOUTHERN STATES: Our Southeast wild flower seed mix is specially formulated for Alabama, Arkansas, northern Florida, Georgia, Louisiana, Mississippi, North Carolina, eastern Oklahoma, Tennessee, eastern Texas, and South Carolina. This tailored blend ensures optimal growth and beauty in these specific climates.
Plant Spring Bulbs for Early Season Interest
Spring bulbs provide the foundation for year-round mailbox garden color, emerging as the first signs of life after winter dormancy. Tulips offer bold, cup-shaped blooms in vibrant reds, yellows, and purples that create instant visual impact around the mailbox post. Daffodils bring cheerful yellow and white flowers that naturalize easily, returning stronger each year with minimal maintenance requirements.
Crocuses deliver delicate purple, white, and yellow blooms that push through late winter snow, signaling the start of the growing season. These early bloomers establish foundational color before other perennials begin their growth cycle. We recommend planting bulbs in fall, positioning them 4 to 6 inches deep around the mailbox base for optimal spring emergence.
Add Summer Perennials for Peak Growing Season
Summer perennials form the backbone of mailbox gardens during the peak growing months, providing sustained blooms and structural height. Echinacea produces distinctive cone-shaped flowers in pink, purple, and white that attract butterflies and beneficial pollinators to the mailbox area. Black-eyed Susans offer bright yellow daisy-like blooms that thrive in full sun conditions commonly found around mailbox installations.
Daylilies contribute trumpet-shaped flowers in orange, red, and yellow varieties that bloom for extended periods throughout summer months. These perennials require minimal annual maintenance while providing fullness and vertical interest to complement the mailbox post. We suggest grouping these summer bloomers according to their mature size to prevent overcrowding as they establish.
Include Fall-Blooming Plants for Extended Beauty
Fall-blooming plants extend the mailbox garden’s appeal into autumn, maintaining interest as summer flowers begin to fade. Asters produce clusters of small purple, pink, and white flowers that create a soft, natural appearance around the mailbox structure. Ornamental grasses like Fountain Grass and Little Bluestem add texture and movement while providing seed heads that persist through winter months.
Chrysanthemums deliver rich autumn colors in bronze, burgundy, and golden yellow that complement the seasonal industry transition. These fall bloomers maintain warmth and visual softness as deciduous trees begin their color change. We recommend positioning fall plants strategically to create a natural progression from summer blooms, ensuring the mailbox garden remains a colorful focal point through the entire growing season.
Consider Mailbox Safety and Visibility Requirements

Creating a beautiful mailbox garden requires balancing aesthetics with essential safety regulations. The United States Postal Service mandates exact placement rules that we must follow to ensure mail carrier safety and efficient delivery.

High quality seeds and expert guidance: Experience the quality seed difference. We are committed to providing the highest quality, open-pollinated, non-GMO, drought resistant wildflower seeds to our customers. A trusted source of high quality flower seeds since 1985.
Vibrant Plant: Hosta plants are grown primarily for their foliage. Enjoy the vibrant foliage changes throughout the growing season, dividing the plants every few years to keep them alive and looking beautiful throughout the garden

[Creeping Growth Habit] Plants form dense mats 8-12 inches tall, spreading 12-24 inches wide. Trailing stems root as they spread, creating effective living mulch that suppresses weeds.
Avoid Plants That Block Driver Sightlines
Visibility remains the top priority when selecting plants for our mailbox landscaping project. Mail carriers need unobstructed views of the mailbox from the street to safely deliver mail without leaving their vehicles. Dense foliage or overgrown branches can create dangerous blind spots that interfere with mail delivery and pose safety risks for both carriers and drivers.
We should choose low-growing plants that won’t exceed the mailbox height of 41 to 45 inches from the ground. Compact varieties like dwarf boxwood or low-growing ornamental grasses maintain clear sightlines while adding visual appeal. Regular pruning becomes essential for maintaining visibility as our plants mature and grow throughout the seasons.
Strategic placement keeps our landscaping from interfering with the required 6 to 8-inch setback from the curb. This positioning ensures mail carriers can access the mailbox door easily while keeping our garden design within safe parameters.
Choose Non-Invasive Species That Won’t Spread
Non-invasive plants protect both our mailbox area and surrounding landscapes from aggressive spreading. Invasive species can quickly overtake our carefully planned garden design and create maintenance headaches that require constant management. These plants often spread through underground root systems or prolific seed production that can impact neighboring properties.
Evergreen shrubs like compact holly or dwarf conifers provide year-round structure without aggressive growth patterns. Perennial favorites such as Russian sage and maiden grass offer seasonal interest while maintaining manageable root systems that won’t interfere with our mailbox post foundation.
Native plants adapted to our exact climate zone typically exhibit better behavior in industry settings. Black-eyed Susans and Purple Coneflowers establish well-defined growing areas while supporting local pollinators and wildlife.
Maintain Clear Access to Mailbox Door
Accessibility ensures our mail delivery continues without disruption while protecting our investment in landscaping materials. Plants should be positioned to allow unobstructed access to the mailbox door for daily mail retrieval and periodic maintenance needs.
We need to maintain proper clearance around the mailbox mechanism to prevent damage from plant growth or irrigation systems. Irrigation heads require placement at least 12 to 18 inches away from the post to prevent water damage and rust formation on metal components.
House numbers must remain clearly visible at least 1 inch tall on the front or flag side of our mailbox. Solar-powered path lights or low-voltage spotlights can enhance nighttime visibility without interfering with plant growth patterns or creating additional maintenance requirements.
Posts buried less than 24 inches deep in durable materials like wood or metal provide the foundation stability our landscaping design requires. This depth specification ensures our plants won’t interfere with the structural integrity of the mailbox installation while allowing proper root development in the surrounding soil.
Add Mulch and Edging for a Polished Look

After selecting the perfect plants and designing your mailbox garden layout, we need to focus on the finishing touches that transform an ordinary planting area into a professional-looking industry feature. Research shows that proper mulching and edging techniques not only enhance visual appeal but also promote healthier plant growth around your mailbox post.

Size at Maturity: Reaching heights of 100-130 feet, the American Elm provides ample shade and grandeur to any landscape. Historical Significance: Widely planted along streets and in parks, the American Elm holds cultural and historical importance in North America.

1. Generous Seed Count: Includes 2000+ wild columbine seeds for planting, offering plenty of seeds for flower beds, borders, pollinator gardens, woodland landscapes, and naturalized planting areas.

NATIVE MIX VARIETY: Includes 250 seeds of 6 native Penstemon species - Large Beardtongue, Rocky Mountain, Prairie, Palmers, Foxglove, and Pale Penstemon for a diverse, colorful garden display.
Apply Organic Mulch to Retain Moisture
Organic mulch serves as nature’s protective blanket for your mailbox plants, offering multiple benefits that support long-term garden health. Bark chips, shredded leaves, and compost create an effective moisture barrier that reduces water evaporation by up to 70%, keeping plant roots consistently hydrated between watering sessions.
Spreading organic materials around the base of your mailbox plants significantly reduces the frequency of irrigation needed throughout growing seasons. Decomposing mulch gradually releases nutrients into the soil, feeding your perennials and shrubs naturally over time. Weed suppression becomes effortless when organic mulch blocks sunlight from reaching dormant seeds in the soil below your plantings.
Install Clean Edging Materials for Definition
Clean edging transforms your mailbox garden from amateur to professional by creating distinct boundaries between planted areas and surrounding lawn spaces. Stone pavers, metal strips, and brick borders provide the visual separation needed to prevent grass encroachment while highlighting your carefully selected plant combinations.
Choosing the right edging material depends on your home’s architectural style and maintenance preferences, with options ranging from natural fieldstone to modern aluminum strips. Plastic borders offer affordability and flexibility for curved garden beds, while brick edging complements traditional home designs with timeless appeal. Metal edging delivers the sharpest lines and longest durability, making it ideal for contemporary industry designs around mailbox installations.
Maintain Proper Mulch Depth for Plant Health
Maintaining the correct mulch depth ensures optimal plant performance while preventing common problems that damage roots and stems. Research indicates that 2 to 3 inches of mulch provides ideal moisture retention without creating conditions that promote root rot or pest problems around your mailbox plantings.
Applying mulch too thickly suffocates plant roots and creates breeding grounds for harmful insects and diseases that threaten garden health. Keeping mulch several inches away from your mailbox post prevents moisture buildup that could damage wooden or metal structures over time. Refreshing your mulch layer annually maintains its effectiveness while giving your mailbox garden a consistently well-maintained appearance throughout all seasons.
Establish a Simple Maintenance Routine

Maintaining your mailbox garden doesn’t require extensive effort when you establish smart routines from the start. We’ll focus on three essential maintenance areas that keep your plants healthy while ensuring mail delivery remains unobstructed.
Schedule Regular Watering During Establishment
New plantings need consistent moisture to develop strong root systems in their first growing season. Water newly planted flowers and shrubs regularly until they’re established, especially during dry periods or in well-draining soil conditions. Check soil moisture by inserting your finger 2 inches deep into the ground around each plant.
Established plants typically require less frequent watering, but curbside conditions like exposure to road salt and heat reflection from pavement create additional stress. Deep watering twice weekly works better than daily light sprinkling for most mailbox plantings. Morning watering allows plants to absorb moisture before afternoon heat while reducing disease risks from overnight dampness.
Plan Seasonal Pruning and Deadheading Tasks
Pruning keeps your mailbox garden functional and attractive throughout the growing season. Trim vigorous climbers regularly to maintain their shape and prevent them from covering the mailbox opening or blocking visibility. Cut back climbing vines when they reach within 6 inches of the mailbox door to ensure uninterrupted mail access.
Deadheading flowering plants encourages continuous blooms and maintains a tidy appearance from spring through fall. Remove spent flowers weekly during peak growing season by pinching or cutting stems just above the next leaf node. Seasonal pruning in late winter prepares perennials for new growth while keeping plants shorter than the mailbox bottom for safety compliance.
Monitor for Pests and Diseases
Regular plant inspection prevents small problems from becoming major issues that could damage your entire mailbox garden. Check plants weekly for signs of pests like aphids, spider mites, or caterpillars that commonly affect curbside plantings. Look for yellowing leaves, brown spots, or unusual growth patterns that indicate disease problems.
Early detection helps prevent spread to neighboring plants and maintains the health of your low-maintenance varieties. Remove affected plant parts immediately and dispose of them away from the garden area. Choose pest-resistant plants suited to curbside conditions to minimize future maintenance needs while keeping your mailbox area attractive year-round.
Conclusion
We’ve shown you how to create a stunning mailbox garden that enhances your home’s curb appeal while remaining practical and low-maintenance. With the right plant selection proper planning and attention to safety regulations you’ll have a beautiful focal point that welcomes visitors year-round.
Remember that success lies in choosing plants suited to your exact conditions and maintaining proper clearances for mail delivery. Whether you opt for drought-tolerant perennials native species or seasonal bloomers your mailbox area can become a showcase of your gardening skills.
Start small with a few well-chosen plants and expand as your confidence grows. Your mail carrier and neighbors will appreciate the thoughtful landscaping and you’ll enjoy the daily satisfaction of a well-designed garden that adds value to your property.

High-quality seeds and expert guidance: Experience the quality seed difference. We are committed to providing the highest quality, open-pollinated, non-GMO/non-GE seeds to our customers, guaranteed. A trusted source of high-quality seeds since 1985.

COLORFUL MIXED FLOWER BULB COLLECTION Create a vibrant spring and summer garden with a beautiful mix of 100 flower bulbs in warm, cheerful shades of yellow, pink, white, and orange. This colorful collection brings long-lasting seasonal beauty to garden beds, borders, and landscape plantings.

Alaska Shasta Daisy Seeds - Shasta Daisy ‘Alaska’ is an old-fashioned variety that is perfect for cut flowers and cottage gardens. Plants grow to 30 inches tall with white flowers. Attracts beneficial insects to the garden.
Frequently Asked Questions
What plants work best for mailbox gardens?
Choose low-maintenance perennials like Black-eyed Susans, Purple Coneflowers, and native plants suited to your climate zone. For full sun areas, select drought-tolerant varieties like Sedum and dwarf daylilies. In shaded spots, opt for Hostas, Astilbe, and ferns. These plants return each season, support local wildlife, and require minimal care while providing year-round visual appeal.
How much space should I plan around my mailbox for planting?
Measure a 3 to 4-foot radius around your mailbox post to determine the planting bed size. Always maintain a 2-foot clearance on the approach side for safe mail delivery. Consider the mature size of your chosen plants to avoid overcrowding and ensure postal workers can easily access the mailbox without obstruction.
Do I need a large budget to create an attractive mailbox garden?
No, creating a beautiful mailbox garden doesn’t require extensive funds or gardening expertise. Focus on selecting native, low-maintenance perennials that return each season, eliminating the need for annual replanting. Use natural materials like rocks or bricks for edging, and choose drought-tolerant plants to minimize water costs and maintenance requirements.
What safety regulations should I consider for mailbox landscaping?
Follow USPS guidelines by selecting low-growing plants that don’t obstruct sightlines for drivers and mail carriers. Avoid tall or dense vegetation near the mailbox, position thorny plants away from high-traffic areas, and ensure clear access to the mailbox door. Keep house numbers visible and maintain proper clearance for mail delivery vehicles.
How do I improve drainage around my mailbox?
Assess your soil’s drainage capacity and add organic matter to improve soil structure. Create raised beds in areas with poor drainage to enhance growing conditions. Install a gravel base when setting the mailbox post to prevent water accumulation and protect against root rot, which can compromise both plant health and mailbox stability.
What’s the best way to create year-round interest in my mailbox garden?
Plant spring bulbs like Tulips and Daffodils in fall for early season color. Include summer perennials such as Echinacea and Daylilies for peak growing season appeal. Add fall-blooming plants like Asters and Chrysanthemums for autumn interest. Mix in evergreen shrubs and ornamental grasses to maintain structure and color throughout winter months.
How often do I need to maintain my mailbox garden?
Mailbox gardens require minimal maintenance when properly planned. Water new plantings consistently during establishment, then deep water twice weekly for mature plants. Schedule seasonal pruning and deadheading to maintain appearance and functionality. Conduct regular inspections for pests and diseases. Apply organic mulch annually to retain moisture and suppress weeds.
Should I use mulch in my mailbox garden?
Yes, organic mulch provides multiple benefits including moisture retention, weed suppression, and soil nourishment over time. Apply mulch at the proper depth to ensure optimal moisture retention while preventing root issues. Combine mulching with clean edging materials to define the garden space, prevent grass encroachment, and create a polished, professional appearance.