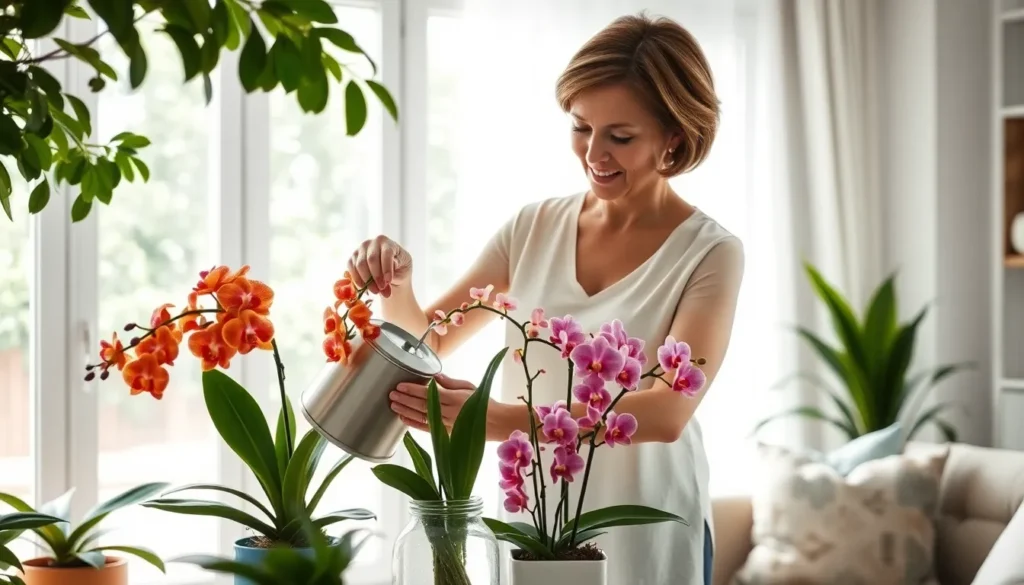
Orchids have earned their reputation as finicky houseplants but we’re here to change that misconception. These stunning flowering beauties can thrive in your home with the right knowledge and care routine. Once you understand their basic needs you’ll discover that orchids are surprisingly forgiving and rewarding companions.
We’ve helped thousands of plant enthusiasts transform their orchid care from guesswork into success stories. The secret isn’t complicated formulas or expensive equipment – it’s understanding what these tropical treasures actually need to flourish. From proper watering techniques to ideal lighting conditions we’ll walk you through every essential step.
Whether you’re rescuing a struggling orchid or starting fresh with a new plant our proven methods will give you the confidence to grow these magnificent flowers. Let’s turn your home into an orchid paradise where blooms return year after year with proper care and attention.
Understanding Your Orchid’s Basic Needs
Orchids thrive when we provide them with conditions that mimic their natural tropical environments. We’ve found that mastering these fundamental requirements transforms struggling plants into stunning bloomers.
Light Requirements for Healthy Growth
Bright, indirect light serves as the foundation for orchid success. We position our orchids near east or west-facing windows where they receive morning or afternoon sun without harsh midday rays. South-facing windows work well too, but we hang sheer curtains to filter the intense light.
Fluorescent lights offer excellent alternatives for darker spaces. We place grow lights 12-15 inches above our orchids and run them for 12-14 hours daily. LED grow lights work equally well and consume less energy than traditional fluorescent options.
Signs of improper lighting appear quickly in orchid leaves. Dark green, elongated leaves indicate insufficient light, while yellow or reddish leaves suggest too much direct sun. We adjust placement immediately when we notice these warning signs.
Temperature and Humidity Preferences
Most orchids prefer daytime temperatures between 65-80°F with nighttime drops of 10-15 degrees. We maintain this temperature differential using programmable thermostats or by moving plants to cooler areas at night. Phalaenopsis orchids tolerate slightly warmer conditions, while Cymbidiums prefer cooler temperatures around 60-70°F.
Humidity levels between 40-70% create optimal growing conditions. We use humidity trays filled with water and pebbles beneath our orchid pots to increase local moisture. Humidifiers work well for larger collections, while grouping plants together naturally raises humidity levels.
Consistent temperatures prevent stress-related problems. We avoid placing orchids near heating vents, air conditioners, or drafty windows where temperature fluctuations occur frequently. Sudden temperature changes can cause bud drop and delayed flowering.
Air Circulation Importance
Gentle air movement prevents fungal diseases and strengthens orchid stems. We use small fans on low settings to create constant airflow around our plants. Ceiling fans work well too, as long as they don’t create strong drafts directly hitting the orchids.
Stagnant air encourages bacterial and fungal growth in orchid growing media. We ensure at least 6 inches of space between plants to allow proper air circulation. Overcrowded orchids often develop crown rot and other moisture-related issues.
Natural ventilation through open windows benefits orchids during mild weather. We open windows on pleasant days to provide fresh air exchange, but we monitor for sudden temperature drops or strong winds that could damage delicate flowers and leaves.
Choosing the Right Potting Medium and Container

After establishing the ideal environment for your orchids, we need to focus on their foundation. The right potting medium and container create the perfect balance between moisture retention and airflow that orchids desperately need.
Best Orchid Bark and Soil Mixes
Orchid mixes typically combine fir bark, coconut husk chips, charcoal, and sphagnum moss to create the perfect growing environment. These materials provide essential aeration while retaining just enough moisture for proper hydration without suffocating delicate roots.
Pre-made orchid bark mixes offer convenience and proven results for most growers. But, creating your own blend allows us to customize the mixture based on our exact orchid varieties and environmental conditions.
Never use regular potting soil for orchids since it holds excessive moisture and causes devastating root rot. Instead, we recommend lightweight, airy mediums that mimic the natural epiphytic conditions where orchids thrive on trees rather than in traditional soil.
Proper Drainage Requirements
Water drainage stands as the most critical factor in orchid care since these plants absolutely cannot tolerate sitting in standing water. Thorough drainage after each watering session prevents the number one killer of orchids: root rot from overwatering.
Weekly watering schedules work best for most orchids, though this varies based on your climate and the moisture retention of your chosen medium. We always check that water flows completely through the medium and out the drainage holes.
Between waterings, the potting medium should dry out substantially to allow roots access to the oxygen they need. This natural wet and dry cycle mimics their native tropical environment where rain alternates with drier periods.
Container Size and Material Selection
Transparent plastic pots with multiple drainage holes remain our top recommendation because they let us monitor root health and moisture levels easily. These clear containers help us identify when roots turn green (healthy) or brown (problematic).
Terracotta pots provide another excellent option since they allow moisture to evaporate more quickly through their porous walls. This natural evaporation helps prevent the waterlogged conditions that orchids hate.
Container sizing should accommodate the root system with just slightly extra room since oversized pots hold too much moisture around the roots. We avoid containers that dwarf the plant or provide excessive space that retains water longer than necessary.
Mastering the Watering Technique

Water application for orchids requires precision and understanding of their epiphytic nature. Since orchids naturally grow on tree bark rather than in soil, they need a thorough soak followed by complete drainage to prevent root rot.
How Often to Water Your Orchids
Weekly watering schedules work best for most orchid varieties. We recommend allowing the potting medium to dry out completely between watering sessions to replicate their natural environment where water drains quickly. During winter months when orchids enter dormancy, reduce watering frequency accordingly since plants require less moisture during these periods.
Checking the potting medium with your finger helps determine when it’s time to water again. Stick your finger about an inch into the medium, and if it feels dry, your orchid is ready for its next drink. Overwatering proves more harmful than underwatering and remains a leading cause of orchid failure.
Ice Cube Method vs Traditional Watering
Traditional watering methods outperform the popular ice cube technique by important margins. Room temperature water provides the ideal conditions for orchid roots, while ice cubes can shock the delicate root system with their cold temperature. Cold water contradicts orchids’ tropical nature and can cause unnecessary stress to the plant.
Thorough soaking followed by complete drainage mimics the natural rainfall patterns orchids experience in their native habitats. We pour room temperature water slowly over the entire potting medium until it runs freely from the drainage holes. This method ensures proper hydration while maintaining the airy conditions orchids need for healthy root development.
Signs of Overwatering and Underwatering
Overwatering symptoms appear as yellowing leaves, soft or mushy roots, and consistently soggy potting mix. These warning signs indicate potential root rot development, which can quickly kill an orchid if left untreated. Brown or black roots signal advanced overwatering damage that requires immediate attention.
Underwatering manifests through wrinkled or shriveled leaves, bone dry potting medium, and noticeably slowed growth patterns. Pseudobulbs may appear deflated when orchids experience water stress. Silver or white aerial roots often indicate healthy moisture levels, while gray or brown roots suggest watering issues that need correction.
Providing Adequate Light Without Burning

Orchids require bright, indirect light to produce their stunning blooms effectively. We’ve found that providing as many hours as possible of bright light while avoiding harsh direct sun exposure is the key to preventing leaf scorch and ensuring healthy growth.
Best Window Locations for Orchids
East facing windows are our top recommendation for orchid placement because they provide gentle morning light that’s bright but less intense. This natural lighting creates the perfect conditions for orchid health without risking leaf burn.
South facing windows offer ample bright light but can deliver strong direct sun that may harm your plants. We suggest placing orchids slightly away from direct rays or behind sheer curtains to filter the intensity while maintaining adequate brightness.
West facing windows can work effectively if you filter the direct afternoon sun, which tends to be hotter and stronger than morning light. Position your orchids where they’ll receive the bright light without the harsh direct exposure that typically occurs in late afternoon.
North facing windows should be avoided as they generally provide insufficient light levels for orchids to thrive and bloom properly.
Using Artificial Grow Lights
Full spectrum grow lights designed specifically for plants can support orchid health and blooming when natural light is inadequate. We recommend positioning these lights to mimic the intensity and duration of bright indirect sunlight for optimal results.
12 to 14 hours of artificial light per day is what orchids typically need to thrive under artificial lighting conditions. This extended duration compensates for the lower intensity compared to natural sunlight.
Winter months and rooms without suitable windows benefit most from artificial lighting supplementation. We’ve seen excellent results when using grow lights during darker seasons or in spaces with limited natural light access.
Recognizing Light Stress Symptoms
Excessive light exposure causes leaves to turn yellow, brown, or develop dry, crisp patches, particularly on the edges or tips. These burning symptoms indicate your orchid is receiving too much direct sunlight and needs to be moved to a more filtered location.
Insufficient light conditions result in dark green leaves and rare blooming or weak, spindly growth patterns. We notice that orchids struggling with low light rarely produce the vibrant blooms they’re known for.
Adjustment strategies should be implemented immediately when you observe these symptoms by moving the orchid to a different location or modifying light intensity with curtains or changing artificial light duration.
Fertilizing Your Orchids for Optimal Blooms

Proper nutrition plays a crucial role in encouraging your orchids to produce their spectacular blooms. We’ll guide you through the essential fertilizing practices that support healthy growth and maximize flowering potential.
Choosing the Right Orchid Fertilizer
Specialized orchid fertilizers deliver the precise nutritional balance these plants require for optimal growth. Look for fertilizers specifically labeled as “orchid fertilizer” with balanced N-P-K ratios like 20-20-20, which provide equal amounts of nitrogen, phosphorus, and potassium. These formulations prevent root burn that can occur with stronger, general-purpose fertilizers.
Regular houseplant fertilizers often contain concentrations too high for orchid roots to handle safely. We recommend avoiding these products entirely since they can damage the delicate root system and reduce blooming capacity. Quality orchid fertilizers cost slightly more than standard options, but they’re formulated to meet the unique needs of epiphytic plants like orchids.
Feeding Schedule and Dilution Ratios
Weekly fertilizing at diluted strength produces the best results for most orchid varieties. Mix your orchid fertilizer to half or quarter strength of what the package recommends for other houseplants. This “weakly, weekly” approach provides consistent nutrition without overwhelming the plant’s root system.
Apply diluted fertilizer every time you water during the active growing season, except during rest periods when growth naturally slows. Avoid over-fertilizing, which can harm roots and actually reduce blooming rather than enhance it. Monitor your orchid’s response and adjust the frequency if you notice any signs of fertilizer burn, such as brown leaf tips or stunted growth.
Seasonal Fertilizing Adjustments
Spring through early fall represents the prime feeding season when orchids actively grow and bloom. Maintain your weekly fertilizing schedule during these months to support vigorous growth and flower production. Temperature and light conditions during this period create optimal conditions for nutrient uptake.
Winter dormancy requires a different approach as orchid growth naturally slows down. Reduce fertilizing frequency or pause it entirely during the dormant period to prevent stressing the plant with excess nutrients. Resume regular feeding when you notice new growth emerging, typically as daylight hours increase in late winter or early spring.
Use pure water or rainwater when mixing fertilizer to avoid salt buildup that can occur with tap water containing minerals and chemicals. This practice helps maintain healthy root systems and ensures your orchids can efficiently absorb the nutrients you provide.
Maintaining Proper Humidity Levels

Humidity levels between 50% and 75% create the optimal environment for most orchid varieties to flourish. We’ve found that maintaining this range significantly reduces water loss through transpiration while promoting healthier overall plant development.
Creating a Humidity Tray System
Building a humidity tray provides an effective localized microclimate around your orchids without the risk of overwatering. We recommend using a shallow waterproof tray filled halfway with decorative gravel or pebbles.
Fill the tray with water until it reaches approximately halfway up the gravel layer. Position your orchid pot directly on top of the gravel surface, ensuring the bottom never touches the water directly.
Water evaporation from the tray surface naturally increases ambient humidity around your plant by 10-15%. We’ve observed that this method works particularly well for Phalaenopsis orchids, which thrive in the 55% to 75% humidity range.
Replace the water weekly to prevent stagnation and bacterial growth. Clean the gravel monthly with a mild bleach solution to maintain hygiene around your orchids.
Using Humidifiers Effectively
Electric humidifiers offer consistent humidity control throughout your orchid growing space, especially during winter months when indoor air becomes particularly dry. We suggest choosing models with large water tanks to minimize daily refilling requirements.
Position the humidifier 3-4 feet away from your orchids to ensure even moisture distribution without creating wet spots on leaves. Monitor humidity levels with a digital hygrometer to maintain the optimal 40% to 70% range consistently.
Clean your humidifier weekly following manufacturer instructions to prevent mold and bacterial contamination that can harm orchid health. We’ve noticed that neglecting this maintenance often leads to fungal issues on orchid foliage.
Watch for excessive condensation on nearby windows or mirrors as an indicator of over-humidification. Reduce settings immediately if you notice water droplets forming on orchid leaves, which can encourage bacterial soft rot.
Natural Ways to Increase Humidity
Grouping multiple orchids together creates a beneficial microclimate through collective transpiration from all plants. We position our orchids 6-8 inches apart to maximize this effect while maintaining proper air circulation.
Strategic placement in naturally humid areas like well-lit bathrooms can significantly improve growing conditions without additional equipment. Morning light from bathroom windows often provides ideal conditions for orchid growth.
Misting techniques require careful timing and proper execution to avoid fungal problems on orchid foliage. We recommend misting early morning hours, allowing leaves to dry completely before evening temperatures drop.
Consider placing shallow water dishes near heating vents to add moisture to circulating air throughout your growing space. This passive method works particularly well during winter when central heating systems dramatically reduce indoor humidity levels.
Repotting Your Orchids at the Right Time

Repotting represents one of the most crucial aspects of long-term orchid care, directly impacting your plant’s health and blooming potential. We’ve found that timing this process correctly makes the difference between thriving orchids and struggling plants.
When to Repot Your Orchid
Recognizing the right time to repot requires careful observation of both your orchid’s growth cycle and the condition of its growing medium. We recommend repotting every 1-2 years, ideally after your orchid has finished blooming and entered its rest period.
Several clear indicators signal it’s time for repotting:
- Roots growing out of drainage holes or over the pot’s rim indicate your orchid needs more space
- Breaking down of potting medium becomes evident when bark pieces turn mushy or retain excessive moisture
- Root suffocation occurs when decomposed medium prevents proper air circulation around roots
- Medium begins to decay and develops an unpleasant odor, creating conditions for root rot
Timing matters significantly because repotting during active blooming can shock your orchid and cause premature flower drop. We always wait until the blooming cycle completes before starting the repotting process.
Step-by-Step Repotting Process
Proper technique during repotting ensures minimal stress to your orchid while maximizing its chances of successful adaptation to fresh medium.
Selecting Your Potting Medium
Choose an orchid-exact mix containing bark, sphagnum moss, perlite, or peat that provides excellent aeration and drainage. Regular potting soil should never be used as it retains too much moisture and lacks the air circulation orchids require.
Removing Your Orchid Safely
Gently extract your orchid from its current container, taking care not to damage healthy roots. Remove old potting medium by carefully working it away from the root system with your fingers or a soft brush.
Trimming Dead Root Material
Examine roots thoroughly and cut away any dead or mushy sections using sterilized scissors. Healthy roots appear firm and display white or green coloration, while damaged roots feel soft and show brown or black discoloration.
Positioning in New Container
Place your orchid in a pot that’s only slightly larger than the previous container to prevent water retention issues. Fill around the roots with fresh orchid medium, avoiding tight packing that restricts air movement.
Initial Watering Approach
Water lightly just enough to settle the new medium around roots without soaking the entire pot. Excessive moisture immediately after repotting increases the risk of root rot while roots are still recovering from the transplant shock.
Post-Repotting Care Instructions
Recovery after repotting requires adjusted care practices that support your orchid’s adaptation to its new environment while preventing common post-repotting problems.
Lighting Requirements
Position your newly repotted orchid in bright, indirect light near south or east-facing windows. Direct sunlight can burn stressed leaves during the recovery period, so filtered light works best for the first few weeks.
Modified Watering Schedule
Allow the growing medium to dry completely between waterings, which typically means watering once weekly depending on your home’s humidity and temperature. Use tepid water and water early in the day so foliage dries completely by nighttime to prevent bacterial issues.
Fertilization Adjustments
Feed with diluted orchid-exact fertilizer such as 20-20-20 formula on a weekly basis during active growth periods. Reduce fertilization frequency during winter dormant phases when your orchid’s nutrient needs decrease significantly.
Environmental Conditions
Maintain humid environments with good air circulation using humidity trays or room humidifiers as needed. Stagnant air around freshly repotted orchids can lead to fungal problems, so ensure gentle air movement without creating drafts that might stress your plant.
Following these post-repotting guidelines helps ensure your orchid establishes successfully in its new medium, encouraging healthy root development and setting the stage for future blooming cycles.
Pruning and Grooming for Plant Health

Regular maintenance keeps our orchids healthy and encourages continuous blooming cycles. Strategic pruning and grooming practices help redirect the plant’s energy toward new growth and flowering.
Removing Dead Roots and Leaves
Inspect your orchid regularly to identify dead or rotting roots that appear brown and mushy compared to healthy white or green roots. We recommend checking root health during each watering session to catch problems early. Remove damaged roots carefully using sterilized scissors or pruning shears to prevent disease spread and encourage robust root development.
Yellow or dried leaves should be trimmed away to maintain both plant health and visual appeal. These declining leaves drain energy from the orchid that could otherwise support new growth. Cut yellowed foliage at the base where it meets the stem, allowing the plant to focus its resources on producing fresh leaves and flower spikes.
Brown or black spots on leaves often indicate bacterial or fungal issues that require immediate removal. We’ve found that addressing leaf problems quickly prevents them from spreading to healthy plant tissue. Always remove affected areas completely, cutting back to healthy green tissue to stop disease progression.
Trimming Spent Flower Spikes
After blooms fade completely, trim the flower spike just above a visible node or joint to encourage potential secondary flowering. This strategic cut often triggers the orchid to produce new flower branches from dormant buds along the spike. We’ve observed that Phalaenopsis orchids respond particularly well to this technique.
Brown or yellowing spikes that show no signs of new growth should be cut completely at the base near the plant crown. Dead spikes continue drawing energy from the orchid without producing any blooms. Remove these entirely to redirect the plant’s resources toward developing new flower spikes and foliage.
Timing your cuts matters significantly for orchid health and future blooming potential. We recommend waiting until flowers drop naturally before making any cuts, as premature trimming can stress the plant. Monitor spikes for 2-3 weeks after the last bloom falls to determine whether they’ll produce secondary flowers.
Cleaning and Disinfecting Tools
Sterilize all pruning tools before and after each use to prevent bacterial and fungal transmission between plants. We use rubbing alcohol with at least 70% concentration or a diluted bleach solution (1 part bleach to 9 parts water) for effective disinfection. Clean tools are essential when working with multiple orchids in your collection.
Wipe cutting surfaces thoroughly with your chosen disinfectant, allowing tools to air dry briefly before use. Sharp, clean scissors or pruning shears make cleaner cuts that heal faster than jagged wounds from dull blades. We recommend dedicated orchid tools that aren’t used for other gardening tasks to minimize contamination risk.
Replace worn cutting tools when they become dull or develop rust, as damaged implements can crush plant tissue rather than making clean cuts. Quality pruning shears designed for delicate work perform better than household scissors for orchid maintenance. Investing in proper tools pays dividends in plant health and successful recovery from pruning sessions.
Preventing and Treating Common Orchid Problems

Even with proper care, orchids can encounter issues that threaten their health and blooming potential. We’ll guide you through identifying and resolving the most common problems that orchid enthusiasts face.
Identifying Pest Infestations
Scale insects represent one of the most persistent threats to orchid health, creating sticky honeydew residue on leaves and stems. These small, brown or white bumps attach firmly to plant surfaces and can quickly multiply if left untreated. Mealybugs appear as white, cottony masses in leaf joints and along stems, feeding on plant juices and weakening your orchid over time.
Spider mites create fine webbing on leaves and cause stippled, yellowing foliage that eventually turns bronze. Regular inspections help catch these tiny pests before they establish large colonies on your plants. We recommend checking the undersides of leaves weekly, as this is where many pests prefer to hide and reproduce.
Early detection proves crucial for successful pest management and prevents infestations from spreading to other orchids. Wiping leaves with insecticidal soap solution or neem oil effectively controls most common orchid pests when applied consistently. Isolating affected plants immediately prevents pests from migrating to healthy orchids in your collection.
Dealing with Root Rot and Fungal Issues
Root rot manifests as mushy, brown roots that easily break away from the plant, often resulting from overwatering or poor drainage conditions. Healthy orchid roots should appear firm and white or green, while rotted roots turn dark and feel soft to the touch. Most orchids need watering about once a week, allowing the medium to dry out completely between waterings to prevent this common problem.
Preventing root rot requires using fast draining orchid mix containing bark, sphagnum moss, and perlite instead of regular potting soil that retains too much moisture. Ensuring pots have adequate drainage holes allows excess water to escape and prevents waterlogged conditions that encourage fungal growth.
Treatment involves carefully removing affected roots with sterile tools and repotting in fresh orchid medium to give your plant a healthy foundation. Fungal leaf spots appear as discolored patches on foliage and require increased air circulation around your orchids. Treating severe fungal issues with appropriate fungicides may become necessary if environmental adjustments don’t resolve the problem.
Addressing Leaf Yellowing and Dropping
Yellow leaves commonly result from overwatering, insufficient light exposure, or nutrient deficiencies that stress your orchid over time. Orchids need bright, indirect light to maintain healthy foliage, ideally positioned in east, south, or west facing windows without direct sun exposure. Dropping leaves typically indicate environmental stress from temperature changes, pest damage, or improper watering schedules.
Adjusting watering frequency prevents waterlogged soil conditions that cause root damage and subsequent leaf yellowing throughout your plant. We recommend checking the potting medium moisture level before each watering session to avoid oversaturating the roots. Providing adequate indirect light helps maintain chlorophyll production and prevents the pale, yellowing appearance that indicates light stress.
Using orchid exact fertilizer or balanced 20-20-20 diluted fertilizer weekly during growing season addresses nutrient deficiencies that contribute to leaf problems. Removing yellow or dead leaves with clean, sharp tools maintains plant health and redirects energy toward new growth and flowering. Maintaining balanced water, light, humidity, and feeding schedules helps orchids recover from stress and return to vigorous growth patterns.
Encouraging Reblooming and Long-Term Care

We’ve mastered the fundamentals of orchid care, now let’s focus on the strategies that transform one-time bloomers into perpetual flowering champions.
Creating Seasonal Temperature Changes
Temperature fluctuations trigger orchid reblooming cycles naturally. We recommend maintaining a 10°F (5-6°C) temperature drop between day and night to stimulate flower spike development. Daytime temperatures should range between 65-75°F while nighttime temperatures drop to 55-65°F.
Moving orchids to slightly cooler locations during evening hours mimics their natural tropical environment. Many successful orchid growers relocate their plants to basements, covered porches, or unheated rooms for nighttime cooling. Air conditioning vents provide another effective cooling method during summer months.
Seasonal adjustments enhance blooming potential significantly. We’ve observed that orchids exposed to cooler fall temperatures often produce more robust flower spikes in winter and spring. Gradual temperature changes work better than sudden shifts, which can stress the plant and delay flowering.
Patience During Dormant Periods
Dormancy periods represent critical recovery phases for orchids between blooming cycles. We reduce watering frequency to every 10-14 days during these rest periods, allowing growing medium to dry completely. Fertilization decreases to monthly applications or stops entirely depending on the orchid variety.
Maintaining consistent light levels remains important even when orchids aren’t actively growing. We continue providing bright, indirect light near east or south facing windows throughout dormant phases. Growth may appear stagnant for several months, but root development continues beneath the surface.
Avoiding the temptation to discard “inactive” orchids proves essential for long term success. We’ve rescued countless orchids that owners assumed were dead simply because they entered extended dormancy periods. Healthy roots and firm pseudobulbs indicate viable plants ready to rebloom with proper care.
Supporting Healthy Growth Cycles
Repotting schedules align with natural growth patterns for optimal results. We repot orchids every 1-3 years immediately after blooming ceases, when root systems are most receptive to disturbance. Fresh bark based growing medium prevents decomposition that leads to root rot.
Humidity levels between 40-60% support continuous healthy development throughout growth cycles. We maintain consistent moisture in the air using humidity trays, room humidifiers, or grouping plants together. Proper air circulation prevents fungal issues while supporting robust growth.
Root and leaf monitoring helps us identify stress signals before they become serious problems. Healthy orchid roots appear firm and white or green, while diseased roots turn brown and mushy. We inspect plants weekly for pest infestations, yellowing leaves, or other signs requiring immediate attention.
Consistent care routines establish predictable environments that orchids thrive in year after year. We track watering dates, flowering periods, and growth patterns to optimize care schedules for each individual plant. Patient, attentive maintenance rewards us with spectacular blooms season after season.
Conclusion
Taking care of orchids doesn’t have to be overwhelming once you’ve mastered the fundamentals. We’ve covered everything from creating the perfect environment to establishing consistent care routines that work.
Remember that orchids reward patience and attention to detail. Small adjustments in your watering schedule humidity levels or lighting can make a dramatic difference in your plant’s health and blooming potential.
The key to orchid success lies in consistency rather than perfection. Start with one or two plants apply these techniques gradually and watch as your confidence grows alongside your beautiful orchids.
With the right knowledge and a little practice you’ll soon discover that these stunning plants are more resilient than their reputation suggests. Your orchids will thank you with spectacular blooms that last for months.
Frequently Asked Questions
Are orchids really difficult to care for as houseplants?
No, orchids are not inherently difficult houseplants. The myth of difficulty stems from misunderstanding their basic needs. With proper watering, lighting, and environmental conditions that mimic their natural tropical habitats, orchids can thrive indoors. Understanding their epiphytic nature and providing appropriate care makes orchid cultivation quite manageable for most plant enthusiasts.
What type of potting medium should I use for my orchids?
Use a specialized orchid potting mix that combines fir bark, coconut husk chips, charcoal, and sphagnum moss. This lightweight, airy medium provides essential drainage and aeration while retaining appropriate moisture. Never use regular potting soil, as it retains too much water and can cause deadly root rot in orchids.
How often should I water my orchids?
Water orchids weekly, allowing the potting medium to completely dry out between waterings. Reduce watering frequency during winter dormancy. Always use room temperature water and avoid the ice cube method, which can shock the roots. Check for proper drainage and ensure water doesn’t sit in the pot.
What lighting conditions do orchids need?
Orchids thrive in bright, indirect light. East-facing windows provide ideal gentle morning light, while south-facing windows may be too intense without filtering. Consider using full-spectrum grow lights to supplement natural light, especially during winter months. Watch for yellowing leaves (too much light) or dark green leaves (insufficient light).
What humidity levels do orchids require?
Maintain humidity levels between 50-75% for optimal orchid growth. Create a humidity tray system using shallow trays filled with gravel and water, or use electric humidifiers during dry periods. Group orchids together and place them in naturally humid areas like bathrooms to increase local humidity levels.
How do I know when to repot my orchid?
Repot orchids every 1-2 years, ideally after blooming. Signs include roots growing out of drainage holes, decomposing potting medium, or the plant becoming top-heavy. Choose a container only slightly larger than the root system and use fresh orchid potting mix to prevent water retention issues.
What fertilizer should I use for orchids?
Use specialized orchid fertilizers with balanced N-P-K ratios. Follow a “weakly, weekly” feeding schedule during the growing season, using diluted fertilizer to avoid overwhelming the roots. Reduce fertilization during winter dormancy and use pure or rainwater when possible to prevent harmful salt buildup in the potting medium.
How can I encourage my orchid to rebloom?
Stimulate reblooming by providing a 10°F temperature difference between day and night temperatures. Move orchids to cooler areas in the evening and maintain consistent care during dormant periods. Be patient, as orchids naturally cycle through blooming and rest periods. Proper light, humidity, and nutrition support healthy blooming cycles.
What are common signs of orchid problems?
Watch for yellowing leaves (overwatering or light issues), mushy roots (root rot), wrinkled leaves (underwatering), and pest infestations like scale insects or mealybugs. Early detection is key. Maintain proper watering practices, adequate lighting, and good air circulation to prevent most common orchid problems and diseases.
When and how should I prune my orchids?
Prune orchids regularly by removing dead roots, yellowing leaves, and spent flower spikes. Use clean, disinfected tools to prevent disease transmission. Make strategic cuts to redirect energy toward new growth and flowering. Proper grooming encourages continuous blooming cycles and maintains overall plant health and appearance.