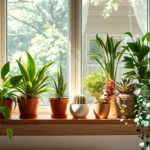
We’ve all felt that pang of sticker shock when shopping for plant pots – especially when we’re trying to fill our homes with greenery on a budget. The good news? Creating stunning DIY pots for plants isn’t just wallet-friendly; it’s also incredibly rewarding and lets us express our unique style.
From upcycling everyday household items to crafting completely custom designs we’ll explore simple techniques that transform ordinary materials into extraordinary planters. Whether you’re a seasoned crafter or someone who’s never picked up a paintbrush these projects work for every skill level.
Ready to ditch expensive store-bought pots and create something truly special? We’re about to show you how easy it is to make beautiful plant containers that’ll have your friends asking where you bought them – and you’ll love telling them you made them yourself.
Choose the Right Materials for Your DIY Pots for Plants
Selecting quality materials forms the foundation of successful DIY plant containers that last for years. We’ll explore four excellent material categories that offer durability and aesthetic appeal for your homemade planters.
Recycled Plastic Containers
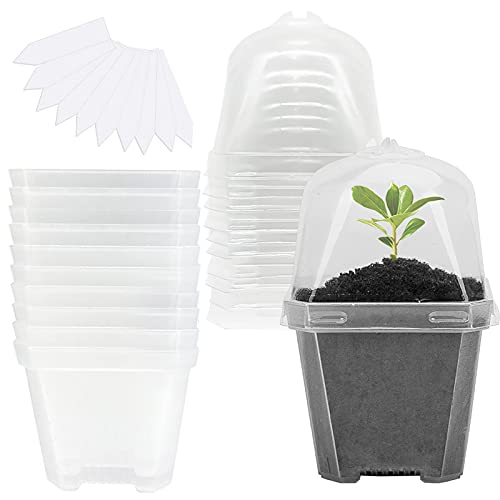
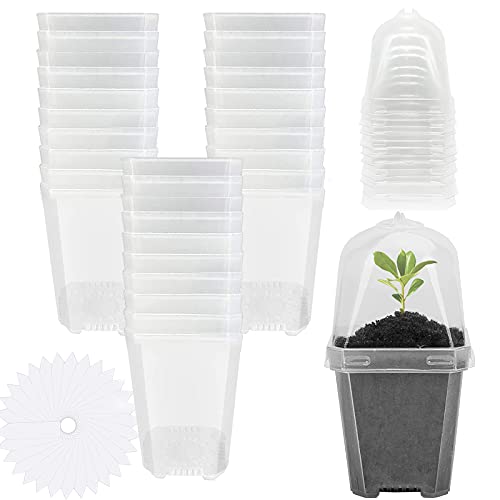
Plastic containers transform into lightweight and waterproof planters perfect for both indoor and outdoor use. We recommend yogurt containers, milk jugs, and large detergent bottles as excellent starting materials. These containers resist cracking in cold weather and won’t break if accidentally dropped.
Cleaning your chosen plastic thoroughly removes any residual chemicals that could harm plant roots. Drill drainage holes in the bottom using a standard drill bit to prevent waterlogging. Paint the exterior with plastic-exact spray paint to create attractive finishes that complement your home decor.
Terracotta and Clay Options
Clay materials provide natural breathability that promotes healthy root development in most plant varieties. We source air-dry clay from create stores or salvage broken terracotta pots for mosaic projects. These materials maintain soil moisture levels while allowing excess water to evaporate naturally.
Working with clay requires basic tools like sculpting instruments and rolling pins for shaping. Allow 24 to 48 hours for complete drying before adding drainage materials. Seal finished clay pots with clear acrylic spray to extend their lifespan in outdoor conditions.
Natural Wood Materials
Reclaimed wood creates rustic planters that age beautifully in outdoor environments. We use cedar, pine, and oak scraps from construction projects or old furniture pieces. These woods naturally resist moisture damage while developing attractive patinas over time.
Constructing wooden planters requires basic carpentry skills and standard tools like saws and drills. Line the interior with plastic sheeting to protect the wood from direct soil contact. Apply wood stain or natural oils annually to maintain appearance and prevent premature deterioration.
Concrete and Cement Alternatives
Concrete offers exceptional durability for large planters that house substantial root systems. We mix standard Portland cement with perlite or vermiculite to reduce weight while maintaining strength. These materials create modern, industrial-style containers that complement contemporary landscaping.
Building concrete planters involves creating molds from cardboard boxes or existing containers. Remove the mold after 24 hours of curing time for best results. Smooth rough edges with sandpaper and seal the surface to prevent lime leaching into the soil.

Gather Essential Tools and Supplies for Pot Making

Now that we’ve explored the best materials for our DIY plant pots, let’s assemble the essential tools and supplies we’ll need to bring our creative visions to life.
Basic Crafting Tools
Cutting implements form the foundation of our pot making toolkit. Sharp scissors or knives allow us to transform milk jugs, juice cartons, and cardboard containers into functional planters with clean, precise edges.
Measuring devices ensure consistency across our pot collection. Rulers and tape measures help us create uniform sizes and maintain proper proportions for our plant containers.
Mixing tools become essential when working with concrete planters. Simple plastic spoons or small trowels let us blend materials smoothly and achieve the perfect consistency for our concrete projects.
Container molds provide the framework for our creations. Salvaged garden center disposable pots or plastic containers serve dual purposes as both molds for concrete planters and ready-to-use containers themselves.
Drainage Materials
Drilling implements create the crucial drainage holes our plants desperately need. Screwdrivers or manual tools help us puncture ice cream buckets, milk jugs, and other repurposed materials to prevent water buildup.
Mesh screens prevent soil loss while maintaining proper water flow. These materials cover our drainage holes and keep growing medium contained within our containers.
Adequate drainage prevents waterlogging and root rot in our beloved plants. This essential feature ensures our DIY containers support healthy plant growth rather than hindering it.
Decorative Elements
Painting supplies transform plain containers into stunning focal points. FrogTape Multi-Surface Painters Tape combined with acrylic or outdoor paints creates professional-looking finishes on concrete and clay planters.
Natural materials add organic beauty to our handmade containers. Stones, pebbles, and moss provide decorative appeal while sometimes improving drainage performance.
Recycled treasures inject personality into our plant pot projects. Vintage canisters, mason jars, and unconventional items like old boots create unique character pieces that spark conversation.
Safety Equipment
Protective gloves shield our hands from cuts and irritation during construction. These essential items protect us when handling sharp tools or working with concrete materials.
Dust masks prevent inhalation of harmful particles during concrete mixing. Safety protection becomes crucial when working with concrete powder to avoid respiratory irritation.
Eye protection guards against debris and splashes during drilling or mixing activities. Protective eyewear ensures our vision stays safe while we create our beautiful plant containers.
Create Simple Upcycled Planters from Household Items

We’ll transform everyday household items into beautiful planters that cost practically nothing. This approach lets us create unique containers while reducing waste in our homes.
Tin Can Transformations
Clean empty tin cans thoroughly and remove all labels before starting your project. We recommend using cans of various sizes to create a diverse collection of planters. Paint the exterior with weather-resistant paint if you plan to use them outdoors, or leave them natural for a rustic industrial look.
Drill drainage holes in the bottom using a nail and hammer or electric drill. Space these holes about 2 inches apart to ensure proper water drainage. Small cans work perfectly for herbs like basil, mint, or thyme, while larger cans accommodate succulents and small flowering plants.
Wrap decorative twine around the cans or attach them to wooden boards for a cohesive garden display. These durable containers withstand outdoor conditions and develop a charming patina over time.
Plastic Bottle Conversions
Cut plastic milk jugs or large juice bottles in half to create instant planters. We use the bottom portion as the main container and can invert the top half to create a matching companion planter. This technique works especially well with gallon-sized containers that provide ample root space.
Poke drainage holes using a heated nail or drill bit to prevent water accumulation. Space holes every 3 inches across the bottom for optimal drainage. The natural handle on milk jugs makes these planters easy to move and hang.
Create self-watering systems by inverting the top portion with the cap removed into the bottom half. Thread a cloth wick through the cap opening to maintain consistent moisture levels for seedlings and herbs.
Old Boot and Shoe Planters
Fill old rain boots or worn-out shoes with potting soil for quirky garden displays. We love how these containers add personality to porches, patios, and garden beds. The existing drainage through worn soles often provides adequate water flow without additional modifications.
Choose hardy plants that tolerate confined root systems, such as sedums, small ferns, or trailing flowers. Colorful rain boots work particularly well with bright annuals like petunias or marigolds.
Position these planters strategically throughout your garden to create conversation pieces. Groups of different sized shoes create visual interest and can house plants with varying heights and textures.
Kitchen Container Repurposing
Transform ice cream buckets, yogurt containers, and plastic canisters into functional planters. We find these containers particularly useful for starting seedlings indoors before transplanting to larger spaces. Their wide mouths make planting and maintenance simple.
Add drainage holes using a drill or heated nail, spacing them every 2 to 3 inches across the bottom. Larger containers like ice cream buckets accommodate multiple plants or serve as temporary homes for garden vegetables.
Decorate these containers with waterproof paint, fabric, or decorative paper to match your home’s aesthetic. Clear containers work especially well for hydroponic systems where you can observe root development.


Build Concrete Planters for Durability and Style

Concrete planters offer the perfect combination of durability and customization for gardeners who want long-lasting containers. These sturdy pots can withstand harsh weather conditions while providing endless opportunities for creative expression.
Basic Concrete Pot Technique
Portland cement serves as the best foundation material for DIY concrete planters due to its fine powder form and smooth finish when mixed properly. We’ll need basic supplies including Portland cement, room temperature tap water, and a mixing container such as a plastic bucket or tub. Mix the cement with water until smooth to create the planter base that’ll form our durable container.
Create molds using plastic buckets or containers by placing a smaller bucket inside a larger one to form the hollow section of the pot. Position the smaller bucket slightly above the bottom layer of cement to establish the planter cavity properly. Pour concrete into the mold in layers and compact by tapping and shaking to release air bubbles for a solid finish.
Fill the mold completely and smooth the top surface before leaving the concrete to cure until solidified. This curing process ensures our planters develop maximum strength and durability for years of use.
Adding Texture and Patterns
Flexible trims or molds with patterns can be adhered to the edges before pouring cement to create decorative surfaces on our planters. Apply microcement or waterproofing membranes after the concrete has dried and brush them on to enhance surface details while protecting against water damage. Introduce textures through imprinting or molding techniques during the pouring phase to give each planter a unique style.
Create custom patterns by pressing objects like leaves, rope, or textured materials into the wet concrete surface. Remove these items once the concrete begins to set but before it fully hardens to leave lasting impressions. This technique allows us to design planters that complement our garden’s aesthetic perfectly.
Creating Different Sizes and Shapes
Various sizes and shapes become possible by using different mold containers or combining several molds together for complex designs. Build large planters by beginning with a compacted concrete base inside a larger bucket then positioning a smaller bucket or mold inside to create the hollow center. Customize planter dimensions by adjusting the thickness of concrete walls and the size of inner molds to suit indoor or outdoor plants.
Design fluted, round, square, or custom shaped pots by selecting the right forms and molds for our exact needs. Scale up projects for garden displays or create smaller versions perfect for succulents and houseplants on windowsills.
| Planter Size | Outer Mold Diameter | Inner Mold Diameter | Wall Thickness |
|---|---|---|---|
| Small | 6-8 inches | 4-5 inches | 1-1.5 inches |
| Medium | 10-12 inches | 7-8 inches | 1.5-2 inches |
| Large | 14-16 inches | 10-11 inches | 2-2.5 inches |


Craft Decorative Paper Mache Plant Containers

Paper mache pots offer an eco-friendly alternative to store-bought containers using simple materials you likely have at home. We’ll transform recycled paper into sturdy, decorative planters that can house your favorite plants while adding a personal touch to your garden space.
Newspaper and Magazine Base
Gather recycled newspapers or magazines as your primary material since they’re readily available and provide excellent flexibility for shaping. We recommend tearing the paper into strips about 1-2 inches wide rather than cutting them, as torn edges blend better during the layering process.
Soak the paper strips in warm water for 10-15 minutes to make them more pliable and easier to work with. Magazine pages add vibrant colors and interesting textures to your finished pot, making them ideal for decorative accents on the outer layers.
Create your mold using a plastic container or bowl wrapped in plastic food wrap to prevent the paper mache from sticking. This technique allows you to easily remove your finished pot once it’s completely dry.
Layer the soaked paper strips over your mold, alternating directions with each layer to build strength and structure. We typically apply 3-4 layers for lightweight pots or 5-6 layers for more durable containers that’ll hold larger plants.
Waterproofing Techniques
Apply a waterproof sealant to both the interior and exterior surfaces of your dried paper mache pot since the material is naturally absorbent. Acrylic-based sealers work best for protecting against moisture while maintaining the pot’s breathability.
Use multiple thin coats rather than one thick application to ensure even coverage and prevent drips or bubbles. We recommend allowing each coat to dry completely (typically 2-4 hours) before applying the next layer.
Consider using a glue-based paste instead of flour and water during construction to improve the pot’s inherent water resistance. This simple substitution can significantly extend your planter’s lifespan when exposed to regular watering.
Brush varnish or polyurethane finish as a final protective layer, especially for outdoor planters that’ll face weather exposure. These finishes create a barrier against moisture while improving the overall durability of your handmade containers.
Painting and Finishing Options
Choose acrylic paints for their excellent adhesion to paper mache surfaces and quick drying times. We prefer water-based create paints since they’re easy to clean up and offer vibrant color options that won’t fade quickly.
Start with a base coat in your desired primary color, using smooth brush strokes in one direction for an even finish. Light colors work well as base coats since they make any decorative patterns or designs more visible.
Add creative patterns like dots, stripes, or geometric designs using contrasting colors and small brushes or sponges. Fringed edges or textured surfaces can be created by cutting small slits around the rim before the final drying phase.
Finish with a clear protective topcoat to seal your paint job and protect it from fading or chipping. This final step is especially important for outdoor planters that’ll be exposed to sunlight and weather conditions.
Embellish your pots with natural materials like twine, shells, or dried flowers attached with strong create glue for added visual interest. These decorative elements can complement your plants while reflecting your personal style preferences.


Design Wooden Planters for Indoor and Outdoor Use

Wooden planters offer versatility that adapts perfectly to any space in your home or garden. Cedar and pine materials provide natural durability while maintaining an attractive appearance that complements various decorating styles.
Pallet Wood Projects
Pallet wood transforms into stunning planters through sustainable repurposing that saves money and reduces waste. We recommend selecting pallets with different wood types to create rustic charm and visual interest in your planter designs.
Cutting pallet boards to your desired dimensions allows complete customization of planter size and shape. Assembly becomes straightforward when you use exterior wood screws and wood glue to secure joints permanently.
Weather protection extends the life of pallet wood planters significantly through proper finishing techniques. Applying stain or sealer creates a protective barrier that withstands outdoor elements while improving the natural wood grain.
Outdoor placement works best for pallet wood planters due to their sturdy construction and rustic appearance. These planters handle heavy soil loads and frequent watering without compromising structural integrity.
Cedar and Pine Constructions
Cedar stands out as our top choice for planter construction because it naturally resists rot and insect damage. This aromatic wood requires minimal treatment while maintaining its pleasant scent and attractive appearance for years.
Pine offers excellent structural support for planter legs and caps when you choose pressure treated lumber. Cutting pine and cedar to precise dimensions using quality saws ensures professional looking results in your finished planters.
Staining or sealing pine enhances its durability significantly while allowing you to match existing outdoor furniture or home decor. These finishing products penetrate the wood fibers to provide long lasting protection against moisture and UV damage.
Building techniques for cedar and pine involve creating a planter box frame first, then installing side panels with decorative elements like “X” shaped trims. Adding planter bottoms with proper spacing accommodates plastic nursery pots for easy plant maintenance and seasonal changes.
Hanging Wooden Planters
Hanging planters maximize vertical gardening space in small areas while adding visual interest at eye level. We create these planters from lightweight cedar to ensure secure mounting without overloading attachment points.
Smaller dimensions work best for hanging designs since they reduce weight while maintaining adequate soil capacity for most plants. These compact planters typically measure 12 to 18 inches in length and 6 to 8 inches in depth.
Secure mounting requires proper hardware installation into wall studs or ceiling joists that can support the combined weight of planter, soil, and water. Including hooks or rope attachments in your design provides flexibility for different hanging locations.
Drainage considerations become critical in hanging planters to prevent water damage to floors or outdoor surfaces below. Incorporating small drainage holes and catch trays protects your space while maintaining healthy plant growing conditions.
Paint or stain finishes allow hanging planters to coordinate with indoor or outdoor aesthetics seamlessly. These finishing touches also provide weather protection for planters exposed to rain, snow, and temperature fluctuations.


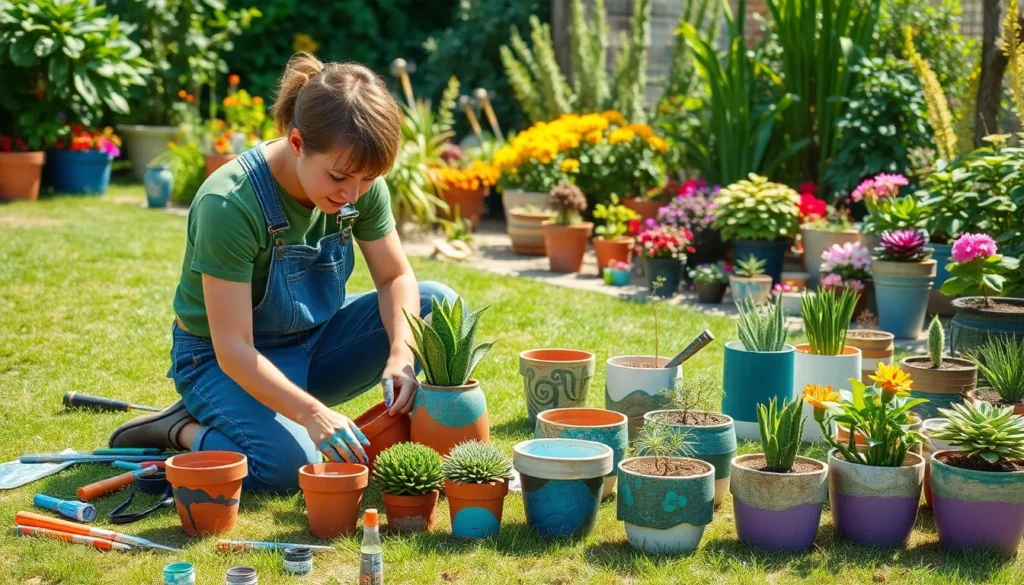
Customize Your DIY Pots with Creative Decorating Ideas

Now that you’ve built your basic planters, it’s time to transform them into stunning decorative pieces that reflect your personal style.
Paint and Stain Techniques
Painting your DIY pots adds vibrant color and personality to any garden space. Acrylic paint works exceptionally well on terracotta and cement surfaces, allowing you to create solid colors or intricate patterns that catch the eye. We recommend using staining techniques on wooden pots to enhance their natural grain while providing essential surface protection.
Apply primer first on porous materials like cement to ensure better paint adhesion and longer-lasting results. Create geometric patterns using painter’s tape, or try sponge painting for a textured, organic appearance. Finish with a clear sealant to protect against moisture damage and UV fading, especially for outdoor planters.
Rope and Twine Wrapping
Wrapping pots with rope, twine, or jute creates an instantly rustic and textured appearance that complements both indoor and outdoor settings. Start at the bottom of your pot and work upward, using strong create adhesive to secure each layer as you go. Cover the entire surface for a complete transformation, or wrap just the rim for subtle accentuation.
Choose natural fibers like hemp or cotton for breathable coverage that won’t trap moisture against your pot’s surface. This inexpensive technique works perfectly for upcycling plain nursery pots or adding warmth to stark concrete planters. Secure the final wrap with a dab of clear-drying glue and tuck the end underneath for a clean finish.
Mosaic and Tile Designs
Creating mosaic patterns transforms ordinary pots into artistic masterpieces using small pieces of tiles, glass, or broken ceramics. Plan your design first by sketching it on paper, then arrange your pieces before adhering them to the pot surface. Use tile adhesive for permanent installation and work in small sections to prevent the adhesive from drying out.
Mix different materials like mirror tiles with ceramic pieces for light-reflecting accents that sparkle in sunlight. Apply grout between pieces once the adhesive has set completely, wiping excess grout immediately with a damp sponge. This technique creates durable, weather-resistant decorations perfect for outdoor use.
Natural Material Embellishments
Incorporating natural elements like shells, pine cones, dried flowers, or bark pieces adds organic texture and connects your planters to their natural environment. Collect materials during nature walks or purchase them from create stores to ensure they’re clean and pest-free. Attach these embellishments using weather-resistant outdoor adhesive for permanent installation.
Press materials into wet cement during the setting phase for the most secure attachment on concrete pots. Create seasonal themes by using autumn leaves, winter pinecones, or summer shells to match your garden’s changing character. Layer different textures together for depth, such as combining smooth river rocks with rough bark pieces for visual contrast.

Ensure Proper Drainage in Your Homemade Plant Pots

Proper drainage prevents root rot and allows plant roots to breathe by letting excess water escape from your DIY containers. Without adequate drainage, water accumulates at the bottom and suffocates roots, eventually harming your plants.
Drilling Drainage Holes
Drilling drainage holes offers the most effective method for ensuring water exits your homemade pots. Power drills equipped with ceramic drill bits work best for materials like terracotta and ceramic containers. We recommend drilling from the bottom of your pot to achieve optimal results and prevent cracking.
Creating holes manually becomes necessary when power tools aren’t available. Chiseling or using hand tools requires extra care to avoid damaging your container. Start with small pilot holes and gradually expand them to your desired size.
Positioning multiple holes throughout the bottom ensures even water distribution. Space drainage holes approximately 2 inches apart for containers larger than 8 inches in diameter. Smaller pots typically need just one central hole to function properly.
Adding Drainage Layers
Building internal drainage layers provides an alternative when drilling holes isn’t feasible. Place materials like small stones, gravel, or broken pottery shards at the bottom of your container before adding soil. This layer prevents soil from blocking water flow and creates space for excess moisture to collect.
Selecting the right drainage materials affects your pot’s performance. We suggest using materials between ¼ inch and ½ inch in size for optimal water movement. Avoid sand or fine materials that can create muddy conditions instead of improving drainage.
Using container exact potting mix improves drainage and aeration significantly. These formulated soils contain ingredients like perlite and vermiculite that enhance water movement. Garden soil becomes too dense for containers and often leads to waterlogged conditions.
Selecting Appropriate Pot Sizes
Choosing pot sizes that match your plant’s root system prevents watering issues. Oversized containers retain excess moisture and create conditions for root rot to develop. We recommend selecting pots that provide 1 to 2 inches of space around your plant’s current root ball.
Managing moisture levels becomes more challenging with larger containers. These pots require enhanced drainage systems including multiple holes and thicker drainage layers. Consider the plant’s mature size when selecting your final container dimensions.
Placing saucers beneath your drainage equipped pots protects surfaces and catches overflow. This setup allows you to monitor water output and prevents damage to furniture or floors. Empty saucers regularly to prevent water from being reabsorbed through the drainage holes.


Maintain and Care for Your DIY Plant Containers

Proper maintenance extends the life of our handcrafted planters while keeping our plants healthy and thriving. Regular care prevents common issues that can damage both containers and plant roots.
Cleaning and Sanitizing
Remove old soil and debris from containers after each growing season to prevent disease buildup. We recommend washing pots thoroughly with warm water and mild dish soap to eliminate harmful bacteria. Scrub away stubborn residue using a soft brush or sponge without damaging the container surface.
Disinfect plastic and non-porous containers using a 10% bleach solution to kill fungi and bacteria that threaten plant health. Mix one part bleach with nine parts water for effective sanitization. Soak containers for 10 minutes then rinse completely with clean water.
Allow pots to dry completely before storing or replanting to prevent mold growth and root rot. Place containers in a well-ventilated area away from direct sunlight during the drying process. Complete drying typically takes 24 to 48 hours depending on humidity levels.
Seasonal Storage Tips
Clean containers thoroughly before winter storage by removing all soil particles and organic matter that harbor pathogens. We’ve found this prevents pest infestations and disease problems when containers return to service. Inspect each pot for damage while cleaning to address issues before storage.
Store pots in dry, sheltered locations away from extreme temperature fluctuations that cause cracking and warping. Garages, sheds, or covered porches provide ideal protection for materials like plastic, wood, and concrete. Stack lightweight containers carefully to save space without crushing delicate surfaces.
Apply weather-resistant sealant to wooden planters and stands before storage to prevent moisture damage and decay. Choose marine-grade polyurethane or exterior wood stain for maximum protection. Two thin coats provide better coverage than one thick application.
Repair and Touch-Up Methods
Inspect containers regularly for cracks, chips, and loose hardware that compromise structural integrity. We recommend monthly checks during growing season and thorough inspections before seasonal storage. Early detection prevents minor issues from becoming major repairs.
Tighten loose screws and hardware on wooden planters using appropriate screwdrivers or drill bits. Replace damaged fasteners with galvanized or stainless steel alternatives that resist rust and corrosion. Add wood glue to loose joints for extra stability.
Patch plastic containers using waterproof adhesive or outdoor-rated repair tape designed for flexible materials. Clean the damaged area thoroughly before applying patches for maximum adhesion. Cover repairs with decorative elements like rope or paint to maintain visual appeal.
Fill concrete cracks using concrete repair mix or hydraulic cement for lasting fixes. Clean debris from cracks using a wire brush then dampen the area before applying repair compound. Smooth repairs with a putty knife and allow 24 hours curing time before use.
Conclusion
Creating your own plant pots transforms gardening from an expensive hobby into an accessible creative outlet. We’ve shown you how everyday materials can become stunning planters that rival store-bought options while saving money and reducing waste.
The beauty of DIY plant containers lies in their endless customization possibilities. Whether you’re drawn to rustic wooden designs concrete masterpieces or colorful upcycled creations your homemade pots will reflect your unique style and personality.
With proper drainage techniques and regular maintenance your handcrafted planters will provide healthy homes for your plants for years to come. Start with simple projects using materials you already have at home and watch your confidence grow alongside your plants.
Your garden deserves containers as unique as the plants they hold. Roll up your sleeves grab those basic tools and begin creating planters that’ll make your neighbors wonder where you found such amazing pots.
Frequently Asked Questions
What materials work best for DIY plant pots?
The best materials for DIY plant pots include recycled plastic containers for lightweight options, terracotta and clay for breathability, reclaimed wood for rustic designs, and concrete for durability. Each material offers unique benefits – plastic is waterproof and easy to work with, clay provides excellent drainage, wood adds natural charm, and concrete creates long-lasting containers.
How do I create proper drainage in homemade plant pots?
Use a power drill to create drainage holes in the bottom of your containers, spacing them evenly across the surface. For hard materials like ceramic, start with a small bit and gradually increase size. Add an internal drainage layer using small stones or gravel before adding soil to prevent root rot and ensure healthy plant growth.
What household items can I upcycle into planters?
Common household items perfect for upcycling include tin cans, plastic bottles, old boots, wooden crates, and ceramic containers. These items can be transformed into unique planters with simple modifications like adding drainage holes and decorative touches. Always ensure the container is clean and food-safe materials are properly prepared before planting.
How can I decorate my DIY plant pots?
Popular decorating techniques include painting with weather-resistant paints, wrapping with rope or twine for texture, creating mosaic designs with tiles or broken ceramics, and adding natural embellishments like shells or stones. Choose decorating methods that complement your plant choices and outdoor environment while ensuring materials can withstand weather conditions.
How do I maintain and care for DIY plant containers?
Regular maintenance includes cleaning pots with mild soap and water, disinfecting with a diluted bleach solution for non-porous materials, and inspecting for cracks or damage. Store containers indoors during harsh winter weather, perform seasonal touch-ups on paint or finishes, and repair small cracks promptly to extend the lifespan of your handmade planters.
What tools do I need for DIY pot making?
Essential tools include a power drill with various bit sizes, sandpaper, measuring tape, safety equipment like goggles and gloves, and basic crafting supplies. Specific projects may require additional tools like saws for wood projects, mixing containers for concrete work, or paintbrushes for decorating. Start with basic tools and add specialized equipment as needed.
How do I choose the right pot size for my plants?
Select container sizes based on your plant’s root system and mature size. Small herbs need 6-8 inch pots, medium plants require 10-12 inches, and large plants need 14+ inch containers. Ensure pots are deep enough for root development and wide enough to accommodate growth. Consider the plant’s drainage needs when selecting materials and designing your containers.