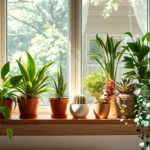
We’ve all admired those stunning hanging gardens that transform ordinary spaces into lush green sanctuaries. But let’s be honest – store-bought plant hangers can be expensive and often lack that personal touch we’re craving for our homes. That’s where DIY magic comes in.
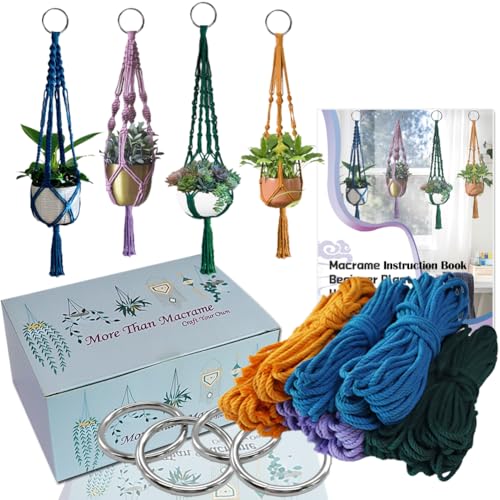
Creating your own hanging plant pot hangers isn’t just about saving money. It’s about crafting something uniquely yours while giving your beloved plants the perfect elevated display they deserve. Whether you’re working with macramé cord rope or repurposing household materials we’ll show you how to create stunning hangers that’ll make your neighbors green with envy.
Ready to turn your living space into an Instagram-worthy plant paradise? We’re diving into simple yet gorgeous DIY hanging plant projects that anyone can master – no advanced crafting skills required. Your plants are about to get the stylish upgrade they’ve been waiting for.
Choose the Right Materials for Your DIY Pot Hanger
Selecting quality materials determines the success and longevity of your hanging plant pot hanger project. We’ll explore the essential components that transform basic supplies into stunning, functional plant displays.
Natural Rope and Cord Options
Macramé cord stands as our top recommendation for hanging plant pot hangers due to its strength and aesthetic appeal. Cotton rope provides excellent grip and won’t slip when knotted, making it perfect for securing heavy ceramic or terracotta pots. Jute twine offers a rustic appearance that complements bohemian and farmhouse décor styles beautifully.
Hemp rope delivers exceptional durability and can support pots weighing up to 15 pounds when properly knotted. Paracord serves as an excellent weatherproof option for outdoor hanging plant displays, resisting UV damage and moisture. Sisal rope creates interesting texture variations and works particularly well for modern minimalist designs.
Consider the thickness carefully when selecting your cord material. We recommend 4mm to 6mm diameter for most standard pot sizes, while larger planters require 8mm or thicker rope for adequate support.
Metal Hardware and Fasteners
Ceiling hooks rated for at least 25 pounds ensure your hanging plant pot hanger stays securely mounted. Swivel clips allow your plants to rotate naturally toward light sources while preventing cord tangling. S hooks provide versatile connection points between your rope work and mounting hardware.
Eye screws work exceptionally well for wooden ceiling beams and offer a clean, permanent mounting solution. Toggle bolts distribute weight effectively across drywall and can support multiple hanging plant arrangements safely. Carabiners enable quick removal of plants for watering or repositioning without dismantling the entire hanger.
Stainless steel hardware resists rust and corrosion, making it ideal for humid environments like bathrooms or covered outdoor spaces. Brass fittings add an elegant touch to sophisticated hanging plant displays while maintaining excellent durability.
Decorative Beads and Accessories
Wooden beads introduce natural warmth and can be painted or stained to match your existing décor perfectly. Glass beads catch and reflect light beautifully, creating stunning visual effects as sunlight filters through your hanging plant display. Metal ring accents provide modern industrial touches that complement contemporary home styles.
Ceramic beads offer unlimited color possibilities and can incorporate patterns or glazes that coordinate with your planters. Leather cord wraps add sophisticated texture and work particularly well with succulent arrangements. Tassels create movement and visual interest at the bottom of your hanging plant pot hanger design.
Shell or stone beads bring coastal or earthy elements into your plant displays naturally. We suggest limiting decorative elements to avoid overwhelming the plants themselves, which should remain the focal point of your hanging arrangement.

Measure and Plan Your Hanging Plant Setup

Planning transforms our DIY hanging plant project from guesswork into a professional-looking installation. We’ll ensure our plants hang beautifully while maintaining proper spacing and structural integrity.
Determine Ceiling Height and Space Requirements
Measuring from our ceiling to the desired pot position gives us the foundation for our hanger design. We need to account for the plant’s current size plus its future growth potential, ensuring adequate clearance around neighboring furniture and walkways.
Standard room ceilings typically measure 8 to 10 feet high, providing ample space for most hanging arrangements. We should position larger plants like Boston ferns or spider plants at least 18 inches from walls and 24 inches from high-traffic areas to prevent bumping.
Consider the plant’s mature spread when determining horizontal spacing. Trailing varieties such as pothos or string of pearls require additional room to cascade gracefully without tangling with nearby objects.
Calculate Rope Length for Different Plant Sizes
Rope calculations depend on three key factors: pot diameter, desired hanging height, and decorative length below the pot. We recommend starting with these measurements for different pot sizes:
| Pot Diameter | Total Rope Length Per Strand | Number of Strands |
|---|---|---|
| 4-5 inches | 28-32 inches | 8 strands |
| 6-7 inches | 34-38 inches | 8 strands |
| 8-10 inches | 40-46 inches | 8 strands |
| 12+ inches | 48-54 inches | 12 strands |
Adding 6 to 8 inches to our calculated length accommodates the knots we’ll tie throughout the hanger construction. We always cut our rope pieces slightly longer than needed, as trimming excess material is easier than splicing short pieces together.
Medium-sized pots around 7 inches in diameter work well with 38-inch rope strands, providing enough length for secure knotting and attractive proportions.
Mark Mounting Points for Optimal Display
Ceiling marks should align with our room’s focal points while avoiding structural obstacles like light fixtures or ceiling fans. We use a stud finder to locate ceiling joists, which provide the strongest mounting support for heavier plant combinations.
Drawing a simple floor plan helps us visualize the final arrangement before drilling any holes. We mark potential mounting points with removable tape, then step back to assess the overall balance and spacing.
Weight distribution becomes crucial when planning multiple hangers in the same area. We space mounting points at least 24 inches apart for medium-sized pots and 36 inches for larger installations to prevent overcrowding.
Installing ceiling hooks rated for at least twice our pot’s total weight (including soil and water) ensures long-term safety and stability.


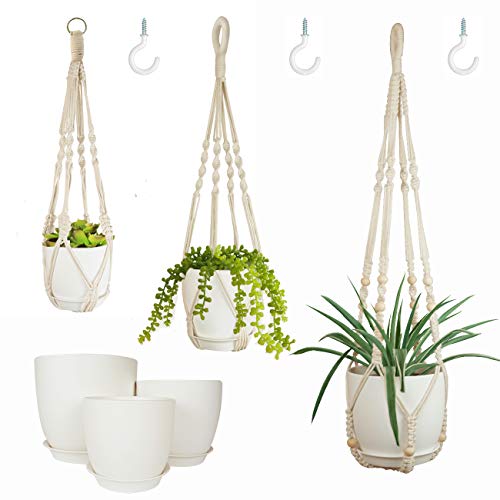
Create a Basic Macrame Plant Hanger

Now that we’ve planned our hanging setup, we’ll create a beautiful macrame plant hanger using the materials we’ve selected. Start by gathering eight cords, each cut to four times your desired hanger length, then fold them in half and thread through your ring to create the foundation.
Master Essential Macrame Knots
Begin with a gathering knot to secure all cords at your ring, creating a strong anchor point for your hanger. Practice the square knot first since it’s fundamental for creating decorative patterns and consists of crossing and tying cords alternately. Half knots create spiral patterns when tied repeatedly on the same side, causing your work to twist naturally as you progress down the hanger.
| Knot Type | Purpose | Difficulty |
|---|---|---|
| Gathering Knot | Secures cords at base or end | Beginner |
| Square Knots | Creates strong decorative patterns | Beginner |
| Half Knots | Forms spiral twisted patterns | Beginner |
| Wrapping Knot | Neatly finishes cord sections | Intermediate |
Square knots can be arranged in diamond patterns by connecting cord sections with alternating knots spaced about 3.5 inches apart. Wrapping knots help you finish sections cleanly by securing cord bundles in place.
Form the Cradle Base for Your Pot
Group your cords into sets and tie square knots around the midpoint to form pockets that will cradle your pot. Connect these groups with additional square knots spaced evenly to create a net pattern that holds the pot securely. Space your knots carefully to ensure the cradle fits snugly around your chosen pot size.
Finish the base structure with another gathering knot positioned about one inch below your last set of knots. This final knot stabilizes the entire cradle and prevents your pot from slipping through the bottom.
Add Decorative Patterns and Finishing Touches
Enhance your macrame hanger with spiral knots for added texture along the hanging strands. Thread decorative beads onto cords before tying knots to create visual interest that complements your plant display. Leave cord ends loose to form natural fringe or trim them evenly for a cleaner appearance.
Wrapping knots provide professional finishing touches by neatly securing loose ends at the bottom of your hanger. Test your completed hanger by placing the pot inside and adjusting any loose knots before final installation.


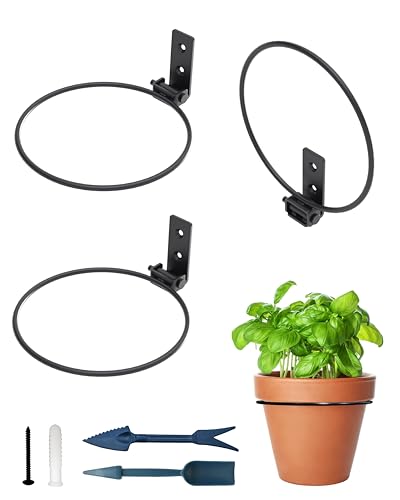
Build a Minimalist Rope and Ring Hanger

We’ll create an elegant rope and ring hanger that showcases our plants while maintaining a clean, modern aesthetic. This design uses fewer materials than traditional macramé styles while delivering stunning results.
Select Appropriate Ring Size and Material
Choose the right ring dimensions for your exact project. Wooden or metal rings measuring 2 to 4 inches in diameter work best for most hanging plant applications. Metal rings offer superior durability for heavier pots, while wooden rings provide natural warmth that complements organic plant displays.
Consider the weight capacity of your chosen material. We recommend testing rings with at least twice the weight of your filled pot before installation. Bamboo rings suit lightweight succulent arrangements, whereas steel rings handle larger ceramic planters weighing up to 15 pounds.
Match ring color to your existing décor palette. Natural wood tones blend seamlessly with bohemian or rustic interiors, while black metal rings complement modern minimalist spaces. Copper rings develop beautiful patina over time and pair exceptionally well with trailing plants like pothos or philodendrons.
Thread and Secure the Rope Through Rings
Cut 4 to 8 equal length cords measuring approximately 8 feet each for larger pots. We fold each rope in half to create a natural anchor point for threading through the ring. This technique doubles our working strands while maintaining symmetrical spacing around the ring.
Create lark’s head knots to secure each folded rope to the ring. We thread the folded end through the ring, then pull the loose ends through the loop to form a secure attachment. This knot distributes weight evenly and prevents slipping during use.
Distribute ropes evenly around the ring perimeter for balanced support. We space cords at equal intervals to ensure our pot hangs level and stable. Four cords work well for small to medium pots, while eight cords provide extra security for heavier planters.
Tie strategic knots at measured intervals to form a basket structure. We group adjacent cords and tie square knots approximately 6 inches below the ring, then again 4 inches lower to create the pot cradle. This alternating pattern weaves cords together for a secure, attractive basket design.
Adjust Length for Perfect Plant Positioning
Measure total hanging length before making final cuts. We calculate the distance from ceiling to desired pot height, then subtract our ring and knot sections to determine final rope length. Standard installations work well with 36 to 48 inch total lengths for most room configurations.
Test fit your pot in the completed basket before trimming excess rope. We place the pot in our knotted cradle and adjust spacing as needed for a snug, secure fit. The pot should sit firmly without tilting or sliding through the rope structure.
Create gathering knots at the bottom to prevent rope ends from fraying. We bundle all loose ends together and tie a final knot approximately 2 inches below the pot cradle. This finishing touch prevents slipping while adding visual weight to balance the overall design.
Trim rope ends to desired length for your preferred aesthetic. We typically leave 4 to 6 inches of rope below the gathering knot for a clean finish. Fraying the ends slightly creates texture, while cutting them blunt maintains the minimalist appearance.

Craft a Multi-Tiered Hanging Garden System

Now that we’ve mastered single hangers, let’s expand our skills to create stunning vertical displays that maximize our growing space. Multi-tiered systems transform any corner into a lush cascading garden paradise.
Design Cascading Levels for Multiple Plants
Cascading designs enable us to grow several plants in compact spaces by stacking planters vertically or hanging multiple pots at different heights. We can create this layered visual effect using tiered containers or suspending individual hangers in a descending arrangement. Products like the GreenStalk Vertical Garden Planter feature free-standing tiers, but we’ll adapt similar concepts to hanging systems for patios, balconies, or small indoor gardens.
Spacing becomes crucial when designing our vertical garden layout. We should position each tier 12-18 inches apart to allow adequate light penetration and growth room for trailing plants like pothos or philodendrons. These cascading varieties naturally accentuate our tiered design while creating beautiful flowing lines throughout the display.
Balance Weight Distribution Across Tiers
Weight balance ensures stability and prevents dangerous swinging or strain on our main support structure. We must distribute heavier pots on lower tiers and lighter ones at the top since this approach lowers the center of gravity significantly. Strong, durable materials like sturdy ropes, chains, or wire hangers bear the combined weight effectively when we ensure secure knots and proper attachments.
Our ceiling hooks should support at least twice the total weight of all pots combined for maximum safety. We can calculate this by weighing each planted pot when fully watered, then doubling that figure to account for plant growth and water absorption over time.
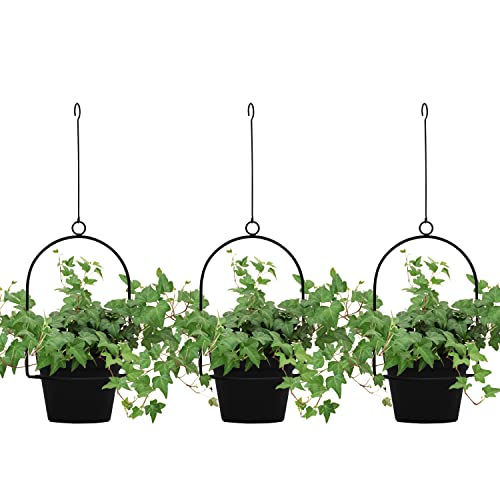
Connect Individual Hangers for Unified Display
Individual pot hangers connect vertically or horizontally using chains, hooks, or metal rings to achieve a cohesive unified look. This connection method allows flexibility in spacing and arrangement while maintaining visual consistency throughout our garden display. We can repurpose a wooden ladder structure to hold multiple hanging pots on each rung, linking them with hooks or S-shaped hangers for an attractive vertical garden.
Wiring or framing joins individual pots on a single support line, creating our desired tiered cascading effect. We should use weather-resistant materials like BPA-free plastics or treated wood for outdoor installations, ensuring our system withstands various environmental conditions while maintaining its beautiful appearance.


Install Secure Mounting Hardware

Proper mounting hardware forms the foundation of any safe hanging plant installation. We’ll guide you through selecting and installing hardware that keeps your plants secure while protecting your home.
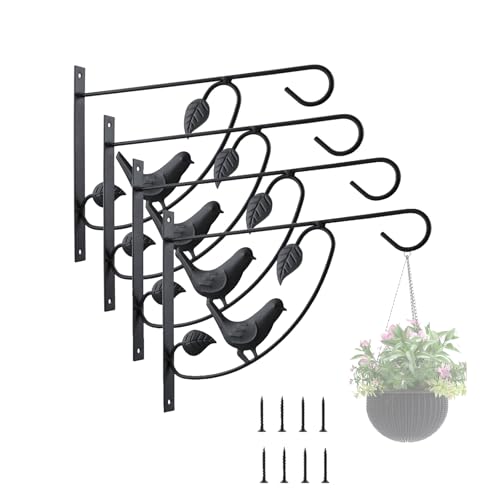
Choose Between Ceiling Hooks and Wall Brackets
Ceiling hooks offer the most natural hanging solution for plants that need to dangle freely from above. We recommend these when you want your plants to sway gently and receive light from multiple angles. Stainless steel or thick metal ceiling hooks provide maximum durability and can support heavier plant arrangements without compromising safety.
Wall brackets work better when ceiling space is limited or when you prefer a different aesthetic approach. These mounting options excel in rooms with low ceilings or areas where you want plants positioned closer to walls. Metal wall brackets with reinforced backing plates distribute weight more effectively across wall surfaces.
Consider your available space and desired plant placement when making this choice. Ceiling installations typically handle more weight and create dramatic visual impact, while wall mounts offer easier access for plant care and watering.
Locate Ceiling Joists for Maximum Support
Finding ceiling joists ensures your hanging plants stay securely mounted without damaging your ceiling. We use a stud finder to accurately locate these wooden beams that run behind drywall and provide structural support. Electronic stud finders detect density changes and mark joist locations with audio or visual signals.
Measure 16 or 24 inches from your first joist location to find additional mounting points, as most homes use standard joist spacing. Mark each joist with a pencil before drilling to ensure accurate placement of your mounting hardware.
Secure your ceiling hook or bracket directly into a joist rather than just drywall to prevent the hanger from pulling out under weight. Drilling into solid wood provides the strongest possible anchor point for your hanging garden system.
Test Weight Capacity Before Hanging Plants
Testing your mounting hardware prevents accidents and ensures long term reliability of your hanging plant setup. We pull gently on each hook or bracket after installation to check stability and resistance. Apply gradual pressure while watching for any movement or loosening of the hardware.
Calculate the total weight including your plant, pot, soil, and water to determine actual load requirements. Most hanging plants with medium sized pots weigh between 5 to 15 pounds when fully watered, so we recommend hardware rated for at least twice this weight.
Overestimate weight capacity rather than underestimate to maintain safety margins in your installation. Hardware that can support 30 pounds easily handles a 10 pound plant while providing buffer for plant growth and seasonal watering variations.

Select the Best Plants for Hanging Displays

Now that we’ve constructed our DIY hangers, we need to choose plants that’ll create stunning displays while working harmoniously with our handcrafted designs.
Trailing and Cascading Plant Varieties
Bacopa stands out as our top choice for creating dramatic hanging displays with its tough, flower-covered stems that grow over 45cm in length. This resilient plant produces beautiful white, blue, and lavender blooms while adding volume and elegance to any hanging arrangement. Lobelia offers delicate beauty with its airy foliage and graceful flowers ranging from white to violet-blue, creating perfect cascading effects that spill naturally over pot edges. Calibrachoa, known as “miniature petunias,” delivers prolific blooms in many colors while requiring minimal maintenance and performing exceptionally well in both sunny and shaded locations.
Trailing begonias provide excellent texture variation with their lush foliage and continuous blooms that create dense, flowing displays. Pelargoniums add sophisticated charm to hanging arrangements with their distinctive leaf patterns and vibrant flower clusters that trail beautifully downward. Verbena creates bold, fast-growing displays perfect for sunny locations where we want maximum visual impact from our DIY hangers.
Consider Light Requirements and Growth Patterns
Petunias, Calibrachoa, and Verbena thrive in full sun conditions where they’ll produce their most abundant blooms and maintain compact, healthy growth patterns. Impatiens and begonias excel in shady spots where other flowering plants might struggle, making them perfect for covered porches or areas with limited direct sunlight. Understanding each plant’s growth habit helps us optimize our displays by choosing compact varieties for smaller hangers and spreading types for larger installations.
Growth patterns directly impact our hanging arrangements since some plants naturally form neat mounds while others create long, trailing stems that cascade dramatically. Compact growers like certain Calibrachoa varieties work well when we want controlled, tidy displays that won’t overwhelm our space. Long trailing varieties such as Bacopa are ideal when we’re aiming for waterfall-like effects that draw the eye downward and create vertical interest.
Match Plant Weight to Hanger Strength
Plant weight significantly impacts our DIY hanger performance since the combined weight of pot, soil, and plants increases dramatically once we add water to the equation. Lightweight trailing plants like Lobelia pair perfectly with delicate macramé hangers or rope designs that prioritize aesthetics over heavy-duty support. Heavier plants such as large Petunias or dense begonias require our most robust hanger designs with reinforced knots and sturdy mounting hardware.
Water retention varies greatly among plant varieties and directly affects the total weight our hangers must support throughout the growing season. Bacopa and Calibrachoa have moderate water needs that won’t dramatically increase weight between waterings, making them excellent choices for medium-strength rope hangers. Plants with high water requirements need our strongest DIY designs with proper weight distribution to prevent accidents and maintain long-term stability.
Seasonal growth patterns also influence weight considerations as plants mature and develop fuller, heavier foliage throughout the growing period. Starting with lighter, younger plants allows us to test our hanger strength while giving plants time to establish before reaching their full mature weight.

Maintain Your DIY Hanging Plant System

Ongoing maintenance ensures our DIY hanging plant systems remain safe and functional for years. We’ll protect our investment and keep our plants healthy with these essential care practices.
Regular Inspection of Rope and Hardware
Check all rope connections monthly for signs of wear or fraying. Natural fibers like jute and cotton are particularly susceptible to degradation from moisture and UV exposure. We should examine where ropes connect to metal hardware since these junction points experience the most stress.
Inspect ceiling hooks and mounting hardware for corrosion or loosening. Metal components can rust over time especially in humid environments or outdoor installations. We’ll look for any movement in the mounting points when gently testing the system.
Test the stability of each hanger by applying gentle pressure. This reveals potential weak spots before they become safety hazards. We should pay special attention to hangers supporting heavier plants or those exposed to weather conditions.
Rotate Plants for Even Growth
Turn each hanging plant a quarter rotation every two weeks. This prevents plants from leaning toward their light source and developing uneven growth patterns. We’ll achieve fuller more balanced plant development with consistent rotation.
Monitor trailing plants for directional growth toward windows or light sources. Cascading varieties like Bacopa and trailing begonias naturally reach for optimal light conditions. We can guide their growth by adjusting their position relative to light sources.
Adjust hanger height seasonally to accommodate changing light patterns. Window angles shift throughout the year affecting how light reaches our plants. We’ll move hangers closer to or farther from windows as needed for optimal exposure.
Replace Worn Components as Needed
Replace rope sections immediately when fraying becomes visible. Damaged rope compromises the entire hanging system’s integrity and poses safety risks. We should keep extra rope on hand for quick repairs without waiting for complete system failure.
Upgrade ceiling hooks if weight capacity becomes insufficient. Plants grow heavier as they mature and require water retention increases with larger root systems. We’ll install hooks rated for at least twice our current plant weight to accommodate future growth.
Refresh decorative elements like beads and rings annually. These components enhance our hanging displays but can become weathered or damaged over time. We can update colors and styles to match seasonal decor changes while maintaining system functionality.
Conclusion
Creating your own hanging plant pot hangers transforms any space into a thriving green oasis while saving money and expressing your personal style. We’ve equipped you with everything needed to design secure multi-tiered systems that showcase your favorite trailing plants beautifully.
The key to success lies in choosing quality materials that match your plant’s weight and growth patterns. Remember that proper installation and regular maintenance aren’t just safety measures—they’re investments in your hanging garden’s longevity.
Start with simple designs and gradually experiment with more complex arrangements as your confidence grows. Your DIY hanging planters will become stunning focal points that bring nature indoors while reflecting your unique creative vision.
Frequently Asked Questions
What materials do I need to make a DIY hanging plant pot hanger?
You’ll need rope or cord (macramé, cotton, jute, or hemp), metal hardware like ceiling hooks and S hooks, and optional decorative beads. Choose materials based on your pot weight and style preferences. Natural ropes work well for most indoor plants, while paracord offers durability for heavier pots.
How do I calculate the right rope length for my hanging planter?
Measure your ceiling height and subtract your desired hanging height, then add 12-18 inches for knots and adjustments. Account for pot depth and plant growth. For standard 8-foot ceilings, plan for 4-6 feet of rope length to achieve optimal plant positioning.
What’s the weight capacity I should consider for ceiling hooks?
Choose ceiling hooks rated for at least twice the total weight of your pot, soil, plant, and water. A typical small hanging plant weighs 3-5 pounds, so use hooks rated for 10+ pounds. Always locate ceiling joists for maximum support and safety.
Which plants work best in DIY hanging planters?
Trailing varieties like Bacopa, Lobelia, Calibrachoa, and trailing begonias are ideal choices. These plants complement hanging displays with their cascading growth patterns. Start with lightweight plants to test your hanger’s strength before adding heavier specimens as they mature.
How do I create a multi-tiered hanging garden system?
Space each tier 12-18 inches apart for adequate light and growth. Place heavier pots on lower tiers and lighter ones on top for stability. Connect individual hangers using chains or hooks to create a unified display while maintaining proper weight distribution.
How often should I inspect my DIY hanging plant hangers?
Inspect your hangers monthly for rope wear, hardware corrosion, and overall stability. Test each hanger’s security and rotate plants for even growth. Replace worn components immediately and upgrade ceiling hooks as plants grow heavier to maintain safety.
Can I use DIY hanging planters outdoors?
Yes, but choose weather-resistant materials like treated rope, stainless steel hardware, and UV-resistant components. Outdoor installations face additional stress from wind and weather, so ensure extra-strong mounting points and consider seasonal plant rotation for optimal results.
What’s the difference between macramé and rope-and-ring hangers?
Macramé hangers use decorative knots to create intricate patterns and support systems, while rope-and-ring hangers offer a minimalist design using rings for structure. Macramé provides more customization options, while ring hangers are simpler to construct and maintain.