
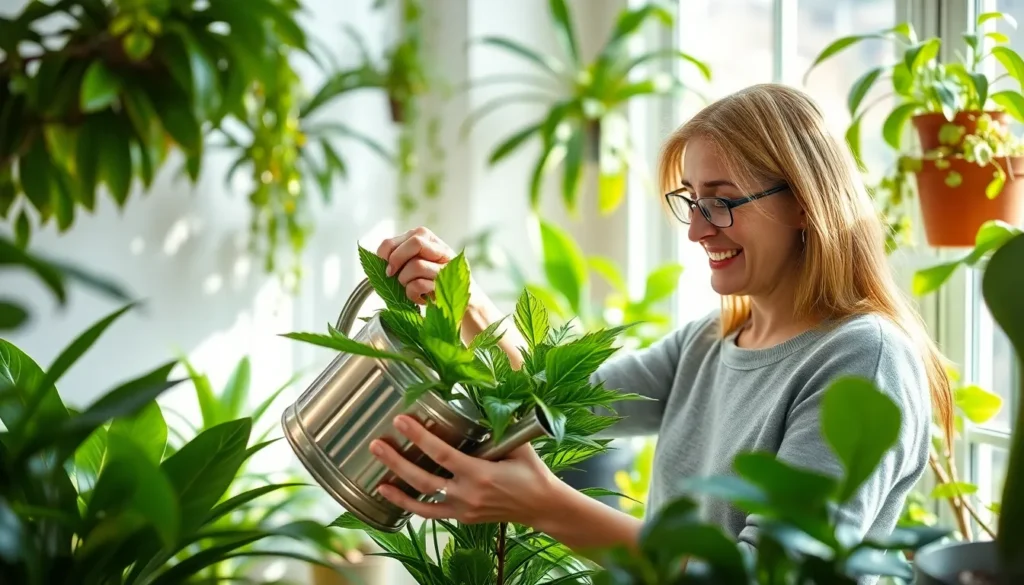
We’ve all been there – standing in front of a wilted plant wondering where we went wrong. Whether you’re a complete beginner or someone who’s accidentally turned your home into a plant graveyard, caring for plants doesn’t have to feel like rocket science.
The truth is, most plants are surprisingly forgiving once you understand their basic needs. With just a few simple techniques and the right knowledge, you can transform your space into a thriving green oasis that not only looks amazing but also purifies your air and boosts your mood.
In this comprehensive guide, we’ll walk you through everything you need to know about plant care – from choosing the right plants for your lifestyle to mastering watering schedules and troubleshooting common problems. You’ll discover practical tips that actually work and learn how to avoid the mistakes that kill most houseplants.
Understanding Your Plant’s Basic Needs
Every plant thrives when we provide the right balance of light, water, and soil conditions. These three fundamental elements work together to create an environment where your green companions can flourish.
Light Requirements for Different Plant Types
Low-light plants like pothos, snake plants, and ZZ plants adapt well to areas with minimal natural sunlight. These hardy varieties can survive in offices, bathrooms, or rooms with north-facing windows where direct sunlight rarely reaches. We recommend placing them within 6-10 feet of a window for optimal growth.
Medium-light plants such as rubber trees, fiddle leaf figs, and monstera deliciosa need bright, indirect light throughout the day. Position these plants near east or west-facing windows but avoid direct afternoon sun which can scorch their leaves. Rotating them weekly ensures even growth on all sides.
High-light plants including succulents, cacti, and most flowering varieties require 6-8 hours of direct sunlight daily. South-facing windows provide the intense light these sun-loving plants crave. During winter months, we suggest moving them closer to windows or supplementing with grow lights.
Watering Frequency and Techniques
Finger test method works best for determining when to water most houseplants. Insert your finger 1-2 inches into the soil near the base of the plant. Water thoroughly when the top inch feels dry to the touch.
Bottom watering technique prevents overwatering and encourages healthy root development. Place your plant’s pot in a tray filled with water and let it soak for 20-30 minutes. The soil absorbs moisture from the drainage holes, ensuring even distribution throughout the root system.
Seasonal adjustments are crucial for maintaining proper watering schedules. Plants need less water during winter months when growth slows and more frequent watering during spring and summer growing seasons. We typically reduce watering frequency by 30-50% in cooler months.
Soil and Potting Mix Selection
Well-draining potting mix forms the foundation of healthy plant growth. Commercial potting soils containing perlite, vermiculite, or bark chips allow excess water to flow through while retaining necessary moisture. Avoid garden soil which compacts in containers and restricts root development.
Specialized soil blends cater to exact plant families and their unique needs. Cacti and succulents require sandy, fast-draining mixes with minimal organic matter. African violets prefer acidic soil with excellent drainage, while orchids thrive in bark-based mediums that mimic their natural growing conditions.
Soil pH levels significantly impact nutrient absorption and overall plant health. Most houseplants prefer slightly acidic to neutral soil with pH levels between 6.0-7.0. We recommend testing your potting mix annually and adjusting with lime to raise pH or sulfur to lower it when necessary.


Choosing the Right Location for Your Plants

Finding the perfect spot for your plants sets the foundation for their long-term health and growth. We’ll explore the key factors that determine whether your green companions will thrive or struggle in their new home.
Indoor vs Outdoor Placement Considerations
Indoor placement requires us to focus on natural light availability and room conditions. We should position plants near windows that provide appropriate light levels—bright, indirect light works best for most houseplants near south or west-facing windows. Artificial grow lights become necessary when natural light proves insufficient for our plants’ needs.
Outdoor placement demands careful consideration of light intensity and environmental factors. Most houseplants are tropical understory species adapted to low light conditions, so we must avoid exposing them directly to intense sunlight. Full-shade or part-shade locations work ideally, and we can use cloth or shade materials when complete shade isn’t available.
Seasonal transitions require gradual acclimation to prevent plant shock. When moving indoor plants outdoors for summer, we start by placing them outside for just a few hours and increase the time each day over several days. Monitoring for pests and environmental changes like wind and increased heat becomes crucial during this process.
Winter preparation involves bringing outdoor plants indoors to locations that match their exact light requirements. We maintain consistent temperatures and avoid placing plants near heat sources or drafty windows while ensuring good air circulation prevents mold growth.
Temperature and Humidity Control
Temperature management centers around maintaining optimal ranges for plant health. Most houseplants thrive at temperatures between 60-75°F (15-24°C) during the day with slightly cooler nights. We avoid sudden temperature changes that stress plants and compromise their immune systems.
Humidity adjustments become necessary since indoor air often lacks the moisture levels plants prefer. We can use humidifiers or place plants on trays filled with water and pebbles to increase humidity around our tropical species. This method creates a microclimate that mimics their natural habitat conditions.
Seasonal humidity variations require us to adapt our approach throughout the year. Winter heating systems typically reduce indoor humidity levels significantly, making supplemental humidity even more important for maintaining healthy plant growth.
Air Circulation and Ventilation
Indoor air movement prevents stagnant conditions that promote mold growth and pest infestations. We benefit our plants by providing fresh air through periodically opened windows on mild days while maintaining protection from harsh drafts that can damage delicate foliage.
Outdoor wind exposure needs careful management to avoid plant stress and damage. We select sheltered spots where wind exposure remains moderate, as strong winds can damage foliage and cause soil to dry out too quickly for proper root function.
Ventilation balance requires us to provide adequate airflow without creating harmful drafts. Strategic placement away from air conditioning vents and heating systems helps maintain consistent growing conditions while still allowing beneficial air movement around our plants.


Establishing a Proper Watering Schedule

Creating a consistent watering routine forms the foundation of successful plant care. We recommend checking your plants at least once weekly and watering only when the top two inches of soil feel dry to the touch.
Signs of Overwatering and Underwatering
Overwatering symptoms include soggy soil that stays wet for days, yellowing leaves that wilt even though moist conditions, and roots that develop a foul smell from rot. We often notice slow growth patterns and sometimes mold appearing on the soil surface when plants receive too much water.
Underwatering indicators show up as extremely dry soil, leaves that curl inward and turn brown at the edges, and premature leaf drop. Plants will wilt from lack of moisture but typically recover quickly once we provide adequate water.
Seasonal Watering Adjustments
Summer months require more frequent watering sessions, sometimes every couple of days, as plants dry out faster in hot weather conditions. We adjust our watering schedule based on temperature changes and increased evaporation rates during warmer periods.
Winter brings slower growth cycles and reduced water needs across most houseplant varieties. Plants enter rest periods during cooler, darker months, so we water perhaps every few weeks rather than our summer schedule.
Spring and fall seasons call for moderate watering approaches as we transition between extreme weather patterns. We monitor soil moisture more closely during these periods to avoid shocking plants with sudden schedule changes.
Best Times of Day to Water Plants
Early morning hours provide the optimal window for watering most plant varieties. We water during these cooler periods to minimize evaporation loss and allow plants to absorb moisture before daily heat peaks.
Late afternoon watering works as our second choice when morning sessions aren’t possible. Plants can still benefit from cooler temperatures while avoiding the stress of midday heat exposure.
Midday watering should be avoided completely as hot conditions cause rapid water evaporation before plants can properly absorb nutrients. We never water during peak sun hours as this can actually harm plant roots and leaves through thermal shock.


Providing Adequate Light and Sun Exposure

Light serves as the primary energy source for photosynthesis, making it essential for healthy plant growth and development. Understanding your plants’ exact light requirements helps ensure they receive the optimal conditions needed to thrive in your home.
Natural Light vs Artificial Grow Lights
Natural sunlight provides the complete light spectrum plants need for robust growth and vibrant foliage. We recommend positioning your plants near south or west facing windows to maximize their exposure to this full spectrum illumination. These locations typically offer the most consistent and intense natural light throughout the day.
Artificial grow lights become invaluable when natural sunlight proves insufficient for your plants’ needs. LED grow lights effectively emulate sunlight and allow you to adjust both intensity and duration based on exact plant requirements. We suggest using these supplemental lights during winter months or in rooms lacking adequate sun exposure to maintain healthy plant growth year round.
Comparison of Light Sources:
| Light Type | Spectrum Quality | Cost | Best Use Case |
|---|---|---|---|
| Natural Sunlight | Full spectrum | Free | South/west facing windows |
| LED Grow Lights | Adjustable spectrum | Moderate | Winter or low light rooms |
| Fluorescent Lights | Limited spectrum | Low | Supplemental lighting only |
Rotating Plants for Even Growth
Plants naturally grow toward their primary light source, creating unbalanced and lopsided appearances over time. We recommend rotating your plants approximately once per week to ensure all sides receive equal light exposure. This simple practice promotes symmetrical growth patterns and prevents your plants from leaning heavily in one direction.
Consistent rotation helps maintain your plants’ overall health by encouraging uniform leaf development across the entire structure. Weekly turns of a quarter rotation work best for most houseplants, though fast growing species may benefit from more frequent adjustments.
Managing Light for Low Light Plants
Shade tolerant plants like ZZ plants, snake plants, and peace lilies require careful light management to prevent damage. We position these species near north facing windows where they receive gentle, indirect illumination throughout the day. Direct sunlight can actually harm these plants by scorching their leaves and causing permanent damage.
Artificial grow lights provide excellent supplementation when natural light remains extremely limited in your space. We set these lights on lower intensity settings specifically designed for low light species to avoid overwhelming their sensitive foliage. Maintaining consistent but gentle lighting conditions helps these plants maintain their natural beauty while avoiding the stress of excessive brightness.
Fertilizing Your Plants for Optimal Growth

Proper fertilization provides essential nutrients that naturally occurring soil often lacks. We’ll explore how to feed your plants effectively to support vigorous growth and vibrant health.
Organic vs Synthetic Fertilizer Options
Organic fertilizers contain natural materials and beneficial organisms that slowly release nutrients while improving soil health over time. These options work by relying on soil microbes to break down and release nutrients, making them excellent for building long term soil fertility. Bone meal, compost, and fish emulsion represent popular organic choices that gradually nourish plants.
Synthetic fertilizers provide precise nutrient formulations that become immediately available for plant uptake. Chemical fertilizers offer more reliability for beginners because manufacturers formulate them with balanced macro and micronutrients. We recommend these options when you need quick results or want predictable nutrient delivery.
Key differences include release timing and soil impact. Organic options improve soil structure and microbial activity but release nutrients slowly and unpredictably. Synthetic varieties deliver immediate nutrition but don’t enhance long term soil health.
Seasonal Feeding Schedules
Spring marks the optimal time to begin fertilizing because plants start their active growth phase. Most plants benefit from their first feeding when new growth appears, typically between March and April in temperate climates.
Fast growing plants require more frequent feeding throughout the growing season compared to slow growing varieties. Vegetables, annuals, and young perennials need monthly applications during peak growing months.
Slow growing plants like cacti and succulents need minimal feeding, often just once or twice per year. Dormant plants require no fertilization until they resume active growth.
Sandy soils require multiple nitrogen applications during the growing season because nutrients leach away quickly through drainage. Clay soils retain nutrients longer and need fewer applications.
Application methods vary between granular and liquid forms. Granular fertilizers should be watered in thoroughly after application, while liquid fertilizers can be applied directly to soil or sprayed on foliage for quick absorption.
Signs Your Plants Need Nutrients
Yellowing leaves often indicate nitrogen or iron deficiencies, particularly when older leaves turn yellow first. This chlorosis can sometimes be corrected quickly with foliar sprays containing the deficient nutrients.
Poor growth patterns suggest insufficient phosphorus or potassium in the soil. Plants may appear stunted, produce fewer flowers, or develop weak root systems when lacking these essential nutrients.
Leaf discoloration beyond yellowing can signal exact deficiencies. Purple or reddish leaves may indicate phosphorus deficiency, while brown leaf edges often suggest potassium shortage.
Reduced flowering or fruiting occurs when plants lack adequate phosphorus for reproductive growth. We notice this especially in tomatoes, peppers, and flowering houseplants.
Subtle symptoms may not be immediately obvious, making regular soil testing valuable for identifying nutrient needs before visible problems appear. Professional soil tests reveal precise nutrient levels and pH balance for accurate fertilizer selection.


Pruning and Deadheading for Plant Health

Regular pruning and deadheading are fundamental practices that maintain plant health while encouraging robust growth patterns. These techniques help redirect energy toward healthy development rather than maintaining damaged or spent plant parts.
When and How to Prune Different Plants
Timing your pruning correctly maximizes plant health and flowering potential throughout the growing season. Most plants benefit from pruning during their dormant season, while flowering varieties should be trimmed immediately after blooming to preserve next season’s buds.
Seasonal considerations play a crucial role in successful pruning outcomes:
- Spring pruning works best for plants that flower on new wood
- Post-bloom trimming suits plants that develop buds on previous year’s growth
- Late winter cutting helps most deciduous plants before active growth begins
Proper technique ensures clean cuts that heal quickly and resist infection:
- Sharp, clean tools prevent tissue damage and disease transmission
- Cut at 45-degree angles just above healthy growth nodes or buds
- Remove crossing branches first to improve air circulation throughout the plant
Houseplant maintenance requires gentler approaches than outdoor varieties:
- Trim leggy stems back to healthy growth points for fuller development
- Remove weak or spindly growth to concentrate energy on stronger branches
- Use smaller tools like precision scissors for delicate indoor plants
Removing Dead or Diseased Foliage
Dead and diseased plant material creates entry points for pests and infections that can compromise entire plant systems. Regular inspection helps identify problem areas before they spread to healthy tissue.
Visual indicators of problematic foliage include:
- Yellowing leaves that feel soft or mushy
- Brown spots with fuzzy growth indicating fungal infections
- Wilted sections that don’t recover after proper watering
Removal techniques prevent contamination while protecting healthy growth:
- Use sanitized tools between cuts to avoid spreading pathogens
- Dispose of diseased material in trash rather than compost bins
- Clean hands thoroughly after handling infected plant parts
Prevention strategies reduce the likelihood of future problems:
- Maintain proper spacing between plants for adequate air circulation
- Water at soil level rather than splashing leaves with moisture
- Monitor environmental conditions that favor disease development
Encouraging New Growth Through Pruning
Strategic pruning redirects plant energy toward developing new shoots, flowers, and stronger root systems. Understanding how plants respond to cutting helps maximize growth benefits from maintenance activities.
Growth stimulation occurs when we remove apical dominance through targeted cuts:
- Trimming branch tips encourages lateral bud development for bushier growth
- Deadheading spent flowers prevents seed production and promotes continued blooming
- Cutting back one-third of old stems annually rejuvenates aging perennials
Energy redirection happens naturally when plants no longer support damaged or unnecessary growth:
- Removing weak branches allows stronger ones to develop more fully
- Eliminating suckers at plant bases concentrates energy in main stems
- Cutting back leggy growth forces plants to develop more compact, sturdy forms
- Active growing seasons produce faster recovery and new development
- Dormant period cutting results in explosive spring growth when conditions improve
- Regular light pruning throughout growing seasons maintains consistent plant vigor


Repotting Plants When They Outgrow Their Containers

Repotting rejuvenates plants by giving roots space to grow and refreshing soil nutrients, promoting healthier and stronger plants in the long term. We’ll guide you through recognizing when it’s time and executing the process effectively.
Signs It’s Time to Repot
Roots growing out of drainage holes signal your plant needs more space immediately. Check the bottom of your pot regularly for this telltale sign of overcrowding.
Soil drying out very quickly indicates root bound conditions where dense roots absorb water faster than normal. Your watering schedule shouldn’t suddenly require daily attention if it previously needed weekly care.
Slow or lack of new growth during active growing seasons suggests your plant has exhausted its current container’s resources. Spring and summer growth spurts should be noticeable in healthy plants.
Plants pushing themselves out of the pot demonstrate they’ve literally outgrown their space. This physical displacement occurs when root systems expand beyond container capacity.
Densely packed or root bound conditions become visible when you gently remove the plant from its pot. Roots circling tightly around the base indicate immediate repotting needs, though some plants like monsteras tolerate slightly cramped roots for extended periods.
Choosing the Right Pot Size and Material
Select a new pot about 1 to 2 inches wider in diameter than the current container to provide adequate growing room without overwhelming the plant. Oversized pots retain excess moisture and can lead to root rot.
Ensure your chosen pot has drainage holes to prevent water accumulation around roots. Proper drainage prevents root rot and maintains healthy soil conditions.
Add a layer of lava rocks or gravel at the bottom if your decorative pot lacks drainage holes. This creates a water collection area that keeps roots from sitting in standing water.
Consider pot material based on your plant’s needs since terracotta breathes better than plastic, while ceramic retains moisture longer. Match container properties to your exact plant’s water requirements.
Step-by-Step Repotting Process
Remove the plant from its current pot by gently turning it sideways and holding it at the stems or base. Tap or squeeze the pot to slide the plant out, using a small shovel or butter knife to loosen soil around edges if needed.
Loosen and massage the roots carefully, especially if they’re root bound, by untangling tight coils with your fingers. Prune any excessively long or damaged roots while avoiding breaking major root structures.
Remove about one third or more of the old potting mix from around the roots to refresh nutrients and eliminate compacted, depleted soil. Fresh soil provides better drainage and nutrient availability.
Add fresh potting mix to the bottom of your new container, ensuring you minimize air pockets that could cause settling. Place a rock layer first if your pot lacks drainage holes.
Center the plant on the new soil layer and fill around the roots with fresh potting mix, avoiding packing too tightly to allow proper root breathing. Gentle tamping settles soil without compacting it.
Water thoroughly immediately after repotting to help settle the soil and eliminate air gaps around roots. Avoid fertilizing right away since fresh soil already contains nutrients your plant needs.
Resume regular care and monitor for stress in the weeks following repotting, watching for signs of transplant shock. Schedule this process during warm, well lit times like spring or summer to reduce plant stress.


Monitoring for Pests and Diseases

Regular inspection forms the foundation of effective pest management. We recommend examining your plants weekly, focusing on leaf undersides, stems, and soil surfaces where problems often begin unnoticed.
Common Plant Pests and Their Identification
Scale insects represent one of the most persistent threats to our houseplants. Members of the Coccidae and Diaspididae families appear as small, brownish, ovate insects that attach firmly to stems and leaves, creating sticky and waxy residues that attract other pests.
Aphids cluster on new growth areas, feeding voraciously on plant sap. These soft-bodied insects cause leaves to curl and yellow, often leaving behind a sticky honeydew substance that promotes sooty mold growth.
Spittlebugs create distinctive foamy masses on plant stems that resemble spit. Brownish-gray insects hide within these protective coverings and can hop quickly when disturbed, making identification easier than capture.
Squash bugs appear as dark brown or black, flat insects that pierce plant tissues to extract sap. Their feeding activity leads to yellowing leaves that eventually wilt and die if left untreated.
Stink bugs display shield-shaped bodies in brown or green coloration. These pests scar fruits and cause permanent deformities, particularly problematic for vegetable gardens and fruit-bearing plants.
Tent caterpillars construct silken shelters on tree branches and shrub stems. Hairy larvae emerge from these protective tents to defoliate entire sections of plants, often working systematically through neighborhoods.
| Pest Type | Key Identifying Features | Primary Damage Signs |
|---|---|---|
| Scale Insects | Small, brownish, waxy coating | Sticky residue, yellowing leaves |
| Aphids | Soft-bodied, cluster formation | Curled leaves, honeydew presence |
| Spittlebugs | Foamy spit-like masses | Stunted growth, browning stems |
| Squash Bugs | Flat, dark brown/black body | Wilting, yellowing foliage |
| Stink Bugs | Shield-shaped, brown/green | Scarred fruits, plant deformities |
| Tent Caterpillars | Hairy, with silken tents | Severe defoliation, bare branches |
Natural and Chemical Treatment Options
Handpicking provides immediate pest removal for larger insects like caterpillars and squash bugs. We’ve found this method most effective during early morning hours when pests are less active and easier to locate.
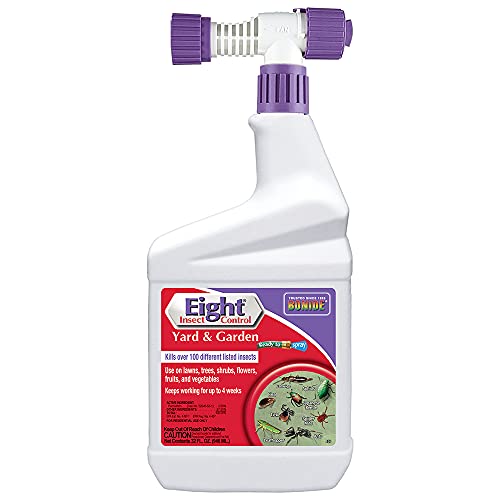
Insecticidal soaps work exceptionally well against soft-bodied pests like aphids and young scale insects. These treatments suffocate pests on contact while remaining safe for beneficial insects when applied correctly.
Neem oil offers systemic protection that disrupts pest feeding and reproduction cycles. Applications every 7-14 days create a protective barrier that deters new infestations while treating existing problems.
Beneficial insects provide long-term biological control without chemical interventions. Ladybugs consume up to 50 aphids daily, while lacewings target multiple pest species throughout their lifecycle.
Horticultural oils excel at controlling scale insects by suffocating adults and preventing egg development. These treatments work best when applied during dormant seasons or early spring before new growth begins.
Chemical insecticides offer targeted answers for severe infestations that resist natural treatments. Always follow label instructions precisely to protect beneficial organisms and prevent environmental contamination.
Preventive Measures for Plant Health
Plant hygiene eliminates pest breeding grounds by removing dead leaves, spent flowers, and debris regularly. Clean growing environments reduce disease pressure and eliminate hiding places for harmful insects.
Proper watering prevents stress conditions that make plants vulnerable to pest attacks. Overwatering creates fungal problems, while underwatering weakens plant defenses against insect damage.
Quarantine protocols protect established plant collections from new pest introductions. We isolate new acquisitions for 2-3 weeks, monitoring closely for signs of hidden problems before integration.
Resistant varieties offer natural protection against common regional pests. These plants require fewer treatments while maintaining healthy growth under normal growing conditions.
Crop rotation disrupts pest life cycles by removing preferred host plants from exact locations. This practice works particularly well for annual vegetables and prevents soil-borne pest populations from building up.
Air circulation reduces humidity levels that promote fungal diseases and pest development. Proper spacing between plants and adequate ventilation create conditions that favor plant health over pest survival.


Creating the Ideal Growing Environment

Building on our foundation of proper watering, lighting, and fertilization, we need to fine-tune our growing environment to support thriving plants. Temperature, humidity, air quality, and seasonal adjustments work together to create optimal conditions for plant health.
Humidity Control Methods
Many plants thrive in moderate to high humidity levels that mimic their natural habitats. Placing plants on pebble trays filled with water creates a localized humid microenvironment as water evaporates around the foliage. Grouping plants together naturally increases humidity through their collective transpiration, creating a beneficial microclimate for all plants in the cluster.
Using humidifiers provides consistent humidity control, especially during winter months when indoor heating systems dry out the air. Misting offers a temporary humidity boost but shouldn’t replace consistent humidity management methods. We recommend avoiding overly dry air conditions, particularly in winter with indoor heating systems, as this can cause leaf damage and stress your plants.
Air Quality and Plant Health
Air pollution significantly impacts plant growth, photosynthesis, and reproduction processes. Pollutants like ground-level ozone, sulfur dioxide, and nitrogen oxides damage leaf cuticles, reduce photosynthetic activity, and stunt overall growth. Contaminated air lowers seed production and increases plant vulnerability to pests and diseases, affecting both ornamental plants and food crops.
Keeping plants in environments with clean, pollutant-free air supports their optimal health and development. Indoors, we should avoid exposing plants to smoke, chemical fumes, or heavy dust accumulation that can interfere with their natural processes. Ensuring good air circulation around plants reduces fungal diseases and helps with proper transpiration.
Fresh air movement prevents stagnant conditions that encourage mold growth and pest infestations while supporting healthy gas exchange in plant leaves.
Seasonal Care Adjustments
Adjusting watering frequency and amounts according to seasonal changes helps plants adapt to their changing needs throughout the year. Plants generally require less water in winter when growth slows and more frequent watering during active summer growing periods. Modifying light exposure becomes necessary as daylight hours change, often requiring us to move plants closer to windows during shorter winter days.
Monitoring humidity shifts seasonally allows us to adapt our methods for maintaining optimal moisture levels in the air. Fertilization schedules should be adjusted to match plant growth cycles, typically reducing feeding during dormant seasons and increasing nutrients during active growth periods.
Temperature fluctuations between seasons require gradual acclimation when moving plants between indoor and outdoor environments to prevent shock and stress.
Troubleshooting Common Plant Care Problems

Even with proper care routines in place, plants can still develop issues that require immediate attention. We’ll guide you through identifying and resolving the most common problems to keep your green friends thriving.
Yellow Leaves and Drooping Plants
Yellowing leaves typically signal overwatering, which prevents roots from absorbing water and nutrients properly. We recommend checking that your pots have adequate drainage holes and avoiding watering until the top inch of soil feels completely dry. Drooping stems can result from both overwatering and underwatering, so we suggest testing soil moisture levels with your finger before taking action.
Pest infestations like spider mites also cause yellowing and leaf drop, appearing as tiny webs or stippled damage on foliage. We’ve found that treating these issues early with insecticidal soap prevents widespread damage. Nutrient deficiencies manifest as yellowing between leaf veins or overall pale coloration, requiring targeted fertilization to restore plant health.
Low light conditions contribute to yellowing lower leaves as plants redirect energy to newer growth. We recommend moving affected plants to brighter locations or supplementing with grow lights to maintain vibrant foliage.
Slow Growth and Poor Flowering
Inadequate light exposure ranks as the primary cause of slow growth and poor flowering in most houseplants. We observe that plants stretching toward windows or developing long, weak stems indicate insufficient brightness. Positioning plants where they receive bright, indirect sunlight or adding artificial lighting typically resolves these growth issues within weeks.
Nutrient imbalances prevent plants from developing strong stems and abundant flowers, particularly when nitrogen levels are too high or phosphorus is lacking. We suggest using balanced fertilizers during growing season and switching to bloom boosters for flowering plants.
Improper watering practices stress plants and reduce their ability to flower, whether from waterlogged roots or drought conditions. We maintain consistent moisture levels by checking soil weekly and adjusting watering frequency based on plant response and environmental conditions.
Recovery Tips for Stressed Plants
Optimizing environmental conditions helps stressed plants recover faster than any single intervention. We start by adjusting lighting to species exact requirements, avoiding direct sun exposure for sensitive varieties to prevent leaf burn and color fading.
Treating pest problems immediately with neem oil or insecticidal soap prevents further damage and allows plants to redirect energy toward recovery. We remove affected leaves and dispose of them away from healthy plants to stop disease spread.
Pruning damaged foliage including leaves with powdery mildew or bacterial spots encourages new growth and prevents infection from spreading. We use clean, sharp tools and make cuts just above healthy growth nodes.
Repotting with fresh soil and improved drainage helps plants with root problems establish healthy growing conditions. We allow overwatered plants to dry out completely before repotting to prevent continued root rot.
Monitoring recovery progress through weekly inspections helps us adjust care routines as plants regain strength. We watch for new growth, improved leaf color, and stronger stems as indicators that our interventions are working effectively.
Conclusion
Taking care of plants doesn’t have to be overwhelming when you understand their fundamental needs. With the right balance of light water soil and attention your green companions will thrive and transform your living space into a healthier more vibrant environment.
Remember that consistency beats perfection in plant care. Regular monitoring proper watering schedules and seasonal adjustments will keep your plants happy throughout the year. When problems arise stay calm and use the troubleshooting techniques we’ve covered to get your plants back on track.
The journey of plant parenthood is rewarding and teaches us patience and observation skills. Start with a few easy-care varieties and gradually expand your collection as your confidence grows. Your plants will thank you with lush growth cleaner air and the satisfaction that comes from nurturing life.
Frequently Asked Questions
What are the basic needs of plants for healthy growth?
Plants require three fundamental elements: proper light exposure, adequate water, and well-draining soil. The balance of these factors determines plant health. Light requirements vary by species, with some needing bright direct sunlight while others thrive in low-light conditions. Watering should be done when the top two inches of soil feel dry, and soil should provide good drainage to prevent root rot.
How often should I water my plants?
Check your plants weekly and water only when the top two inches of soil feel dry. Watering frequency varies by season—plants need more water during active growing months (spring/summer) and less during dormant periods (fall/winter). Early morning is the best time to water for optimal absorption. Avoid midday watering to prevent thermal shock.
How do I know if my plant needs more light?
Signs of insufficient light include slow or stunted growth, leggy stems, pale or yellowing leaves, and poor flowering. Plants naturally lean toward light sources when they’re not getting enough. Position plants near south or west-facing windows for optimal natural light, or supplement with LED grow lights during winter months or in low-light areas.
What’s the difference between organic and synthetic fertilizers?
Organic fertilizers improve soil health over time and release nutrients slowly, while synthetic fertilizers provide immediate nutrient availability. Both can be effective, but organic options build long-term soil structure. Fertilize during spring when plants enter active growth, and reduce feeding in fall/winter when growth slows down.
When should I repot my plants?
Repot when you see roots growing out of drainage holes, soil drying out quickly after watering, or when new growth has stopped despite proper care. Choose a pot only 1-2 inches larger than the current one. Spring is the ideal time for repotting as plants can recover more easily during their active growing season.
How can I prevent common plant pests?
Maintain good plant hygiene by removing dead leaves, ensuring proper air circulation, and avoiding overwatering. Inspect plants regularly for signs of pests like aphids, scale insects, or spider mites. Treat infestations early with insecticidal soap, neem oil, or by introducing beneficial insects. Quarantine new plants before introducing them to your collection.
Why are my plant’s leaves turning yellow?
Yellow leaves typically indicate overwatering, which leads to root rot, or pest infestations. Check soil moisture levels and drainage, and inspect for insects. Other causes include natural aging of older leaves, nutrient deficiencies, or sudden environmental changes. Address the underlying cause rather than just removing yellow leaves.
How do I increase humidity for my houseplants?
Use pebble trays filled with water beneath plants, group plants together to create a microclimate, or use a humidifier. Misting can temporarily increase humidity but may promote fungal issues if done excessively. Most houseplants prefer 40-60% humidity levels, which is higher than typical indoor air during winter months.


