

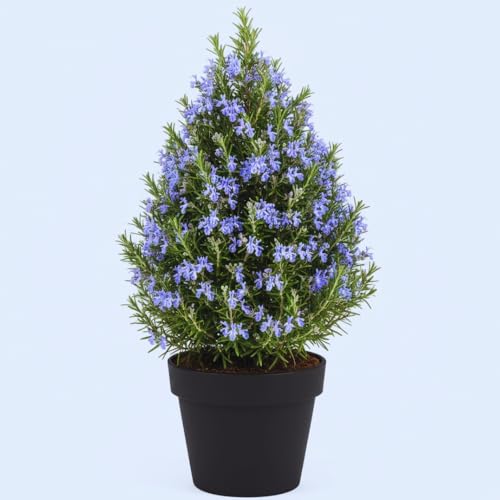
We’ve all dreamed of having fresh herbs at our fingertips but worried about garden space or harsh weather conditions. Rosemary plants in pots offer the perfect solution – bringing this aromatic Mediterranean herb right to your doorstep where it’s always within reach.
Growing rosemary in containers isn’t just convenient; it’s incredibly rewarding. This hardy perennial thrives in pots and delivers year-round harvests of fragrant leaves that’ll transform your cooking. Whether you’re a seasoned gardener or just starting out we’ll show you exactly how to succeed with potted rosemary.
From choosing the right container to mastering watering techniques and winter care we’re covering everything you need to know. You’ll discover why container growing actually gives you more control over your rosemary’s health and how to avoid the common mistakes that cause most potted herbs to fail. Let’s turn your space into an herb lover’s paradise.
Choose the Right Pot Size and Material for Your Rosemary
Selecting the perfect container sets the foundation for thriving rosemary plants in pots. We’ll explore the best materials and dimensions to ensure your herb flourishes in its new home.
Terra Cotta Pots Provide Excellent Drainage
Terra cotta pots offer superior drainage capabilities that prevent waterlogged soil conditions. These porous clay containers naturally wick away excess moisture through their walls, creating ideal growing conditions for rosemary plants. We recommend choosing unglazed terra cotta options as they provide better air circulation to the root system.
Benefits extend beyond drainage as these containers regulate soil temperature effectively. Terra cotta’s natural properties keep roots cooler during hot summer months while providing insulation during cooler periods. The material’s breathability also prevents salt buildup that can damage sensitive rosemary roots over time.
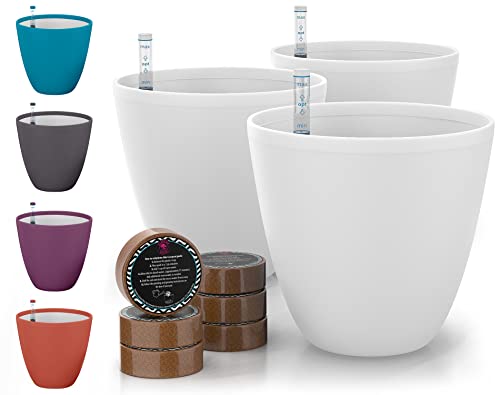
Ceramic and Plastic Options for Different Climates
Ceramic containers work exceptionally well in dry climates where moisture retention becomes crucial. These glazed pots help conserve water while still providing adequate drainage through bottom holes. We find ceramic options particularly useful for indoor rosemary cultivation where consistent moisture levels matter most.
Plastic pots excel in extreme weather conditions due to their lightweight and durable nature. These containers resist cracking in freezing temperatures and won’t shatter if accidentally dropped. Consider plastic options with thick walls that provide better insulation for root protection during temperature fluctuations.
Minimum Pot Dimensions for Healthy Growth
| Container Size | Plant Age | Root Development |
|---|---|---|
| 6-8 inches wide | Young plants | Initial establishment |
| 10-12 inches wide | Mature plants | Full root expansion |
| 14+ inches wide | Long-term growth | Maximum development |
Depth requirements match the width measurements to accommodate rosemary’s taproot system. We recommend containers at least 8 inches deep for young plants and 12 inches deep for established specimens. Adequate space allows roots to spread naturally without becoming root bound.
Drainage holes become essential regardless of pot size or material choice. Ensure your selected container features multiple holes across the bottom surface to prevent standing water. We suggest adding a layer of gravel or broken pottery shards to improve drainage further.


Select the Perfect Rosemary Variety for Container Growing

Choosing the right rosemary variety makes all the difference in successful container gardening. We’ll guide you through the best options that thrive in pots and complement your space perfectly.
Compact Varieties Ideal for Small Spaces
Chef’s Choice tops our list as the ultimate compact rosemary for containers, growing just 2 feet tall and wide with exceptional culinary flavor. Position this variety near your kitchen door for easy access to fresh herbs during cooking.
Blue Boy stands out as the smallest rosemary variety available, featuring slow growth patterns and delicate needles that won’t overwhelm small containers. We recommend this variety for tight spaces like apartment balconies or windowsills.
Golden Rain brings visual appeal with its attractive golden foliage while maintaining compact growth suitable for lower light conditions. This variety works perfectly when you need rosemary in shadier spots around your home.
Hill Hardy offers excellent value with its rounded growth habit reaching 2 to 3 feet in both height and width. We find this variety particularly reliable for beginners due to its manageable size and robust nature.
Roman Beauty and Majora Pink deliver impressive productivity even though their small stature, making them ideal choices when you want maximum herb yield from minimal space.
Upright vs. Trailing Rosemary Types
Upright varieties grow in shrubby vertical patterns that make them perfect for traditional herb containers and small outdoor spaces. Examples like Chef’s Choice, Hill Hardy, and Herb Cottage maintain neat, contained shapes that require minimal pruning.
Trailing varieties create stunning cascading effects as they spill over container edges and walls. Prostratus, also known as creeping rosemary, spreads 2 to 3 feet wide while staying only 10 to 12 inches tall.
We recommend upright types for most container gardeners because they’re easier to prune and maintain in standard pots. Trailing varieties work best in hanging baskets or elevated planters where their cascading nature becomes a decorative feature.
Consider your available space when choosing between these growth habits. Upright varieties fit well on patios and decks, while trailing types need room to spread or hang freely.
Cold-Hardy Varieties for Year-Round Growing
Hill Hardy excels in colder climates as it survives in USDA zones 7 through 10, and with proper protection, it may even withstand zone 6 winters. We’ve found this variety particularly reliable for gardeners in transitional climate zones.
Most rosemary varieties prefer warmer growing conditions, but container growing offers flexibility to move plants indoors during harsh weather. Terra cotta pots provide natural insulation that helps regulate root temperatures during seasonal changes.
We suggest selecting cold hardy varieties if you plan to keep containers outdoors year round in areas with occasional frost. These varieties bounce back quickly from minor cold damage and maintain their aromatic qualities throughout temperature fluctuations.
Consider your local winter conditions when making variety selections. Even cold hardy types benefit from protection during extreme weather events, and containers make this protection much easier to provide.


Prepare the Ideal Soil Mix for Potted Rosemary

Creating the right soil environment is crucial for rosemary’s success in containers. We’ll build a foundation that mimics the Mediterranean conditions where this herb naturally thrives.
Well-Draining Soil Requirements
Rosemary plants demand excellent drainage to prevent root rot and fungal problems that can kill your plant. Water sitting around the roots creates the perfect environment for disease, so we need soil that drains quickly while still providing stability. Mediterranean herbs like rosemary evolved in sandy, loamy conditions where excess moisture moves away from roots rapidly.
Light, airy, and gritty textures work best for potted rosemary because they allow air circulation around the root system. Dense garden soil retains too much moisture and suffocates the roots, leading to plant failure within weeks. Proper drainage holes in your container work together with well-draining soil to create the ideal growing environment.
pH Levels and Nutrient Considerations
Rosemary thrives in soil with a pH range between 6.0 and 7.0, which optimizes nutrient uptake for healthy growth. Slightly acidic to neutral conditions allow the plant to access essential minerals without struggling against soil chemistry. Testing your soil mix before planting ensures you’re starting with the right foundation.
Fertile soil supplies the nutrients rosemary needs without being overly rich, which can actually harm the plant. Organic matter mixed into the potting medium maintains nutrient availability while improving soil structure. Balanced nutrition supports steady growth without the soft, weak stems that come from overfertilization.
DIY Potting Mix Recipes
We recommend mixing equal parts of three key ingredients for the perfect rosemary potting mix:
- Peat moss provides moisture retention and excellent aeration
- Perlite or vermiculite improves drainage while maintaining light soil structure
- High-quality potting soil delivers essential nutrients and creates the base texture
Adding ¼ to ½ part horticultural sand or river sand mimics the natural sandy loam rosemary loves while improving drainage further. Some gardeners include fine limestone gravel or small pebbles to boost drainage and slightly raise the pH toward rosemary’s preferred range. This combination creates a soil mix that drains well, provides adequate nutrition, and maintains the loose, aerated structure rosemary roots need to flourish.

Master the Watering Schedule for Rosemary Plants in Pots

Getting the watering schedule right makes the difference between thriving rosemary and struggling plants. Most potted rosemary plants need water about once a week, though factors like pot size, climate, and season affect this timing.
Signs of Overwatering vs. Underwatering
Overwatering reveals itself through yellowing leaves and soft, mushy stems. Root rot becomes a serious threat when water stagnates around the roots, especially in containers with poor drainage. We’ve seen many gardeners lose their rosemary plants because standing water suffocates the root system.
Underwatering shows up as dry, brittle, or browning leaves. Rosemary prefers slightly dry conditions between waterings, but it doesn’t want to be bone dry. Checking the top inch of soil helps us determine when it’s time to water again.
Newly planted rosemary requires more frequent attention. Fresh cuttings and recently transplanted herbs need watering every few days for the first 1-2 weeks while their roots establish.
Seasonal Watering Adjustments
Summer heat demands more frequent watering sessions. During hot months, we increase watering to twice per week because sun and heat dry out container soil quickly. Smaller pots especially need extra attention since they lose moisture faster than larger containers.
Cooler seasons call for reduced watering frequency. Weekly watering often suffices in humid or mild weather conditions. We monitor soil moisture rather than following a rigid schedule.
Winter brings dormancy and minimal water needs. Growth slows dramatically during cold months, and overwatering becomes especially dangerous. Many experienced growers reduce or completely stop watering container rosemary in winter to prevent root rot.
Drainage Techniques to Prevent Root Rot
Terra cotta pots provide the best drainage solution. These clay containers allow moisture to evaporate through their sides while multiple drainage holes let excess water escape freely.
Well-draining soil mix prevents water accumulation. We combine regular potting soil with sand, perlite, or gravel to create the perfect drainage balance. This mixture keeps roots healthy while providing adequate moisture retention.
Elevating pots improves water flow. Pot feet or raised surfaces ensure water drains completely, preventing accumulation at the container base. This simple technique stops standing water from causing root problems.


Position Your Potted Rosemary for Optimal Sunlight

After setting up proper drainage and watering schedules, sunlight becomes our next priority for healthy rosemary growth. We’ll explore the essential light requirements that make the difference between thriving and struggling plants.
Six to Eight Hours of Direct Sun Daily
Rosemary plants need at least six to eight hours of direct sunlight daily to develop their characteristic aroma and maintain robust growth. Mediterranean origins make these herbs naturally dependent on abundant sunshine to produce the volatile essential oils responsible for their distinctive fragrance and flavor.
Plants receiving less than six hours of direct sun typically exhibit weaker growth patterns and reduced aromatic intensity. We’ve observed that insufficient light exposure directly impacts oil production, resulting in less flavorful leaves for culinary use.
Extremely hot climates above 95°F benefit from slight afternoon shade during peak heat hours. This protection prevents stress without significantly reducing essential oil development or overall plant health.
Indoor vs. Outdoor Placement Options
Outdoor positioning requires full sun exposure without obstruction from trees, buildings, or other structures throughout the day. We recommend checking your chosen location at different times to ensure consistent light availability from morning through afternoon.
Indoor rosemary thrives near south-facing windows where bright, direct sunlight streams in naturally. North-facing windows rarely provide adequate intensity, while east or west-facing options work well in sunny climates.
Grow lights become necessary supplements when natural indoor light proves insufficient for healthy development. We suggest bringing indoor plants outdoors during warm weather to benefit from natural pollination and increased light intensity.
Container mobility offers unique advantages for optimizing sun exposure throughout different seasons. Moving pots to follow the sun’s path or relocating them during extreme weather protects our investment while maintaining growth momentum.
Rotating Plants for Even Growth
Regular rotation prevents rosemary from leaning toward light sources and promotes uniform foliage development on all sides. We recommend turning pots a quarter turn every few days to ensure balanced growth patterns.
Plants naturally bend toward their primary light source, creating uneven shapes and potentially weaker stem structures over time. Consistent rotation counteracts this tendency while encouraging stronger, more symmetrical growth.
Weekly rotation schedules work well for most gardeners, though daily attention produces even better results. We’ve found that setting rotation reminders helps maintain this simple but crucial maintenance task.
Balanced light exposure strengthens stems throughout the entire plant structure rather than just the sun-facing side. This comprehensive development creates more resilient plants that better withstand environmental stresses and produce more harvestable growth.

Feed Your Container Rosemary with Proper Fertilization

Container rosemary typically thrives without frequent feeding, but proper fertilization becomes essential when plants show signs of stunted growth or pale coloring. We recommend fertilizing only once in early spring before new growth begins, using any all-purpose fertilizer while avoiding direct application on leaves to prevent burning.
Low-Nitrogen Fertilizer Recommendations
Low-nitrogen fertilizers work best for rosemary because excess nitrogen promotes leafy growth at the expense of aromatic oils. We prefer organic options like compost, fish emulsion, and seaweed extracts since they provide balanced nutrients without overwhelming the plant. These organic fertilizers release nutrients slowly and improve soil quality while improving microbial activity in container environments. Synthetic high-nitrogen fertilizers should be avoided as they encourage excessive foliage production over essential oil development.
Organic vs. Synthetic Feeding Options
Organic fertilizers offer superior benefits for container rosemary through their slow-release nature and soil-improving properties. Fish emulsion, seaweed extracts, and compost improve overall soil health while providing steady nutrition that container-grown plants depend on entirely. Synthetic fertilizers can be effective when applied sparingly, but they require careful application to prevent leaf burn and nutrient imbalances. We recommend balanced, low-nitrogen synthetic formulas used only once yearly in early spring if organic options aren’t available.
Fertilization Schedule Throughout the Year
Early spring marks the optimal time for fertilization when new growth begins and plants can use added nutrients effectively. Summer and fall typically require no additional feeding unless plants display clear signs of nutrient deficiency like yellowing or stunted growth. Winter fertilization should be avoided completely as rosemary enters dormancy and nutrient uptake slows significantly during colder months. This minimal feeding approach ensures healthy, aromatic plants without encouraging excessive growth that weakens the plant’s natural resilience.

Prune and Harvest Your Potted Rosemary Effectively

Proper pruning and harvesting techniques keep your potted rosemary plants healthy while maximizing their herb production. Smart timing and gentle approaches ensure continuous growth and prevent damage to these Mediterranean treasures.
Best Times for Pruning and Shaping
Late spring or early summer provides the ideal window for major pruning and shaping work on your potted rosemary. During this period, plants actively grow and recover quickly from cuts, making it perfect for controlling size and maintaining attractive shapes.
Light tip pruning works well throughout summer months when you notice excessive growth or wayward branches. We recommend avoiding heavy pruning after early September since plants need time to harden off before winter frost arrives.
Winter damaged stems should be removed in late winter before new growth begins appearing. This timing allows plants to focus energy on healthy development rather than supporting compromised branches.
Propagation timing offers two excellent opportunities: late spring during active growth before blooming starts, or late summer when semi-ripe wood develops sufficient strength for cutting success.
Harvesting Techniques for Maximum Yield
Selective cutting of malleable green tips rather than woody stems maximizes your harvest while promoting plant health. Focus on the tender, flexible growth that contains the highest concentration of flavorful oils and aromatic compounds.
Regular harvesting acts as natural light pruning, encouraging your rosemary to produce continuous fresh growth throughout the growing season. This approach creates a beneficial cycle where taking herbs actually improves plant vigor.
Cutting from healthy plant sections maintains overall vitality while stimulating new branch development. Choose robust stems with vibrant green color and avoid harvesting from stressed or damaged areas.
Target the newest growth tips for the most intense flavor and aroma in your culinary applications. These tender shoots contain peak oil concentrations and provide the best cooking experience.
Encouraging Bushy Growth Patterns
Strategic pruning that removes only the longest stems stimulates new branch formation and creates fuller, more attractive plants. This selective approach maintains natural shape while promoting dense growth patterns.
Pinching back side shoots to just a few leaves encourages compact, bushy development rather than tall, spindly growth. We’ve found this technique particularly effective for maintaining attractive container plants.
Removing new basal stems prevents legginess and maintains dense plant structure throughout the growing season. This practice directs energy into developing strong, productive branches rather than supporting weak bottom growth.
Never remove more than one third of your rosemary plant during any single pruning session to avoid shocking or potentially killing the plant. Gentle, consistent maintenance proves far more effective than aggressive cutting.
Avoid cutting into woody sections by keeping all pruning cuts at least 3 to 4 inches above the woody base. This prevents unsightly bald patches and maintains the plant’s natural regenerative abilities.

Protect Your Rosemary Plants in Pots During Winter

Winter protection becomes crucial for maintaining healthy rosemary plants in containers, especially since these Mediterranean herbs are particularly vulnerable to freezing temperatures and harsh weather conditions.
Moving Containers Indoors for Cold Protection
Relocating your potted rosemary indoors before the first frost offers the most reliable protection against winter damage. We recommend choosing a cool location like an unheated garage, shed, or basement room where temperatures stay above freezing but remain under 65°F. These cooler indoor spaces slow the plant’s growth naturally and reduce watering requirements during dormancy.
Heated indoor environments should be avoided since warm, dry air can quickly desiccate rosemary leaves and stems. Plants moved from outdoor gardens need fresh potting soil when transferred to containers for winter storage. Overwatering becomes a critical concern during this period because rosemary requires significantly less moisture while dormant, making root rot a serious risk if soil stays consistently wet.
Mulching and Wrapping Techniques
Mulching the soil surface with organic materials provides essential insulation for container roots exposed to temperature fluctuations. Straw, shredded leaves, or bark chips create effective barriers that help maintain consistent soil temperatures while retaining necessary moisture levels. These materials should be applied in a 2-3 inch layer around the plant base.
Wrapping containers with insulating materials adds another layer of protection for rosemary that must remain outdoors. Bubble wrap or burlap can be secured around pots to shield roots from freezing, particularly when indoor storage isn’t possible. This technique works especially well when combined with placing containers in sheltered locations away from harsh winds.
Monitoring for Winter Stress Signals
Regular inspection of your rosemary plants reveals early signs of winter stress that require immediate attention. Browning or dropping leaves, desiccated twigs, and changes in overall plant appearance indicate environmental challenges that need addressing. We should check soil moisture levels weekly, watering only when the top inch feels dry to prevent waterlogged conditions.
Maintaining proper humidity levels prevents excessive drying from indoor heating systems that can damage rosemary foliage. Light misting or using nearby humidifiers creates adequate moisture without overwatering the soil. Fertilization should be completely stopped during winter months since dormant rosemary doesn’t require additional nutrients and feeding can actually harm the plant’s natural rest cycle.


Troubleshoot Common Problems with Potted Rosemary

Even with excellent care practices, we might encounter occasional challenges with our potted rosemary plants that require quick identification and treatment.
Identifying and Treating Pest Issues
Aphids represent the most common pest threat to container rosemary, appearing as small green or black insects clustered on new growth. We can spot these tiny invaders by checking the undersides of leaves and stem tips during our regular plant inspections.
Spider mites create fine webbing on foliage and cause stippled yellow spots on leaves. These microscopic pests thrive in dry indoor conditions and hot outdoor environments.
Whiteflies flutter around the plant when disturbed and leave sticky honeydew deposits on leaves. We’ll notice these small white flying insects congregating on the undersides of leaves.
Insecticidal soap provides our first line of defense against most rosemary pests without harming beneficial insects. We can spray affected areas every 3-5 days until the infestation clears.
Neem oil offers another effective organic treatment that disrupts pest life cycles. We should apply neem oil in the evening to prevent leaf burn and reapply weekly as needed.
Good air circulation prevents most pest problems by creating an environment that discourages insect establishment. We can achieve this by spacing containers appropriately and using fans indoors.
Addressing Disease and Fungal Problems
Root rot poses the greatest disease threat to potted rosemary, typically caused by overwatering or poorly draining soil conditions. We’ll recognize this serious condition through yellowing leaves, wilting even though moist soil, and foul odors emanating from the container.
Fungal diseases develop when rosemary experiences prolonged wet conditions or insufficient sunlight exposure. These problems manifest as dark spots on leaves, powdery white coatings, or general plant decline.
Drainage holes must remain unobstructed to prevent water accumulation that leads to root rot. We should check these openings regularly and clear any blockages immediately.
Six hours of daily sunlight minimum helps our rosemary resist fungal infections naturally. Adequate light exposure strengthens plant immunity and reduces moisture retention on foliage.
Deep but infrequent watering allows soil to dry between applications, creating conditions that discourage fungal growth. We should water thoroughly when the top 1-2 inches of soil feel dry to touch.
Fungicide applications become necessary when we notice active fungal infections even though proper care. We must remove affected plant parts before treatment and ensure good air circulation around the container.
Answers for Yellowing or Dropping Leaves
Overwatering causes most cases of yellowing or dropping leaves in container rosemary plants. We can confirm this by checking soil moisture levels and observing whether leaves turn yellow from the bottom up.
Soil moisture testing prevents watering mistakes that lead to leaf problems. We should insert our finger 1-2 inches deep into the soil and water only when this layer feels completely dry.
Poor drainage creates waterlogged conditions that stress root systems and cause leaf drop. We’ll need to repot our rosemary if water sits on the soil surface or drains very slowly from the container.
Compacted soil requires immediate replacement to restore proper root health and prevent continued leaf loss. We should repot using fresh, well-draining potting mix designed for herbs or Mediterranean plants.
Fertilizer burn can cause sudden yellowing when we apply too much plant food to container rosemary. Since rosemary rarely needs fertilization, we should use balanced, dilute fertilizer sparingly only when growth appears poor or leaves look pale.
Adequate sunlight exposure reverses many leaf problems by strengthening overall plant health. We must ensure our potted rosemary receives at least 6 hours of direct sunlight daily and has proper air circulation around all sides.
Repot Your Rosemary Plants for Continued Health

Even the healthiest rosemary plants need fresh space to continue thriving in containers. We’ve found that repotting becomes essential when plants outgrow their current homes and show exact warning signs.
Signs Your Plant Needs a Larger Container
Roots growing through drainage holes signal your rosemary has outgrown its current pot. We notice this happens most frequently with plants that have been in the same container for 2-3 years.
Stunted growth indicates your plant can’t access enough nutrients in its cramped space. Plants that previously grew vigorously will slow their development when root bound.
Soil drying out extremely quickly after watering means the root system has filled most of the pot’s volume. We see this when there’s more root mass than soil in the container.
Dense root balls that resist loosening when you remove the plant confirm it’s time for a larger home. These tightly packed roots can’t absorb nutrients effectively in their current state.
Step-by-Step Repotting Process
Select a new container that’s 50% larger than your current pot to give roots room to expand. We recommend choosing pots with drainage holes to prevent waterlogging.
Fill the new container halfway with well-draining potting mix before transferring your plant. This creates a stable base for positioning the root system.
Remove your rosemary by turning the pot sideways and gently easing the entire root ball out intact. Support the base of the plant while sliding it from its container.
Inspect the roots for any dark, mushy, or damaged sections that need removal. Healthy roots appear white or light brown and feel firm to the touch.
Loosen the root ball gently with your fingers to encourage new growth into fresh soil. We break up circling roots that have formed around the pot’s edges.
Place the plant in its new home, ensuring the soil level matches the original depth. The crown and stems should remain at the same height as before.
Backfill around the root system with fresh potting mix and water deeply until excess drains freely. This eliminates air pockets and settles the soil around the roots.
Root Pruning Techniques for Pot-Bound Plants
Circling roots need trimming to prevent continued spiral growth patterns in the new container. We use clean, sharp shears to cut through these dense root mats before repotting.
Dense outer roots should be removed to encourage the plant to develop fresh feeder roots. Trim away approximately one-third of the root mass that appears most congested.
Root ball scoring helps break up extremely tight root systems that resist manual loosening. Make vertical cuts about 1 inch deep on four sides of the root ball to stimulate new growth.
Sanitized pruning tools prevent introducing diseases during the root trimming process. We clean our shears with rubbing alcohol between cuts to maintain plant health.
Conclusion
Growing rosemary in containers opens up a industry of culinary possibilities right at your fingertips. We’ve covered everything from selecting the perfect pot and soil mix to mastering watering schedules and seasonal care requirements.
With proper attention to drainage sunlight and pruning techniques your potted rosemary will reward you with aromatic herbs year-round. Remember that container gardening gives you the flexibility to move your plants as needed and protect them from harsh weather conditions.
Whether you’re a beginner or experienced gardener these proven strategies will help you cultivate thriving rosemary plants that enhance both your cooking and your outdoor space. Start your container rosemary journey today and enjoy fresh herbs whenever you need them.
Frequently Asked Questions
What size pot is best for growing rosemary?
Choose a pot at least 12-14 inches wide and deep with drainage holes. Terra cotta pots are ideal because they provide excellent drainage and temperature regulation. The container should be 50% larger when repotting. Proper depth prevents root binding, while adequate width allows for healthy growth and prevents the plant from becoming top-heavy.
How often should I water potted rosemary?
Water potted rosemary about once a week, allowing soil to dry between waterings. Check soil moisture by inserting your finger 1-2 inches deep. Newly planted rosemary needs more frequent watering, while winter requires less. Overwatering causes yellowing leaves and root rot, so err on the side of underwatering rather than overwatering.
What type of soil is best for rosemary in containers?
Use well-draining potting mix with a pH between 6.0-7.0. Create a DIY mix using equal parts peat moss, perlite or vermiculite, and quality potting soil. Add sand or gravel for extra drainage. Avoid heavy, clay-based soils that retain moisture, as rosemary is susceptible to root rot in waterlogged conditions.
How much sunlight does potted rosemary need?
Rosemary requires 6-8 hours of direct sunlight daily for optimal growth and flavor. Place containers in south-facing locations outdoors or near south-facing windows indoors. In extremely hot climates, provide slight afternoon shade. Insufficient light leads to weak growth and less aromatic leaves. Rotate pots regularly for even growth.
When should I fertilize container rosemary?
Fertilize once in early spring with low-nitrogen, organic fertilizers like compost or fish emulsion. Avoid high-nitrogen synthetic fertilizers that promote excessive foliage at the expense of aromatic oils. Most healthy rosemary plants don’t need frequent feeding. Only fertilize if you notice stunted growth or pale coloring. Skip winter fertilization completely.
How do I care for potted rosemary in winter?
Move containers indoors before the first frost to a cool location above freezing. Avoid heated areas that dry out plants. For outdoor protection, wrap pots with bubble wrap and add mulch around the base. Reduce watering significantly and stop fertilizing. Monitor for stress signals and maintain proper humidity levels indoors.
What are the best rosemary varieties for containers?
Compact varieties like Chef’s Choice and Blue Boy are perfect for small spaces. Choose upright varieties for standard pots and trailing types for hanging baskets. Cold-hardy varieties like Hill Hardy can survive cooler climates for year-round outdoor growing. Select varieties based on your climate and available space.
How do I know when to repot my rosemary?
Repot when roots grow through drainage holes, growth becomes stunted, or soil dries out quickly after watering. Choose a container 50% larger than the current pot. The best time is early spring before active growth begins. Inspect roots during repotting and prune any damaged or circling roots to encourage healthy development.
What pests commonly affect potted rosemary?
Common pests include aphids, spider mites, and whiteflies. Treat infestations with insecticidal soap or neem oil. Ensure good air circulation around plants to prevent pest problems. Regular inspection helps catch issues early. Most pests prefer stressed plants, so maintaining proper watering, lighting, and drainage reduces pest susceptibility significantly.
When and how should I prune potted rosemary?
Prune major shaping in late spring or early summer. Light tip pruning can continue throughout summer for harvesting. Avoid heavy pruning after early September. Remove winter-damaged stems in late winter. Cut green tips selectively to encourage bushy growth and maximize herb production. Gentle, consistent maintenance works better than aggressive cutting.


