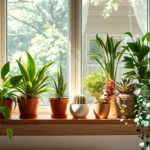
We’ve all been there – staring at empty corners and bare walls wondering how to breathe life into our spaces without very costly. Hanging air plants offer the perfect solution for adding natural beauty while maximizing your vertical space. These stunning tillandsia varieties don’t need soil and require minimal maintenance making them ideal for busy plant lovers.
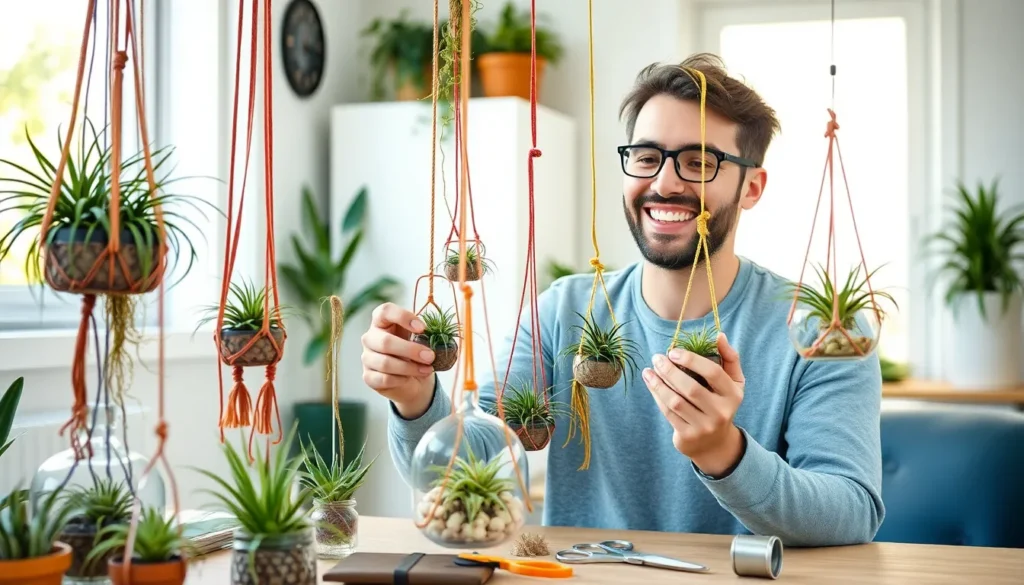
Creating DIY hanging air plant displays transforms any room into a living masterpiece. We’re talking about simple projects that take minutes to complete but deliver maximum visual impact. From macramé holders to geometric terrariums these creative displays work beautifully in bright bathrooms cozy bedrooms or modern living spaces.
The best part? You don’t need a green thumb or expensive materials to get started. With just a few basic supplies and our step-by-step guidance you’ll be crafting Instagram-worthy plant displays that’ll have your friends asking where you bought them. Let’s jump into the wonderful industry of hanging air plant DIY projects.
Choose the Right Air Plants for Hanging Displays
Selecting the perfect air plants for your hanging displays makes all the difference in creating stunning vertical gardens. We’ll guide you through the best species and essential considerations for successful hanging arrangements.
Tillandsia Species Best Suited for Hanging
Tillandsia xerographica stands out as our top choice for dramatic hanging displays with its silvery-gray rosette that can reach 24 inches across. This stunning “Queen of Air Plants” creates an impressive focal point in any room and thrives in bright, indirect light.
Tillandsia usneoides (Spanish moss) offers effortless elegance as it naturally cascades downward in graceful, flowing strands. We love how this variety creates instant vintage charm and requires minimal maintenance once established in your display.
Tillandsia cyanea brings vibrant color to hanging arrangements with its bright pink flower bracts and purple blooms. This compact species works perfectly in smaller hanging containers and adds a tropical flair to any space.
Tillandsia bulbosa features unique, twisted leaves that create interesting shapes and textures in vertical displays. Its compact size makes it ideal for clustering multiple plants together in geometric hanging terrariums.
Size and Growth Pattern Considerations
Large specimens like Tillandsia xerographica need substantial support systems and spacing of at least 12 inches between plants to accommodate their full growth potential. We recommend using sturdy macramé hangers or metal hanging planters for these impressive varieties.
Medium-sized plants such as Tillandsia ionantha and Tillandsia caput-medusae work beautifully in clusters of 3-5 plants per hanging display. These varieties typically reach 4-6 inches and create balanced, visually appealing arrangements.
Cascading varieties require different positioning strategies since they grow downward rather than outward. Spanish moss and Tillandsia usneoides need room to drape freely and should hang at least 18 inches from walls or furniture.
Compact species like Tillandsia tectorum and Tillandsia magnusiana are perfect for creating dense, layered displays in smaller spaces. These varieties stay under 4 inches and can be grouped closely together for maximum visual impact.
Care Requirements for Different Varieties
High-humidity species including Tillandsia bulbosa and Tillandsia butzii thrive in bathroom environments or near humidifiers with 50-60% humidity levels. We mist these varieties 2-3 times per week and ensure good air circulation around hanging displays.
Drought-tolerant varieties such as Tillandsia xerographica and Tillandsia tectorum prefer less frequent watering and can handle lower humidity conditions. These resilient plants need misting only once per week and work well in living rooms or bedrooms.
Light-sensitive plants like Tillandsia cyanea require bright, filtered light but can suffer from direct sunlight exposure. We position these hanging displays near east-facing windows or use sheer curtains to diffuse harsh afternoon sun.
Fast-growing species including Tillandsia ionantha and Tillandsia stricta produce offsets quickly and may need repotting or dividing within 12-18 months. These prolific varieties reward us with multiple new plants that can expand our hanging displays over time.


Gather Essential Materials for Your Hanging Air Plants DIY Project

Now that we’ve selected our perfect air plants, it’s time to gather the materials we’ll need to transform them into stunning hanging displays.
Basic Supplies and Tools Needed
Air plants themselves form the foundation of our project. We’ll want to choose from the Tillandsia species we discussed earlier, ensuring we have healthy specimens ready for mounting.
Floral aluminum wire serves as our primary construction material. This thicker gauge wire bends easily and provides the flexibility we need to create custom holders. Its aluminum composition resists rust and maintains its shape over time.
Pliers and wire cutters become our essential tools for shaping and trimming. A multi-tool that combines both functions works perfectly for this project. These tools help us bend the wire precisely and cut clean edges for professional-looking results.
Square basswood dowels offer an alternative approach for different hanger styles. These lightweight wooden pieces provide a natural aesthetic that complements air plants beautifully. They’re easy to work with and accept various mounting hardware.
Suede lace or strong string creates our hanging mechanism. We can use these materials for both functional hanging loops and decorative wrapping elements. Suede lace adds a sophisticated touch while providing reliable support.
Sharp scissors complete our basic tool kit. They’ll help us trim lace, string, and any plant debris during assembly.
Optional Decorative Elements
Embroidery hoops or wooden frames expand our mounting possibilities. These circular or rectangular frames create structured displays that showcase our air plants as living art pieces.
Varied string or yarn colors enable creative string art designs. We can incorporate multiple colors to match our room’s decor or create striking contrasts that highlight our plants.
Natural or white wood frames provide clean, modern aesthetics. These frames work especially well in minimalist spaces and contemporary interiors.
Small nails or hooks support string art installations. We’ll hammer these into our frames to create anchor points for our string patterns and plant placement.
Where to Source Quality Materials
Online retailers and local garden centers stock quality air plants. We recommend shopping at stores specializing in succulents or air plants specifically, as they’ll offer healthier specimens and better variety.
Create stores and hardware stores carry floral aluminum wire and pliers. These locations typically stock the tools and materials we need for construction at competitive prices.
Create stores also provide basswood dowels, suede lace, and decorative elements. Online shops offer even more variety if we can’t find exact materials locally.
Specialty suppliers offer air plant kits and unique mounting supplies. These providers focus specifically on air plant accessories and often carry innovative materials we won’t find elsewhere.
Create Simple Wire Hanging Holders

We’ll transform your aluminum wire into elegant plant holders using three proven techniques that work beautifully for any air plant species.
Basic Wire Wrapping Techniques
Coiling around your fingers creates the foundation for secure air plant cradles. Start by wrapping the wire around three fingers to form 4-5 loops, depending on your plant’s size. Pull the loose end through the back of the coil and bend it inward using pliers to create a gentle grip that won’t damage delicate plant tissues. Form a hanging loop at the top by twisting the wire back on itself, ensuring it’s sturdy enough to support your plant’s weight.
Wrapping one end around the plant’s base provides immediate security. Measure your desired hanging length before cutting the wire, then carefully wind the bottom portion around the thickest part of your air plant. Secure the opposite end to a hook or mounting frame, creating an instant display that frees up valuable counter space in small or cluttered areas.
Adjustable Wire Cradle Design
Flexibility becomes essential when accommodating your air plant’s natural growth patterns. Create slightly loose but secure loops that allow expansion without constriction, giving your Tillandsia room to develop over time. Customize coil size based on your exact species – larger plants like Tillandsia xerographica need wider cradles than compact varieties.
Wire thickness determines the cradle’s strength and adjustability. Thicker aluminum wire provides more support for heavy plants, while thinner gauges offer easier manipulation for delicate species. Test the cradle’s grip by gently lifting your plant – it should feel secure without causing stress to the leaves or roots.
Air circulation remains crucial for healthy plant development. Design your cradle with gaps between wire coils, ensuring proper airflow reaches all plant surfaces. This open structure prevents moisture buildup that could lead to rot while maintaining the support your hanging display requires.
Adding Decorative Wire Elements
Twisting wire around river rocks creates stunning rustic table displays. Coil colored aluminum wire around smooth stones to form unique bases that complement your hanging arrangements. These weighted elements add visual interest while providing stability for tabletop presentations.
Artistic patterns in your wire enhance the overall aesthetic appeal. Create spirals, zigzags, or geometric shapes that echo your plant’s natural form, turning functional holders into decorative art pieces. Colored aluminum wire offers endless possibilities for matching your home’s color scheme or seasonal decorations.
Safety considerations guide our material choices for long term plant health. We always recommend aluminum wire over copper alternatives, as copper can be toxic to air plants and may cause damage over time. Aluminum provides the perfect balance of flexibility, durability, and plant safety for your DIY projects.

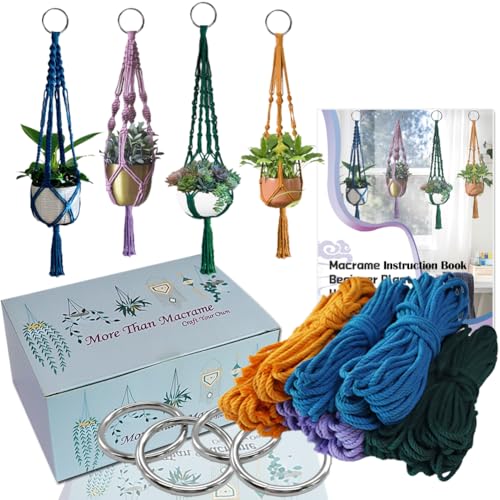
Design Macrame Plant Hangers for Air Plants

Macrame air plant hangers offer an elegant alternative to wire holders, creating decorative displays through knotted cord patterns. We’ll create stunning holders using wooden dowels or rings as bases, forming symmetrical cradles that secure our air plants while maintaining proper airflow.
Basic Macrame Knots and Patterns
Lark’s Head Knot serves as our foundation for attaching cords to wooden dowels or rings. We fold each cord in half, place the loop behind our dowel, then pull both ends through the loop and tighten securely. This knot creates the anchor point for our entire hanger design.
Square Knot forms the decorative body of our macrame hanger through alternating cord patterns. We cross the left cord over the center cords, pass the right cord behind them, then tighten to create flat, stable sections. Repeating this process builds rows that form the plant cradle portion of our hanger.
Gathering Knot finishes our hanger by tying cord ends together neatly at the base. We use this knot to secure all cords in place, creating a stable foundation that holds our air plant safely. This final knot ensures our design maintains its shape while supporting the plant’s weight.
Spiral Knot adds decorative twists by repeating half square knots in the same direction. We create flowing, twisted sections that enhance the visual appeal of our hanger design. This technique works particularly well for longer hangers where we want added visual interest.
Choosing the Right Cord Material
Cotton macrame cord provides the ideal combination of softness, durability, and knotting ease for our air plant hangers. We recommend single strand cotton cords measuring 3.5mm to 4mm thickness, which offer excellent strength while remaining flexible enough for detailed knotwork. This thickness supports our air plants securely without creating overly bulky designs.
Natural materials enhance both sustainability and aesthetics in our macrame projects. We choose FSC certified wooden dowels paired with natural cotton cords to create environmentally responsible plant displays. These eco friendly options maintain the organic feel that complements our air plants perfectly.
Cord quality directly impacts the longevity and appearance of our finished hangers. We avoid very thin or flimsy cords that may stretch or break under the weight of our plants. Premium cotton cords maintain their shape and color over time, ensuring our displays remain beautiful for years.
Sizing Your Macrame Hanger Properly
Cord length typically requires 60 inches or more per strand, depending on our desired hanger height and knot complexity. We calculate extra length for multiple knots and the finished drop distance from our mounting point. Longer cords allow for more decorative elements and accommodate larger air plants.
Cord quantity ranges from 8 to 10 strands attached to our base dowel or ring for optimal stability. We use this number to create balanced cradles that distribute weight evenly across multiple support points. More cords provide additional security for heavier air plant varieties.
Hanger dimensions must accommodate our exact air plant size while maintaining proper airflow around the plant. We design our cradle width to hold plants snugly without restricting their natural growth patterns. The hanging height should position plants at eye level for easy maintenance and optimal visual impact.
| Measurement | Small Air Plants | Medium Air Plants | Large Air Plants |
|---|---|---|---|
| Cord Length | 60 inches | 72 inches | 84 inches |
| Number of Cords | 8 strands | 10 strands | 12 strands |
| Cradle Width | 4-6 inches | 6-8 inches | 8-12 inches |
| Hanging Length | 18-24 inches | 24-30 inches | 30-36 inches |


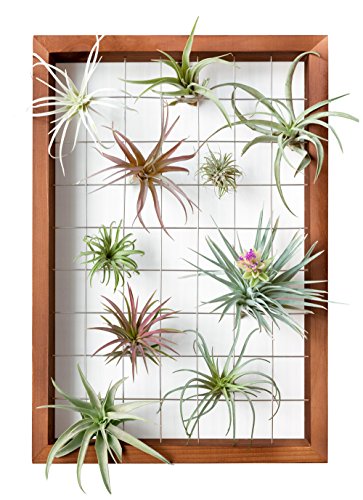
Build Wooden Air Plant Display Frames

Now we’ll explore creating stunning wooden frames that showcase your air plants with rustic charm. These displays combine natural materials with modern design principles for lasting beauty.
Selecting Appropriate Wood Types
Hardwood varieties offer the best foundation for air plant displays. Grapewood, Cholla, Oak, Zebrawood, Ghostwood, and Walnut stand out as top choices for Tillandsia holders due to their durability and natural beauty. These materials resist warping and provide stable mounting surfaces for your plants.
Mopani and Grapevine wood bring exceptional longevity to your displays. Both options feature attractive grain patterns and natural resistance to moisture, making them ideal for humid environments where air plants thrive. Their twisted, organic shapes add visual interest to any hanging arrangement.
Driftwood and log sections create the most authentic appearance. These materials mimic the plants’ native growing conditions while offering unique textures and weathered finishes. Each piece brings its own character to your display, ensuring no two frames look identical.
Choose untreated wood to protect your plants’ health. Avoid chemically treated lumber that could release harmful compounds. Clean wood free from rot or insect damage ensures your frame lasts for years while keeping your air plants safe.
Simple Frame Construction Methods
Start with a basic rectangular frame using wood strips or reclaimed lumber. Cut four pieces to your desired dimensions and join them at corners using wood glue and small finishing nails. This creates a sturdy foundation for your air plant display system.
Insert small nails or tacks halfway along the frame edges. Space them evenly every 2-3 inches to provide anchor points for your twine network. These fasteners should protrude about 1/4 inch from the wood surface for secure twine attachment.
Wrap twine around nails to form a support grid. Create crisscross patterns or simple horizontal lines where air plants will rest. This netting system distributes weight evenly and allows for easy plant repositioning as they grow.
Add driftwood or cork pieces using twine for extra mounting options. These elements provide natural perches for larger air plants while adding textural contrast to your frame. Secure them tightly to prevent shifting once plants are attached.
Mount air plants directly using wire, twine, or hot glue for permanent installations. This method works best with wooden plaques or log sections where you want plants fixed in exact positions. Choose attachment methods based on your desired flexibility for future changes.
Finishing and Sealing Techniques
Sand the wood lightly to eliminate rough edges and splinters. Use 220-grit sandpaper to smooth surfaces while maintaining the wood’s natural texture. This step prevents damage to delicate air plant leaves during handling.
Apply natural oil finishes like tung oil or linseed oil for protection. These treatments penetrate wood fibers to prevent moisture damage without creating harmful surface films. They enhance grain patterns while maintaining the wood’s breathability.
Avoid heavy varnishes or paints that could harm your plants. Chemical off-gassing from synthetic finishes can damage sensitive Tillandsia species. Stick to natural, plant-safe products that won’t interfere with air circulation around your plants.
Allow finishes to cure completely before adding plants. Wait at least 48 hours after application to ensure all odors dissipate and the surface is safe for plant contact. Test with a small air plant first if you’re unsure about finish compatibility.
Consider weather-resistant treatments for outdoor displays. Marine-grade spar varnish or exterior wood stain protects frames exposed to rain and UV rays. These products maintain wood integrity while preserving your investment in both frame and plants.

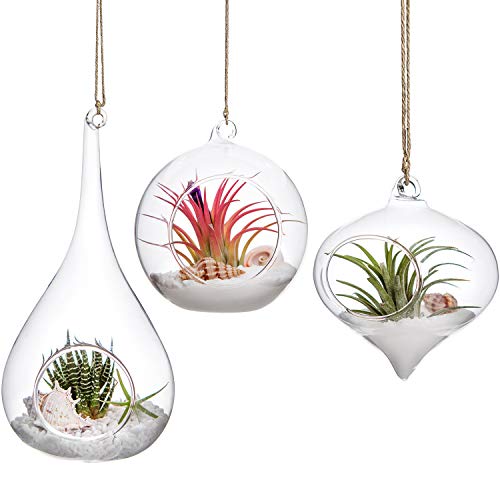
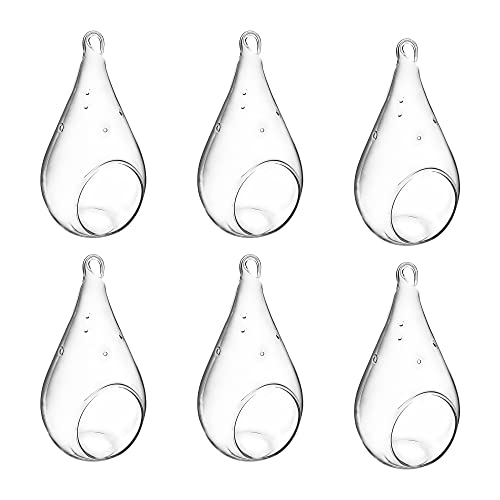
Craft Glass Terrarium Hangers

Glass terrariums offer an elegant way to display air plants while creating stunning focal points throughout your home. Clear glass containers showcase the natural beauty of Tillandsia species while protecting them from dust and debris.
Choosing the Right Glass Containers
Select containers with openings wide enough for your air plants to fit comfortably. Round globes and geometric prisms provide excellent balance when suspended and create visually appealing displays that complement various decor styles from modern to rustic. Clear glass remains the preferred choice since it allows essential light to reach your air plants for photosynthesis while maintaining visibility of the plant’s intricate details.
Consider the container’s interior space when making your selection. You’ll need adequate room for decorative elements like sand, stones, or sphagnum moss that enhance the terrarium’s aesthetic appeal. The container’s shape significantly impacts hanging stability, so we recommend choosing designs with balanced proportions that won’t tip or spin excessively when suspended.
Measure your air plants before purchasing containers to ensure proper fit. Small Tillandsia varieties like T. ionantha work well in 4-6 inch globes, while larger species such as T. xerographica require containers with 8-12 inch openings for comfortable placement and future growth accommodation.
Creating Ventilation for Air Circulation
Prioritize containers with open sides or large openings to ensure adequate airflow. Air plants absorb moisture and nutrients through their leaves rather than roots, making excellent air circulation crucial for their survival and growth. Without proper ventilation, trapped moisture can quickly lead to rot and plant death.
Avoid fully enclosed glass containers that restrict natural air movement. We recommend choosing open design terrariums or containers with multiple openings that allow air to flow freely around your plants. Position your glass terrariums where natural air currents occur, such as near windows or in areas with gentle room circulation.
Rotate your terrariums occasionally to ensure all sides of your air plants receive adequate airflow. This simple practice prevents moisture buildup in any particular area and promotes healthy growth patterns throughout the plant’s structure.
Mounting and Suspension Methods
Wrap the neck of glass containers with natural twine to create simple hanging loops. This rustic approach works exceptionally well with mason jars and narrow-necked terrariums, providing a secure attachment point while adding textural interest to your display. Natural hemp rope offers another durable option that develops an attractive patina over time.
Create custom macramé hangers using cotton or hemp cords for a bohemian aesthetic. These handcrafted holders securely cradle glass containers while adding artistic appeal to your hanging arrangements. Basic square knots and spiral patterns provide both functionality and visual interest that complements the organic nature of air plants.
Install ceiling hooks or wall-mounted plant hangers to support your glass terrariums at desired heights. We recommend using heavy-duty hooks rated for at least twice the weight of your filled terrarium to ensure safety and stability. Position hangers where they won’t interfere with daily activities while maximizing the visual impact of your air plant displays.
Combine different suspension heights to create ever-changing groupings throughout your space. Varying the hanging lengths adds depth and visual interest while ensuring each terrarium receives adequate light and air circulation for optimal plant health.
Make Natural Hanging Displays with Driftwood

Driftwood creates stunning rustic backdrops that perfectly complement air plants’ natural beauty. We’ll show you how to transform weathered wood into artistic displays that bring coastal charm to any space.
Preparing and Cleaning Driftwood
Selecting your driftwood starts with finding pieces that showcase interesting shapes and natural holes or crevices. We recommend collecting driftwood from beaches or purchasing it from create stores for the best results. Beach collected pieces often have the most character and unique formations.
Cleaning requires thorough scrubbing with a brush under running water to remove all dirt and debris. We always ensure the wood gets completely dry before use to prevent mold and decay from developing. Natural air drying takes 24-48 hours depending on the wood’s thickness and humidity levels.
Inspecting the wood for structural integrity helps us identify any weak spots that might break under the weight of plants. We test each piece by gently applying pressure to joints and thin sections. Solid driftwood should feel sturdy without any soft or crumbling areas.
Drilling and Attachment Techniques
Drilling holes requires using a spade bit that matches your air plant sizes for proper fitting. We create openings that allow plants to nestle securely without being too tight or too loose. The number of holes depends on how many plants you want to showcase in your display.
Attachment methods include using mild adhesive like glue gun applications sparingly on plant bases. We apply small amounts only where necessary to avoid damaging the air plants’ natural root systems. Hot glue works well because it dries quickly and holds firmly without being permanent.
Moss wrapping provides a natural alternative that doesn’t require any adhesives. We wrap sphagnum moss around air plant bases and tuck them into driftwood crevices for secure placement. This method looks more organic and allows easy removal for plant care.
Hanging hardware installation involves adding hooks or ties to enable wall or ceiling mounting. We use twine, rope, or wire depending on the display’s weight and desired aesthetic. Natural materials like jute rope complement the rustic driftwood appearance perfectly.
Balancing Multiple Air Plants
Visual balance requires considering both plant placement and weight distribution across the driftwood. We space plants evenly along the wood while mixing different sizes and shapes for ever-changing appeal. Larger plants work well as focal points with smaller varieties filling in gaps.
Weight distribution becomes crucial when hanging displays to prevent tilting or swaying. We test the balance by holding the driftwood at different points before final installation. Adjusting plant positions helps achieve stable hanging that won’t shift over time.
Moss integration helps unify arrangements while providing additional texture and security. We use moss to fill gaps between plants and create cohesive flow throughout the display. The moss also helps maintain humidity levels that air plants love.
Height variation adds visual interest when multiple plants occupy the same piece of driftwood. We position taller plants toward the back and shorter ones in front for layered depth. This arrangement ensures all plants receive adequate light and air circulation.


Select the Perfect Location for Your Hanging Air Plants

Once we’ve crafted our beautiful displays, we need to position them strategically for optimal plant health and visual impact. The right location ensures our air plants thrive while creating stunning focal points throughout our living spaces.
Light Requirements and Positioning
We should place our hanging air plants in bright, indirect sunlight to promote healthy growth without causing damage. Direct harsh sun rays can scorch these delicate plants, so we need to avoid southern facing windows during peak daylight hours. Ideal positioning includes spots near east or west facing windows where filtered light creates perfect growing conditions.
Most Tillandsia species require ample indirect light to flourish, though some varieties tolerate lower light environments better than others. We can adjust our placement based on the exact species we’ve chosen for our displays. Well lit rooms away from direct sunbeams work exceptionally well for maintaining consistent lighting conditions.
Air Circulation Considerations
Good airflow remains crucial since air plants absorb moisture and nutrients directly through their leaves rather than traditional root systems. We must hang our displays in open spaces where air can circulate freely around each plant. Stagnant areas like enclosed corners or cramped spots prevent proper respiration and can lead to harmful rot conditions.
We should avoid positioning our hanging gardens in areas with poor ventilation such as closed cabinets or tight corners between furniture pieces. Open living areas, near doorways, or spaces with natural air movement provide the best circulation for healthy plant development.
Height and Accessibility Factors
We need to hang our air plants at heights that allow easy access for regular maintenance and watering routines. Air plants typically require soaking or misting 1 to 3 times weekly, so accessible positioning simplifies our care schedule significantly. Heights between 5 to 7 feet work well for most ceiling installations while remaining within comfortable reach.
We must also consider the mature size of our plants and ensure our hanging supports can handle increased weight as they grow. Strong ceiling hooks or wall mounted brackets prevent accidents and plant damage over time. Positioning displays where we can easily remove them for thorough soaking ensures our air plants receive proper hydration without creating water damage to floors or furniture below.


Install and Secure Your Hanging Air Plant Displays

Once you’ve crafted your beautiful hanging air plant displays, proper installation ensures they’ll stay secure while maintaining easy access for care. We’ll guide you through the most effective mounting methods and safety considerations to create stunning displays that last.
Ceiling Mount Options and Hardware
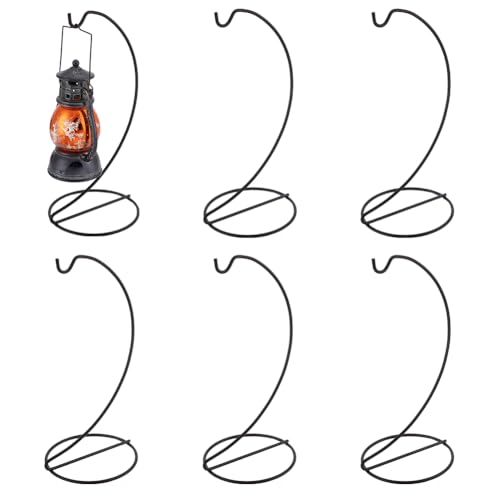
Wire plant hangers offer an economical solution for ceiling installations, especially when displaying larger air plants. We recommend spray painting these hangers to match your decor and crimping the bottom sections to hold plants securely without slipping.
Aluminum create wire provides exceptional versatility for ceiling mounting projects. This bendable material comes in various diameters and colors, allowing you to wrap it around air plants to create custom hooks for hanging. We love that aluminum wire is completely reusable, making it perfect for adjusting displays as your plants grow.
Ceiling Mount Hardware Requirements:
| Mount Type | Weight Capacity | Recommended Use |
|---|---|---|
| Wire Plant Hangers | 2-5 lbs | Large air plants, multiple arrangements |
| Aluminum Create Wire | 1-3 lbs | Individual plants, lightweight displays |
| Heavy-duty Ceiling Hooks | 5-10 lbs | Wood-mounted installations, fountain displays |
Wall Mounting Alternatives
Macramé wall hangers have become incredibly popular for air plant displays, offering stylish options in various designs and lengths. These hangers provide excellent visual appeal while keeping plants easily accessible for regular maintenance.
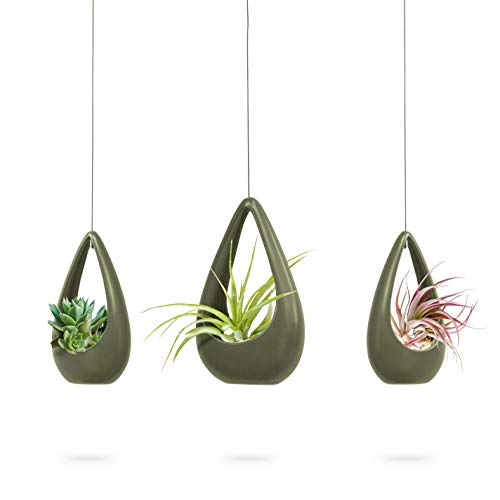
Air plant cradles made from terracotta or ceramic feature center holes that hold plants securely against wall surfaces. We find these cradles particularly effective for creating organized, gallery-style arrangements that showcase multiple plants beautifully.
Moss ball displays using the kokedama style create stunning hanging arrangements when wrapped with fishing line. Plants can be permanently attached to moss using flower glue, though this limits your ability to easily remove them for soaking.
DIY wall fountains using PVC or copper elbows attached to wooden boards offer unique display opportunities. Plants sit naturally in pipe openings without requiring glue, allowing easy removal for watering while creating an eye-catching focal point.
Direct wood mounting provides the simplest wall installation method, combining natural textures with plant displays in just a few steps. This approach works exceptionally well for rustic or modern farmhouse decor styles.
Safety and Weight Distribution Tips
Wire thickness and length must adequately support your plant’s weight plus any additional materials like moss or decorative holders. We always test our wire installations with slightly more weight than the actual display to ensure long-term security.
Weight distribution becomes critical when hanging multiple plants from single mounting points. Even distribution prevents strain on ceiling hooks or wall anchors that could lead to dangerous failures over time.
Proper mounting hardware selection depends entirely on your wall or ceiling material. Drywall requires appropriate anchors, while concrete or wood surfaces need different fastening approaches to ensure secure installation.
Heavy arrangements including wood-mounted installations or fountain displays require careful measurement and leveling before final securing. We recommend dry-fitting all components to ensure stability and visual symmetry before permanent installation.
Avoid using glue or tight bindings that damage roots or prevent proper soaking and air circulation. Air plants require adequate airflow and hydration access, so our securing methods must balance stability with plant health requirements.
Maintain Your Hanging Air Plants DIY Setup

Once you’ve created your stunning hanging displays, proper maintenance ensures your air plants thrive in their elevated positions. We’ll guide you through essential care practices that keep your DIY creations looking vibrant year-round.
Watering Techniques for Hanging Plants
Soaking remains the most effective watering method for hanging air plants, requiring weekly attention for optimal health. Smaller Tillandsia species need approximately 30 minutes of submersion, while larger specimens benefit from 2 to 4 hours of soaking time. Remove your plants from their hanging displays during this process to ensure complete water absorption.
Shake off excess water immediately after soaking to prevent mold and rot development in your hanging arrangements. Gentle movement helps dislodge trapped moisture from leaf crevices before returning plants to their displays. Position plants upside down temporarily if needed to encourage proper drainage.
Misting provides supplemental hydration between soaking sessions, particularly beneficial in dry indoor environments. Apply 2 to 3 misting sessions weekly directly to hanging plants or after temporary removal from displays. Focus spray patterns on leaf surfaces while avoiding oversaturation of mounting materials.
Avoid standing water accumulation outside designated soaking periods to prevent root rot in your hanging specimens. Never allow water to pool in glass containers or decorative holders during regular maintenance. Check drainage capabilities of your hanging systems regularly to ensure proper water flow.
Regular Cleaning and Grooming
Remove dead or dried leaves consistently to maintain plant health and visual appeal in hanging displays. Brown or crispy foliage should be gently pulled away from the base using your fingers rather than cutting tools. Inspect each plant weekly during watering routines for signs of deterioration.
Clean mounting materials periodically to prevent dust and mold accumulation that affects plant health. Wipe down glass containers, macramé cords, and wire holders using damp cloths every few weeks. Replace natural materials like moss or twine if they show signs of decay or excessive wear.
Dust accumulation on leaves reduces photosynthesis efficiency in hanging air plants, requiring gentle cleaning attention. Use soft brushes or cotton swabs to remove debris from textured leaf surfaces during regular maintenance sessions. Rinse plants thoroughly during soaking periods to eliminate stubborn dust particles.
Trim brown leaf tips carefully using clean scissors to maintain aesthetic appeal without damaging healthy tissue. Cut at angles that follow natural leaf shapes to avoid creating harsh, unnatural edges. Monitor trimmed areas for signs of stress or further browning after maintenance procedures.
Seasonal Care Adjustments
Light requirements change seasonally for hanging air plants, necessitating position adjustments throughout the year. Move displays closer to windows during shorter winter days while maintaining bright, indirect exposure. Relocate plants away from harsh summer sun that can cause leaf burn in elevated positions.
Temperature fluctuations affect hanging plants more dramatically than ground level specimens due to heat rising patterns. Maintain environments between 60°F to 80°F by moving displays during extreme weather conditions. Monitor indoor heating and cooling effects on plants positioned near vents or windows.
Humidity levels require seasonal modifications to compensate for changing environmental conditions in your home. Increase misting frequency during winter months when indoor heating reduces ambient moisture levels. Reduce watering schedules slightly during humid summer periods to prevent oversaturation issues.
Air circulation needs intensify during seasonal transitions when stagnant conditions promote fungal growth. Ensure adequate spacing between multiple hanging plants to maintain proper airflow around each specimen. Consider using fans or opening windows periodically to improve ventilation in display areas.
Conclusion
We’ve shown you how to transform your living space with stunning hanging air plant displays that require minimal investment and maximum creativity. These versatile projects work beautifully in any home style while providing the satisfaction of crafting something uniquely yours.
Remember that success lies in choosing the right mounting location and maintaining consistent care routines. Your air plants will thrive when given proper light exposure and airflow circulation.
Whether you prefer the rustic charm of driftwood displays or the modern elegance of glass terrariums we’ve covered all the techniques you need. Start with one simple design and gradually expand your collection as your confidence grows.
Your friends and family will be amazed at these professional-looking displays that cost a fraction of store-bought alternatives. The best part? You’ll enjoy years of low-maintenance beauty while adding natural elements to your home décor.
Frequently Asked Questions
What are the best air plant species for hanging displays?
The top choices for hanging displays include Tillandsia xerographica for its dramatic size and striking appearance, Tillandsia usneoides for its elegant cascading effect, and Tillandsia cyanea for vibrant colors. These species are well-suited for vertical gardens and offer different visual appeals to complement various room styles and design preferences.
What materials do I need to create DIY hanging air plant displays?
Essential materials include floral aluminum wire, pliers, wire cutters, square basswood dowels, suede lace, and sharp scissors. Optional decorative elements like embroidery hoops and varied string colors can enhance your displays. You can source these materials from online retailers, local garden centers, and specialty plant suppliers.
How do I create a simple wire hanging holder for air plants?
Use aluminum wire to form secure cradles through basic wire wrapping techniques. Create flexible structures that accommodate plant growth patterns while ensuring proper air circulation. Avoid copper wire for safety reasons, and focus on making the holder adjustable to support your air plant’s natural growth and health requirements.
What are the basic macramé knots needed for air plant hangers?
The essential knots include the Lark’s Head Knot for starting, Square Knot for structure, Gathering Knot for securing, and Spiral Knot for decorative elements. Use cotton macramé cord for durability and aesthetic appeal. Consider sizing requirements based on your air plant’s dimensions to ensure proper fit and airflow.
How do I choose the right glass terrarium for hanging air plants?
Select glass containers with adequate openings for proper airflow and easy plant access. Ensure good ventilation to prevent moisture buildup, which can harm air plants. Consider the container’s weight and choose appropriate mounting hardware. The opening should be large enough for maintenance while providing an attractive display showcase.
Where should I hang my air plants for optimal health?
Place air plants in bright, indirect sunlight while avoiding harsh direct sun rays. Ensure good airflow by hanging in open spaces to prevent rot. Consider height and accessibility for easy maintenance and watering. The location should provide consistent environmental conditions without extreme temperature fluctuations.
How do I properly install hanging air plant displays?
Use secure mounting methods appropriate for your display’s weight, including heavy-duty ceiling hooks, wire plant hangers, or wall-mounted brackets. Ensure proper weight distribution and follow manufacturer guidelines for installation. Consider both ceiling and wall mounting options based on your space and design preferences for long-term stability.
What maintenance do hanging air plants require?
Regular maintenance includes proper watering through soaking and misting techniques, cleaning to remove dust and dead leaves, and seasonal care adjustments. Modify light exposure, temperature, and humidity based on changing conditions. Consistent grooming maintains both plant health and visual appeal of your hanging displays.