Growing plants at home isn’t just a trend—it’s a rewarding journey that transforms your living space while boosting your well-being. Whether you’re dealing with a tiny apartment or have acres of backyard space, we’ve discovered that anyone can successfully cultivate thriving plants with the right knowledge and approach.
We understand the frustration of watching beloved plants wither even though your best efforts. That’s why we’ve compiled proven strategies that work for beginners and seasoned gardeners alike. From selecting the perfect plants for your environment to mastering watering techniques that prevent root rot, these methods will set you up for success.
Ready to create your own green oasis? We’ll walk you through everything you need to know to grow healthy, vibrant plants that flourish in your home environment. Let’s turn your space into the lush sanctuary you’ve always dreamed of having.
Choose the Right Plants for Your Home Environment
Selecting plants that thrive in your exact home conditions sets the foundation for gardening success. We’ll explore three key factors that determine which plants will flourish in your living space.
Consider Your Light Conditions
Natural light availability determines which plants we can successfully grow indoors. Most homes offer varying light levels throughout different rooms and seasons.
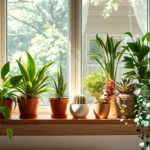
South-facing windows receive the most intense sunlight for 6-8 hours daily, making them perfect for light-loving plants like succulents, cacti, and flowering varieties such as geraniums. East-facing windows provide gentler morning sun for 4-6 hours, ideal for moderate-light plants including pothos, snake plants, and peace lilies. West-facing windows deliver intense afternoon sun that works well for herbs like basil and rosemary.
North-facing windows offer the least natural light, typically 2-4 hours of indirect sunlight daily. We recommend low-light champions like ZZ plants, Chinese evergreens, and cast iron plants for these locations.
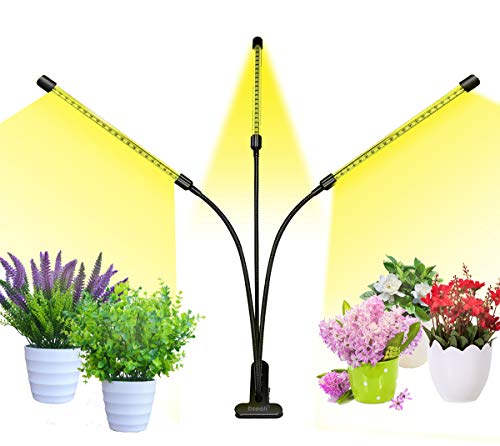
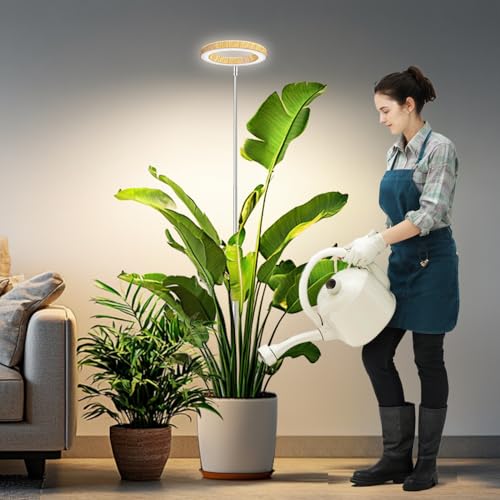
Artificial lighting expands our plant options when natural light is limited. LED grow lights can supplement or replace natural sunlight, allowing us to grow almost any plant regardless of window placement.
Evaluate Your Available Space
Physical space constraints shape our plant selection more than we initially realize. Small apartments require different strategies than spacious homes with multiple rooms.
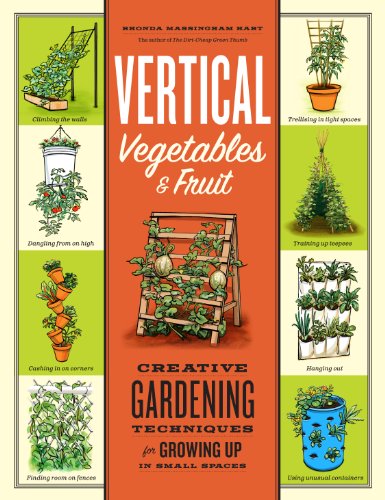
Vertical growing maximizes limited floor space through wall-mounted planters, hanging baskets, and plant stands. Trailing plants like heartleaf philodendrons and string of pearls work perfectly for elevated displays. Compact varieties such as air plants and small succulents fit on shelves and windowsills without overwhelming tight quarters.
Large spaces accommodate bigger statement plants including fiddle leaf figs, monstera deliciosas, and rubber trees. We can create dramatic focal points with floor plants that reach 6-8 feet tall. Multiple plant groupings become possible when we have adequate room to arrange different heights and textures together.
Ceiling height affects our plant choices significantly. Standard 8-foot ceilings limit us to plants under 6 feet tall, while vaulted ceilings allow for towering specimens that create impressive indoor landscapes.
Match Plants to Your Experience Level
Beginner gardeners succeed best with forgiving plants that tolerate occasional neglect. We recommend starting with resilient varieties that bounce back from watering mistakes and inconsistent care.
Snake plants, pothos, and spider plants rank among the most forgiving houseplants for newcomers. These varieties survive weeks without water and adapt to various light conditions. ZZ plants and peace lilies signal their watering needs clearly, making it easier for beginners to learn proper care timing.
Intermediate gardeners can handle plants requiring more exact care routines. Fiddle leaf figs, monstera plants, and most flowering varieties fall into this category. These plants need consistent watering schedules and exact humidity levels but reward attentive care with impressive growth.
Advanced plant parents often seek challenging varieties like orchids, carnivorous plants, and rare tropical species. We suggest mastering easier plants first before investing in these demanding specimens that require precise environmental controls and specialized knowledge.


Set Up the Perfect Growing Space

Now that we’ve selected the right plants for our home environment, we need to create the optimal growing conditions to ensure they thrive.
Select Ideal Locations for Different Plant Types
Position high light plants near south-facing windows where they’ll receive the brightest natural sunlight throughout the day. Cacti, succulents, and sun-loving herbs like basil and thyme perform exceptionally well in these prime spots with 6-8 hours of direct sunlight.
Place medium light plants in areas with bright, indirect light such as east or west-facing windows. These locations provide gentle morning or afternoon sun without the intensity that could scorch delicate foliage.
Locate low light plants in rooms with filtered sunlight or areas that receive ambient light throughout the day. North-facing windows and interior spaces work perfectly for plants like pothos, snake plants, and peace lilies.
Install grow lights in windowless rooms or areas with insufficient natural light to expand our growing options. LED grow lights can supplement daylight and support plant growth in basements, bathrooms, or interior offices.
Group herbs together on kitchen windowsills where we can easily access them for cooking. Mint, parsley, sage, and thyme create a convenient culinary garden within arm’s reach of our food preparation area.
Ensure Proper Ventilation and Air Circulation
Maintain airflow around each plant by avoiding overcrowding and leaving adequate space between containers. Proper air circulation prevents fungal diseases and strengthens plant stems through gentle movement.
Open windows regularly when weather permits to provide fresh air and prevent stagnant growing conditions. Natural breezes help regulate humidity levels and bring outdoor freshness to our indoor garden.
Use fans strategically to improve air circulation in rooms with limited ventilation. Small desk fans or ceiling fans on low settings create gentle airflow without creating harsh drafts that could stress plants.
Monitor temperature stability by keeping plants away from heating vents, air conditioning units, and drafty areas. Consistent temperatures between 65-75°F create optimal growing conditions that mimic plants’ natural environments.
Avoid clustering plants in corners or against walls where air movement becomes restricted. Stagnant air pockets encourage pest problems and disease development that can quickly spread throughout our collection.
Organize Your Indoor Garden Layout
Arrange plants by height with taller specimens in the back and shorter ones in front to ensure all plants receive adequate light exposure. This tiered approach maximizes our growing space while preventing light competition.
Install vertical supports like stakes, trellises, or moss poles for climbing and vining plants. These structures help plants grow upward rather than outward, conserving valuable floor space in compact living areas.
Group plants with similar needs together to streamline our watering and maintenance routines. Succulents, tropical plants, and herbs each have distinct care requirements that we can address more efficiently when clustered.
Rotate plants weekly to ensure even light distribution and prevent lopsided growth patterns. This simple practice keeps plants balanced and encourages uniform development on all sides.
Clean leaves regularly with a damp cloth to remove dust buildup that blocks light absorption and clogs leaf pores. Clear foliage allows plants to photosynthesize efficiently and maintain healthy respiration.
Use proper drainage containers with saucers to protect furniture and flooring from water damage. Quality pots with drainage holes paired with high-quality potting soil create the foundation for healthy root development.

Provide Adequate Lighting for Indoor Plants

Now that we’ve established our perfect growing space, we need to master the most critical aspect of indoor gardening: providing proper lighting for our plants to thrive.
Understand Natural Light Requirements
Different plants have varying natural light needs based on their native environments. High-light plants require bright, direct sunlight for several hours daily, while medium-light varieties prefer indirect sunlight, and low-light plants thrive in shaded conditions.
Matching our plant selection to available natural light becomes crucial for success. We should place sun-loving plants near south-facing windows where they’ll receive maximum direct sunlight throughout the day. North-facing windows work perfectly for shade-tolerant varieties that prefer gentle, indirect illumination.
Understanding light intensity helps us make better placement decisions. South-facing windows provide the brightest light, east and west-facing windows offer moderate morning or evening sun, while north-facing windows deliver consistent but lower light levels.
Use Artificial Grow Lights When Needed
Artificial grow lights become essential when natural light proves insufficient, particularly in rooms without adequate windows or during darker winter months. LED grow lights offer the most energy-efficient solution while providing the exact light spectrum our plants need for photosynthesis and healthy growth.
Positioning grow lights correctly ensures optimal plant development. We should place LED lights 12-24 inches above our plants, depending on the light intensity and plant requirements. Most indoor plants benefit from 12-16 hours of artificial light daily when natural light is limited.
Choosing the right grow light spectrum supports different growth stages. Full-spectrum LED lights work well for most houseplants, while blue light promotes leafy growth and red light encourages flowering and fruiting.
Position Plants for Maximum Light Exposure
Strategic plant placement maximizes our available light sources throughout the home. We should position light-hungry plants as close to windows as possible, ensuring they receive direct or bright indirect sunlight for most of the day.
Rotating our plants regularly prevents uneven growth and ensures all sides receive adequate light exposure. Quarter turns every week help maintain balanced, symmetrical plant development rather than creating lopsided growth patterns.
Avoiding frequent relocations allows our plants to adapt properly to their lighting conditions. Plants need time to adjust their leaf orientation and internal processes to new light environments, so we should resist moving them too often once we’ve found suitable spots.


Master the Art of Proper Watering

After establishing the perfect environment and lighting conditions, we need to tackle the most crucial skill in home plant care. Watering properly makes the difference between thriving plants and failed gardening attempts.
Learn When and How Much to Water
Touch the soil regularly to determine watering needs rather than following rigid schedules. Most houseplants thrive when we water them after the top 1 to 2 inches of soil feels dry to our fingertips. This simple touch test prevents both overwatering and underwatering problems that stress plants.
Water thoroughly each time to ensure the entire root zone receives adequate moisture. Pour water slowly until it begins draining from the bottom holes, indicating complete soil saturation. This deep watering method encourages healthy root development throughout the container.
Remove excess water from saucers within 45 minutes to prevent root rot. Standing water creates anaerobic conditions that damage plant roots and invite harmful bacteria. Empty drainage trays promptly after each watering session.
Adjust watering frequency based on seasonal changes in your home environment. Plants typically need more frequent watering during summer months when soil dries faster due to increased temperatures and longer daylight hours. Reduce watering during cooler months when plant growth slows and soil retains moisture longer.
Choose the Right Watering Tools and Techniques
Top watering with a watering can provides the most control over water distribution. Pour water slowly around the plant’s base rather than directly onto leaves, allowing soil to absorb moisture evenly. This method works well for most houseplants and prevents leaf damage from water droplets.
Create DIY self-watering systems to maintain consistent soil moisture levels when you’re away. Wicking systems use cotton or nylon rope to transfer water gradually from a reservoir container to your plant’s soil. Insert one end of the rope into a water container and bury the other end in the potting soil.
Build simple drip irrigation systems using recycled plastic bottles for extended plant care. Fill clean bottles with water, poke small holes in the caps, and invert them into the soil near plant roots. Water slowly releases as the soil dries, providing steady moisture without oversaturation.
Avoid Common Watering Mistakes
Check soil moisture before every watering session instead of following predetermined schedules. Fixed watering routines ignore environmental factors like humidity, temperature, and seasonal changes that affect plant water needs. Each plant’s requirements vary based on current growing conditions.
Never allow plants to sit in standing water for extended periods. Waterlogged conditions suffocate roots and create perfect breeding grounds for fungal diseases. Always use containers with drainage holes and remove excess water from collection trays.
Water the soil directly rather than spraying plant leaves unnecessarily. Wet foliage encourages fungal growth and disease development, especially in areas with poor air circulation. Focus water application on the root zone where plants actually absorb moisture.
Monitor watering amounts carefully to avoid disrupting plant health through extremes. Too much water drowns roots and prevents nutrient uptake, while too little water causes wilting and stunted growth. Consistent moderate watering promotes steady plant development and resilience.
Select the Best Soil and Containers

Now that we’ve mastered watering techniques, let’s focus on the foundation of successful plant growth: selecting quality soil and suitable containers.
Pick Appropriate Potting Mix for Each Plant Type
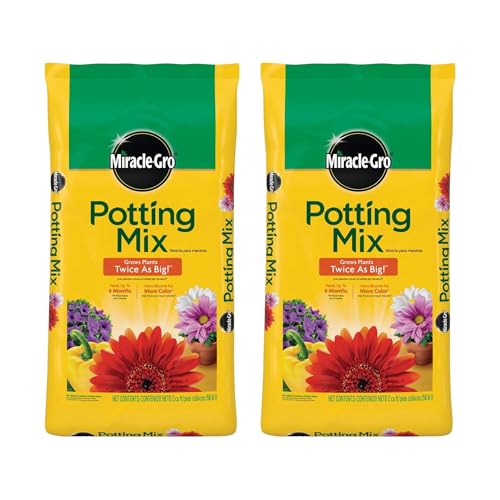
Different plants thrive in exact soil conditions that match their natural habitats. Succulents and cacti prefer sandy, well-draining soil that prevents moisture retention, while herbs and leafy greens flourish in nutrient-rich, moisture-retentive mixes. We recommend using high-quality potting mix designed for indoor plants rather than dense garden soil, which often contains pests and lacks proper drainage.
Standard potting soil works perfectly for popular herbs like basil, mint, parsley, sage, and thyme, as long as it provides good drainage. Tailoring your soil choice to each plant’s exact needs creates the optimal growing environment they require to flourish indoors.
Choose Containers with Proper Drainage
Proper drainage prevents waterlogging and root rot, two of the most common issues in indoor gardening. We always ensure our pots have adequate drainage holes that allow excess water to escape freely. Container size matters significantly for healthy root development, so we choose pots that provide enough room for growth while avoiding frequent repotting.
Adding a layer of gravel at the bottom can help with drainage when holes aren’t present, though this method proves less effective than proper drainage holes. Selecting containers with built-in drainage systems gives our plants the best chance for long-term health and vitality.
Know When to Repot Your Plants
Plants signal when they’ve outgrown their current containers through several clear indicators. Root growth through drainage holes, significantly slowed development, or soil that dries out extremely quickly all suggest it’s time for a larger home. We typically repot our plants every 1-2 years, depending on the species and individual growth rate.
Root-bound plants show restricted growth patterns that limit their potential, making timely repotting essential for continued health. Watching for these signs helps us provide our plants with adequate space before they become stressed or stunted in their development.


Maintain Optimal Temperature and Humidity

Now that we’ve covered watering and soil selection, let’s focus on creating the perfect climate conditions for our indoor plants to thrive.
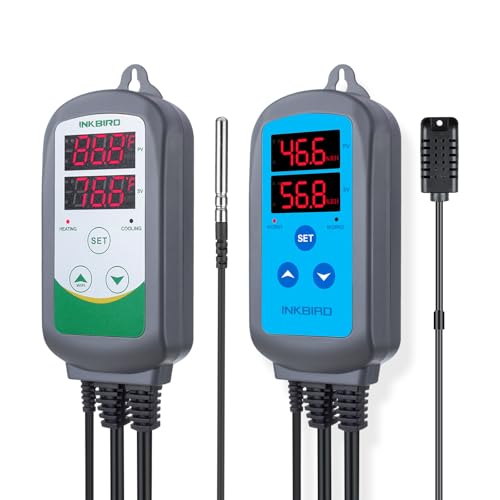
Monitor Indoor Climate Conditions
Track temperature and humidity levels consistently using a thermometer and hygrometer to ensure our plants receive optimal growing conditions. Most indoor foliage plants flourish at daytime temperatures between 70°F and 80°F, while nighttime temperatures should range from 60°F to 68°F for healthy growth.
Position plants away from heat sources like radiators, air conditioners, or drafty windows to prevent sudden temperature fluctuations that can stress our green companions. Extreme temperatures above 78°F or below 59°F can significantly harm plant health, causing reduced growth or making them vulnerable to diseases like mold.
Group plants together naturally to increase humidity in their immediate environment, creating a beneficial microclimate that supports healthy development. This simple technique helps maintain the ideal relative humidity range of 60% to 70% that most adult indoor plants require.
Adjust Temperature for Different Plant Needs
Match day and night temperature ranges to exact plant species for optimal growth results. Cool plants tolerate temperatures between 40°F and 50°F, intermediate varieties prefer 60°F to 75°F, and warm plants thrive at 75°F and above.
Lower nighttime temperatures by 10 to 15°F compared to daytime levels to help plants recover and promote better flowering. Flowering plants particularly benefit from slightly cooler night temperatures around 55°F to 60°F, which enhances flower longevity and color intensity.
Create temperature zones throughout our homes by utilizing different rooms or areas that naturally maintain varying temperature ranges suitable for different plant categories.
Increase Humidity for Tropical Plants
Use humidifiers or water filled trays with pebbles beneath plant pots to boost humidity levels for tropical species that require up to 90% relative humidity. This method provides consistent moisture without creating soggy soil conditions.
Mist tropical plants carefully using tepid water early in the day to allow leaves sufficient time to dry and prevent fungal growth. We should avoid misting fuzzy leaved plants like African violets, as water droplets can damage their delicate foliage.
Monitor humidity levels closely since low humidity causes excessive water loss leading to plant dehydration, while excessive moisture may foster fungal issues that can harm our tropical plants.
Feed Your Plants with Proper Nutrition

We can’t achieve thriving indoor plants without addressing their nutritional needs. Proper feeding ensures our plants receive essential nutrients to flourish in our homes.
Understand Basic Plant Fertilizer Requirements
We need to recognize that plants require both macronutrients and micronutrients for optimal growth. Macronutrients include nitrogen (N), phosphorus (P), and potassium (K), while micronutrients cover iron and magnesium. Most indoor plants benefit from a general-purpose, balanced fertilizer that supplies these essential nutrients.
Fertilizer Type Selection
- Choose fertilizers specifically labeled for houseplants or your exact plant variety like herbs or succulents
- Select from slow-release pellets, liquid fertilizers, or organic options such as compost teas based on your preference
- Consider liquid fertilizers for easy dilution during regular watering sessions
Nutrient Ratio Understanding
- Look for balanced fertilizers with equal parts N-P-K or slightly varied ratios depending on plant type
- Focus on higher nitrogen content for leafy plants that need abundant foliage growth
- Prioritize phosphorus-rich fertilizers for flowering plants to encourage bloom production
- Apply granular fertilizers by mixing them directly into the soil during repotting
Create a Regular Feeding Schedule
We must establish consistent feeding intervals to maintain proper nutrient levels in our plants. Feed indoor plants approximately every 4-6 weeks during the growing season from spring through summer. Winter feeding should be reduced or paused entirely as plant growth naturally slows during colder months.
Feeding Best Practices
- Follow label instructions carefully for proper concentration to avoid over-fertilizing
- Keep a simple calendar or set phone reminders for feeding intervals
- Maintain consistency in feeding schedules to help plants establish healthy growth patterns
- Adjust feeding frequency based on individual plant responses and growth rates
Recognize Signs of Nutrient Deficiency
We can identify exact nutrient deficiencies by observing our plants’ physical symptoms. Understanding these visual cues helps us address problems before they become severe.
| Nutrient Deficiency | Primary Symptoms | Additional Signs |
|---|---|---|
| Nitrogen | Yellowing older leaves | Stunted overall growth |
| Phosphorus | Dark green or purplish leaf coloration | Poor flowering performance |
| Potassium | Browning leaf edges and tips | Weakened plant structure |
| Iron | Yellowing between leaf veins | Especially visible in new leaves |
- Adjust fertilizer type or increase feeding frequency when symptoms appear
- Check soil pH levels since nutrient uptake depends on proper pH balance
- Monitor plant recovery over several weeks after making fertilizer adjustments
- Consider switching to specialized fertilizers if general-purpose options aren’t addressing exact deficiencies


Prevent and Treat Common Plant Problems

Even with excellent care, our indoor plants can face various challenges that require prompt attention and effective answers.
Identify Common Pests and Diseases
Spider mites create fine webbing on leaves and cause yellowing or stippling damage to plant surfaces. These tiny pests thrive in dry conditions and multiply rapidly when humidity levels drop below optimal ranges.
Aphids cluster on new growth and leaf undersides, appearing as small green, black, or white insects that suck plant juices. We can spot them easily by checking for sticky honeydew residue on leaves and stems.
Mealybugs look like small cotton balls attached to stems and leaf joints, leaving behind white, waxy secretions. They weaken plants by feeding on sap and can spread quickly between closely positioned plants.
Fungus gnats appear as small flying insects around soil surfaces, with their larvae feeding on organic matter in potting mix. Adult gnats indicate overly moist soil conditions that create ideal breeding environments.
Root rot manifests through mushy, dark roots and yellowing leaves that eventually drop from the plant. This fungal disease develops when soil remains waterlogged for extended periods without proper drainage.
Powdery mildew creates white, powdery patches on leaf surfaces and stems, typically appearing in humid conditions with poor air circulation. Plants affected by this fungal issue often show stunted growth and leaf distortion.
Leaf spots present as brown, black, or yellow circular marks on foliage, usually caused by bacterial or fungal infections. These spots can spread rapidly when leaves remain wet for too long or when plants lack adequate airflow.
Carry out Natural Prevention Methods
Maintain good airflow around all plants by positioning them with adequate spacing and using fans to circulate air. Proper ventilation reduces fungal issues and creates an environment that discourages pest establishment.
Apply neem oil as a natural pesticide by mixing it with water according to package directions and spraying affected areas. This organic solution controls multiple pests without introducing harsh chemicals into our home environment.
Use insecticidal soap to treat soft bodied insects like aphids and mealybugs by coating them directly with the solution. We can make our own by mixing mild dish soap with water or purchase commercial formulations designed for plant care.
Keep plants clean by gently wiping leaves with a damp cloth to remove dust, debris, and potential pest eggs. Regular cleaning also improves photosynthesis and helps us spot problems before they become serious infestations.
Avoid overwatering by checking soil moisture levels before adding water and ensuring containers have proper drainage holes. Excess moisture creates conditions that promote root rot and attract fungus gnats to our indoor garden.
Quarantine new plants for 2 to 3 weeks before introducing them to our existing collection, monitoring them for signs of pests or diseases. This practice prevents problems from spreading to healthy plants already established in our home.
Know When to Seek Professional Help
Persistent pest problems that continue even though multiple natural treatment attempts require expert diagnosis and targeted answers. Local nurseries and extension services can identify exact pest species and recommend appropriate intervention strategies.
Severe plant stress including prolonged wilting, extensive leaf loss, or visible root rot indicates serious underlying issues. Professional plant doctors can assess whether plants can recover or need replacement to prevent problems from affecting nearby specimens.
Unknown symptoms such as unusual leaf patterns, strange growths, or rapid plant decline warrant professional evaluation. Extension services and certified nurseries have experience diagnosing rare conditions that we might not recognize through standard home gardening resources.
Repeated treatment failures suggest that our current approach may not address the root cause of plant problems. Professional consultations can reveal environmental factors or care practices that contribute to ongoing issues in our indoor garden.


Prune and Maintain Your Indoor Garden

Regular maintenance keeps our indoor plants healthy and attractive throughout their growing seasons. Proper pruning techniques help us shape our plants while promoting vigorous new growth.
Learn Basic Pruning Techniques
Master the fundamentals of pruning by understanding when and how to trim different plant parts. Sharp, clean scissors or pruning shears work best for most indoor plants like herbs such as basil, mint, and thyme. We should always sterilize our tools between plants to prevent disease transmission.
Timing matters when we prune our indoor garden, with most plants benefiting from trimming during their active growing seasons. Spring and early summer provide ideal conditions for pruning since plants can quickly recover and produce new growth. We can safely remove up to one-third of a plant’s foliage without causing stress.
Different techniques apply to various plant types in our indoor collection. Pinching works well for soft-stemmed herbs and flowering plants, while cutting at a 45-degree angle above leaf nodes encourages branching in woody plants. We should always cut just above a healthy leaf or bud to direct new growth in the desired direction.
Remove Dead or Damaged Plant Parts
Yellowing leaves signal the first sign that we need to remove damaged plant material from our indoor garden. Dead or dying foliage drains energy from healthy parts and creates entry points for pests and diseases. We should check our plants weekly and remove any discolored, wilted, or spotted leaves immediately.
Inspect stems regularly for signs of damage such as brown spots, soft areas, or broken sections. Damaged stems can harbor fungal infections that spread quickly in indoor environments. We need to cut back to healthy, green tissue when removing compromised plant parts.
Disease prevention becomes easier when we maintain clean, healthy plants through regular removal of problematic material. Brown leaf tips, black spots, and musty odors indicate problems that require immediate attention. We should dispose of all removed plant material in the trash rather than composting to prevent reinfection.
Encourage Healthy Growth Patterns
Promote bushier growth by pinching or cutting the growing tips of our indoor plants regularly. This technique prevents legginess in herbs like chives and parsley while encouraging fuller, more attractive plant shapes. We can harvest these pinched tips for cooking while maintaining our plants’ appearance.
Rotate plants weekly to ensure even light exposure and prevent lopsided growth patterns in our indoor garden. Plants naturally lean toward their light source, creating uneven development over time. We should turn each plant a quarter turn during our regular watering routine.
Control plant size through strategic pruning that maintains manageable proportions for indoor spaces. Overgrown plants compete for light and space while becoming more susceptible to pest problems. We can keep our indoor garden thriving by trimming back excessive growth and maintaining proper spacing between plants.


Expand Your Indoor Garden Successfully

Now that we’ve mastered the fundamentals of plant care, we can explore exciting ways to multiply our collection and create an even more vibrant indoor garden. These proven methods will help us grow our plant family while building connections with fellow gardening enthusiasts.
Propagate Plants from Cuttings
Selecting healthy cuttings gives us the best chance of success when we’re ready to expand our collection. We should cut 4 to 6 inch sections from the healthiest stems of our established plants, focusing on vigorous growth areas.
Preparing our cuttings requires removing leaves from the lower portion of each stem to prevent rot. Dipping the cut end in rooting hormone isn’t essential but can encourage faster root development for more challenging plants.
Choosing the right rooting medium depends on our preference and the plant type. We can place cuttings in clean water or moist potting mix, keeping them in a warm, bright location away from direct sunlight that might stress the developing roots.
Maintaining proper care means keeping our rooting medium consistently moist without overwatering. Once we see strong root development, usually within 2 to 6 weeks, we can transplant our new plants into individual pots with quality potting soil.
Start New Plants from Seeds
Using seed starting kits provides optimal germination conditions with planting flats and grow lights that create the perfect environment for new seedlings. These kits eliminate much of the guesswork involved in starting plants from scratch.
Choosing suitable seeds focuses on varieties that thrive indoors, such as herbs like basil, chives, and parsley, or compact vegetables like patio cucumbers and bush beans. We should select seeds specifically labeled for container growing to ensure success.
Following proper planting techniques involves sowing seeds according to package instructions and covering them lightly with soil. Maintaining consistent moisture during germination is crucial, but we must avoid overwatering that can cause seeds to rot.
Supporting seedling development requires maintaining warmth and steady moisture until our plants establish strong roots and develop true leaves. Once seedlings reach this stage, we can transplant them into larger containers with confidence.
Trade Plants with Fellow Gardeners
Connecting with local gardening communities opens doors to plant exchanges that diversify our indoor garden without additional cost. We can join gardening clubs, online plant communities, or social media groups dedicated to plant swapping.
Sharing rare or slow growing plants through trading allows us to access varieties that might be expensive or difficult to find in stores. This approach helps us build relationships while expanding our collection with unique specimens.
Exchanging care knowledge becomes just as valuable as the plants themselves when we connect with other gardeners. These interactions provide us with proven tips, troubleshooting advice, and insights about exact plant varieties we’re considering.
Building lasting relationships through plant trading creates a supportive network of fellow gardeners who share our passion. We can organize regular meetups, seasonal exchanges, or online discussions that enhance our gardening journey and provide ongoing support.


Conclusion
Growing plants at home transforms our living spaces into thriving green sanctuaries that boost our mood and purify our air. We’ve equipped you with the essential knowledge to succeed – from selecting the right plants to mastering care techniques that keep them flourishing.
Remember that every plant parent learns through experience. Don’t be discouraged by initial setbacks – they’re part of the journey toward becoming a confident indoor gardener.
Start small with a few beginner-friendly plants and gradually expand your collection as your skills develop. Your home will soon become the vibrant oasis you’ve always envisioned.
Frequently Asked Questions
What are the key factors to consider when choosing plants for my home?
When selecting plants for your home, focus on three main factors: light conditions, available space, and your experience level. Consider your window orientations – south-facing windows suit high-light plants while north-facing ones work for low-light varieties. Assess your space constraints and consider vertical gardening options. Match plant difficulty to your gardening experience, choosing forgiving varieties if you’re a beginner.
How do I know if my plant needs water?
Check the soil moisture by touching the top 1-2 inches of soil. Water when this layer feels dry to the touch. Avoid following rigid watering schedules and instead rely on soil testing. Water thoroughly until it drains from the bottom, then remove excess water from saucers to prevent root rot. Adjust frequency based on seasonal changes.
What type of soil should I use for my indoor plants?
Choose potting mix based on your specific plant type. Succulents need sandy, well-draining soil, while herbs prefer nutrient-rich mixes. Always use containers with drainage holes to prevent waterlogging. Look for signs that indicate repotting time, such as roots growing through drainage holes or slowed plant development.
How can I provide adequate lighting for my indoor plants?
Match your plant selection to available natural light in your home. Place high-light plants near south-facing windows for direct sunlight, while low-light varieties thrive in shaded areas. Use artificial grow lights when natural light is insufficient. Rotate plants regularly for balanced growth and avoid frequent relocations to help plants adapt.
What’s the ideal temperature and humidity for indoor plants?
Maintain daytime temperatures between 70°F-80°F and nighttime temperatures of 60°F-68°F. Use a thermometer and hygrometer to monitor conditions. Keep plants away from heat sources to avoid temperature stress. Group plants together to increase humidity naturally, or use humidifiers and misting techniques for tropical plants requiring higher humidity levels.
How often should I fertilize my indoor plants?
Create a regular feeding schedule based on your plant’s needs, typically every 2-4 weeks during growing season. Use fertilizers containing both macronutrients (nitrogen, phosphorus, potassium) and micronutrients (iron, magnesium). Watch for signs of nutrient deficiencies like yellowing leaves or stunted growth, and adjust fertilizer type and frequency accordingly.
What are common plant problems and how do I prevent them?
Common issues include spider mites, aphids, mealybugs, and root rot. Prevent problems by maintaining good airflow, keeping plants clean, and avoiding overwatering. Use natural treatments like neem oil and insecticidal soap. Quarantine new plants before adding them to your collection. Seek professional help for persistent issues or severe plant stress.
When and how should I prune my indoor plants?
Prune during spring and early summer using sharp, clean tools. Remove dead, damaged, or diseased parts immediately to prevent spread of problems. Trim strategically to encourage bushier growth and maintain plant shape. Rotate plants regularly to ensure even light exposure. Always clean your pruning tools between plants to prevent disease transmission.
How can I expand my plant collection without spending money?
Try propagation techniques like taking cuttings from healthy plants or starting new plants from seeds using seed starting kits. Connect with local gardening communities for plant trading opportunities. Share knowledge with fellow gardeners and exchange plant varieties. Focus on selecting quality cuttings and maintaining proper care during the rooting process for successful propagation.
What’s the best way to set up my indoor growing space?
Arrange plants by height with taller ones in back and shorter ones in front. Use vertical supports and shelving to maximize space. Group herbs on kitchen windowsills for easy access. Ensure proper ventilation and air circulation throughout your growing area. Place high-light plants near south-facing windows and low-light varieties in shadier spots.