Growing your own plants from cuttings is one of the most rewarding and cost-effective ways to expand your garden. We’ve all admired a friend’s beautiful houseplant or spotted the perfect specimen at a nursery, only to discover we can create identical plants for free using simple propagation techniques.
Plant propagation transforms single stems into thriving new plants – it’s like botanical magic that anyone can master. Whether you’re looking to multiply your favorite pothos, create backups of prized succulents, or start an entire garden from a few parent plants, cutting propagation opens up endless possibilities.
We’ll walk you through proven methods that work for beginners and experienced gardeners alike. From selecting the right cutting materials to creating optimal growing conditions, you’ll discover how to turn one plant into dozens while saving money and sharing your green thumb success with others.
Understanding the Basics of Propagating Plants From Cuttings
Plant propagation from cuttings builds naturally on your existing gardening knowledge and opens doors to endless growing possibilities.
What Is Plant Propagation From Cuttings
Plant propagation from cuttings involves taking a piece of a healthy parent plant and encouraging it to develop its own root system. We remove a stem, leaf, or root section from the original plant and place it in conditions that promote new growth. This asexual reproduction method creates genetically identical clones of the parent plant.
Types of cuttings include softwood cuttings from new spring growth, hardwood cuttings from mature woody stems, and semi-hardwood cuttings from partially matured wood. Leaf cuttings work well for succulents like jade plants and begonias, while root cuttings suit plants such as blackberries and phlox.
Essential components for successful propagation include healthy cutting material, appropriate rooting medium, consistent moisture levels, and proper environmental conditions. Most cuttings need temperatures between 65-75°F and indirect bright light to establish roots effectively.
Benefits of Growing Plants From Cuttings
Cost savings represent the most immediate advantage of cutting propagation, as we can create dozens of new plants from a single parent specimen. Commercial plants that cost $15-30 each become free additions to our garden collection through simple cutting techniques.
Genetic consistency ensures that propagated plants maintain the exact characteristics of their parent, including flower color, growth habits, and disease resistance. We preserve special varieties and heirloom plants that might not come true from seed.
Speed advantages allow us to bypass the lengthy germination and seedling stages that seed propagation requires. Most woody cuttings root within 4-8 weeks, while herbaceous cuttings often show root development in just 2-3 weeks.
Sharing opportunities enable us to exchange favorite plants with fellow gardeners and build community connections through plant swaps. We can multiply rare or special varieties to preserve them across multiple locations.
Success Rates and Timeline Expectations
| Plant Type | Success Rate | Rooting Timeline | Best Season |
|---|---|---|---|
| Herbs (basil, mint) | 90-95% | 1-2 weeks | Spring-Summer |
| Softwood trees | 70-85% | 4-6 weeks | Late Spring |
| Hardwood shrubs | 60-80% | 6-12 weeks | Fall-Winter |
| Succulents | 85-95% | 2-4 weeks | Year-round |
| Houseplants | 75-90% | 2-6 weeks | Spring-Summer |
Beginner-friendly plants like pothos, coleus, and willow achieve success rates above 90% with minimal care requirements. These forgiving species tolerate minor mistakes in watering and environmental conditions while still producing robust root systems.
Challenging specimens such as conifers and some flowering shrubs require more precise timing, hormone treatments, and environmental control to achieve acceptable success rates. We recommend mastering easier plants before attempting these advanced propagation projects.
Timeline factors depend on plant species, cutting type, environmental conditions, and seasonal timing. Warm weather and active growing seasons generally produce faster results, while dormant season propagation requires patience and consistent care over several months.


Selecting the Right Plants for Cutting Propagation

Choosing plants that naturally develop roots from cuttings sets us up for propagation success. We’ll focus on species with distinct nodes and soft stems, as these characteristics make root formation much more predictable.
Best Plants for Beginner Propagators
Pothos leads our beginner-friendly recommendations because roots typically form within 1-2 weeks when placed in water. This fast turnaround keeps new propagators motivated and engaged with quick visible results.
ZZ plants offer excellent learning opportunities even though requiring about one month for root development. Taking cuttings at the stem base provides the best success rates, teaching patience while building confidence.
Swiss Cheese Vine (Monstera adansonii) features clear nodes that make cutting placement straightforward. Using a perlite and water method with this species demonstrates proper rooting medium techniques.
Basil represents ideal herb propagation with its soft stems that root readily in water containers. Minimal care requirements make this perfect for practicing basic cutting techniques.
Gardenias and crape myrtle shrubs expand our propagation skills beyond houseplants into woody specimens. These shrubs work particularly well when we take cuttings during pruning sessions.
Seasonal Timing for Taking Cuttings
Spring and summer provide optimal cutting conditions when plants channel energy into active growth rather than dormancy. We achieve higher success rates by aligning our propagation efforts with natural growth cycles.
Crape myrtle cuttings demonstrate perfect seasonal timing when taken during spring or summer months. This timing ensures the plant’s energy focuses on developing new root systems effectively.
Active growth phases offer the best hormone levels for root development in parent plants. We can identify these periods by observing new leaf emergence and stem elongation.
Identifying Healthy Parent Plants
Vigorous growth indicates ideal parent plant candidates that will produce strong, viable cuttings. We look for plants showing active development with firm, non-woody stems throughout the growing season.
Well-developed nodes serve as critical rooting points where new roots will emerge during propagation. These visible bumps or joints along stems signal prime cutting locations.
Disease-free plants prevent propagation failures that occur when stressed or infected material struggles to develop roots. We avoid parent plants showing signs of pest damage, wilting, or nutrient deficiencies.
Stress-free growing conditions in parent plants translate directly to higher cutting success rates. Plants recovering from drought, temperature extremes, or poor nutrition rarely produce viable propagation material.


Gathering Essential Tools and Materials for Plant Propagation

Success in propagating plants from cuttings starts with having the right equipment ready. We’ll walk you through the essential tools and materials that make the difference between thriving new plants and failed attempts.
Cutting Tools and Sterilization Methods
Sharp pruners or a knife create clean cuts that heal quickly and reduce infection risk. We recommend making cuts just below a leaf node since this location provides the optimal rooting site on stems. Clean cutting tools prevent disease transmission between plants, so sterilizing equipment before each use is crucial.
Rubbing alcohol works as an effective sterilization method for quick cleaning between cuts. Alternatively, we can use a bleach solution made with 1 part bleach to 9 parts water for thorough disinfection. Both methods eliminate harmful bacteria and fungi that could compromise our cutting’s success rate.
Rooting Mediums and Container Options
Well-draining, moist rooting medium creates the perfect environment for root development without causing rot. Soilless mixes like potting soil, perlite, vermiculite, sand, or sphagnum moss all provide excellent drainage while retaining necessary moisture. We avoid overly wet conditions that lead to cutting failure and root decay.
Container selection affects both drainage and space management for our cuttings. Several cuttings can share the same container as long as leaves don’t touch the medium surface, preventing overcrowding and disease spread. Drainage holes in containers prevent water buildup that could damage developing roots.
Rooting Hormones and Growth Enhancers
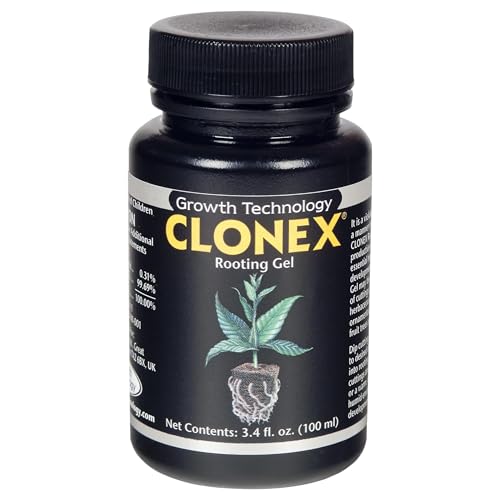
Rooting hormones containing auxins accelerate root formation and improve success rates, especially with woody or difficult plants like citrus. These products often include fungicides that provide additional protection against root rot and other diseases. We dip cuttings briefly into hormones using a separate container to avoid contaminating the entire supply.
Growth enhancers work particularly well with challenging species that naturally root slowly or unpredictably. After applying rooting hormone, we discard any excess to prevent chemical burn on delicate cutting tissue. This careful application ensures we get the benefits without risking damage to our propagation efforts.
Mastering Different Types of Cutting Techniques

Now that we’ve covered the essentials, let’s explore the exact cutting methods that’ll give you the best results for different plant types. Each technique targets plants at particular growth stages and seasons.
Softwood Cuttings for Quick Results
Softwood cuttings come from fresh, flexible new growth that we typically harvest in spring or early summer. These cuttings root faster than other types because the plant tissue is actively growing and more receptive to forming new roots.
We recommend taking cuttings that are 4 to 6 inches long, making our cut just below a node where roots develop most easily. Popular plants for this method include deciduous shrubs like hydrangeas, perennials such as lavender, and many flowering trees.
Rooting hormones can accelerate the process, though easy-to-root plants like coleus and mint often succeed without them. We prefer using a moist, well-draining medium like perlite or peat moss to prevent rot while encouraging healthy root development.
Success rates for softwood cuttings typically range from 70-90% when proper techniques are followed, making this our go-to method for beginners.
Hardwood Cuttings for Woody Plants
Hardwood cuttings require mature, firm woody stems that we collect during the dormant season from late autumn through winter. This method works exceptionally well for deciduous climbers, fruit trees, and established shrubs that don’t respond well to softwood techniques.
We select healthy, mature wood from the previous season’s growth, ensuring our cutting material shows no signs of disease or damage. These cuttings need several months to develop roots, but they’re incredibly effective for woody plants that prove challenging with other methods.
Deciduous trees like willows and poplars, along with shrubs such as roses and dogwoods, respond beautifully to hardwood propagation. We plant these cuttings in suitable growing medium and maintain consistent moisture throughout the rooting period.
Though hardwood cuttings root more slowly than softwood alternatives, they often produce stronger, more established root systems that transplant successfully.
Semi-Hardwood and Leaf Cuttings
Semi-hardwood cuttings bridge the gap between soft and hard techniques, taken in late summer to early autumn when current growth has partially matured. We look for stems that feel firm at the base while remaining soft at the tip.
This method suits many shrubs and trees that challenge other propagation approaches, including evergreens like azaleas and camellias. Heel cuttings, a specialized variant, include a small section of older bark tissue that enhances rooting success.
Leaf cuttings offer a unique approach for exact plants like begonias and various succulents. We use single leaves capable of generating both roots and shoots, watching as the original leaf typically disintegrates after the new plant establishes itself.
| Cutting Type | Best Season | Success Rate | Rooting Time |
|---|---|---|---|
| Softwood | Spring/Early Summer | 70-90% | 2-4 weeks |
| Hardwood | Late Autumn/Winter | 60-80% | 2-6 months |
| Semi-hardwood | Late Summer/Early Autumn | 65-85% | 4-8 weeks |
| Leaf | Year-round (species dependent) | 50-75% | 3-8 weeks |
Root cuttings represent the least common technique, using root sections taken during dormancy to produce new stems and complete root systems. We reserve this method for plants like oriental poppies and blackberries that propagate reliably through root division.
Taking Perfect Cuttings From Your Parent Plants

We’ve mastered the different cutting types, so now it’s time to focus on the art of taking perfect cuttings that’ll give our new plants the best possible start.
Proper Cutting Length and Angle Techniques
Stem cuttings perform best when we cut them to 4 to 6 inches in length. Position your cuts just below a leaf node, since this area contains the highest concentration of growth hormones needed for root development. Make your cuts at a clean angle rather than straight across to increase the surface area available for rooting and prevent water from pooling on the cut surface.
Leaf cuttings require us to take either the entire leaf or exact sections depending on the plant species. Succulents like jade plants need whole leaves, while begonias can be propagated using leaf sections. Always select healthy, mature leaves that show no signs of damage or disease.
Root cuttings should measure 2 to 4 inches in length for optimal results. Cut these segments during the dormant season when the parent plant stores maximum energy in its root system. Mark the top and bottom of each root cutting to ensure proper planting orientation.
Preparing Cuttings for Optimal Root Development
Remove all leaves from the lower portion of stem cuttings to prevent rotting and reduce moisture loss. Keep 2 to 4 leaves at the top of the cutting to maintain photosynthesis while the roots develop. Strip away any flowers or buds since these drain energy from root formation.
Dip the cut end in rooting hormone to stimulate faster root growth and increase success rates. Recent research shows that innovative hormone combinations and nanoparticle delivery methods can boost rooting efficiency by up to 30%. Apply the hormone powder or gel evenly to the bottom inch of the cutting.
Place prepared cuttings in sterile, well draining rooting medium immediately after treatment. Mix equal parts peat moss and perlite for an ideal growing environment, or use clean water for plants that root easily in liquid. Maintain humidity levels around 70 to 80% using plastic covers or humidity domes.
Position cuttings under indirect light or artificial LED lighting with the appropriate spectrum for root development. Full sun can stress newly cut plant material, while insufficient light slows the rooting process. LED grow lights with both red and blue wavelengths provide consistent results year round.
Timing Your Cuts for Maximum Success
Spring and early summer offer the best timing for most cutting propagation since plants are actively growing. Cell division happens rapidly during these months, which accelerates root formation and increases our success rates significantly. Take softwood cuttings during this peak growth period for fastest results.
Semi hardwood cuttings root more successfully when taken later in the growing season. Late summer to early autumn provides the ideal window for these partially mature stems. The wood has begun to harden but still contains enough active growth hormones for root development.
Leaf cuttings should be collected when parent plants are healthy and unstressed. Avoid taking leaf cuttings during flowering periods or extreme weather conditions. Well hydrated plants in moderate temperatures produce the strongest cutting material.
Understanding each species’ growth cycle helps us time our propagation efforts perfectly. Deciduous plants root best during their active season, while evergreens can often be propagated throughout most of the year. Research your exact plant varieties to identify their optimal cutting windows.
Creating the Ideal Environment for Root Development

Once you’ve mastered cutting techniques, establishing optimal environmental conditions determines whether your propagation efforts succeed or fail. We’ll explore the four critical factors that transform fresh cuttings into thriving new plants.
Temperature and Humidity Requirements
Warm conditions create the foundation for successful root development, with most cuttings thriving between 65°F and 75°F (18°C to 24°C). These temperatures stimulate cell division and encourage rapid root initiation, making warmth your most powerful ally in the propagation process.
High humidity levels around 80-90% become essential since cuttings lack root systems to absorb water from soil. We maintain this moisture by covering cuttings with plastic bags or placing them under humidity domes, creating mini greenhouses that prevent water loss through transpiration.
Balance remains crucial when managing moisture levels, as excessive wetness invites fungal infections that can destroy entire batches of cuttings. Keep your rooting media damp but never waterlogged to ensure healthy development.
| Environmental Factor | Ideal Range | Primary Purpose |
|---|---|---|
| Temperature | 65°F – 75°F (18°C – 24°C) | Stimulate root formation |
| Humidity | 80-90% | Reduce water loss from cuttings |
Light Conditions for Propagating Plants From Cuttings
Bright, indirect light provides the perfect balance for most stem and leaf cuttings, supporting photosynthesis without causing dehydration. Direct sunlight can quickly desiccate delicate cuttings, while insufficient light slows root development and weakens overall growth.
Placement near east-facing windows or under grow lights positioned 12-18 inches away delivers optimal illumination for rooting success. We avoid south-facing windows during peak afternoon hours when intense rays can damage vulnerable cutting tissues.
Root cuttings follow different light requirements since they develop underground and can remain in darkness until new shoots emerge. This unique characteristic allows us to store root cuttings in cool, dark spaces while they establish their initial root systems.
Ventilation and Air Circulation Needs
Good air circulation prevents the fungal and bacterial diseases that commonly destroy cutting propagation projects. Gentle airflow reduces excess moisture on leaves and stems, creating an environment where healthy roots can develop without competition from harmful pathogens.
We achieve proper ventilation by slightly opening plastic covers or using small fans to circulate air without drying out our cuttings. This delicate balance maintains humidity while preventing stagnant conditions that encourage disease growth.
Sterilized cutting tools become mandatory for preventing disease transmission between plants, as contaminated equipment can introduce pathogens that spread rapidly in warm, humid propagation environments. Clean cuts made with sharp, sterile blades heal faster and root more successfully than ragged wounds from dull tools.

Choosing the Best Rooting Methods for Your Cuttings

Selecting the right rooting method directly impacts our propagation success rates and determines how well our new plants establish themselves. We’ll explore three primary approaches that cater to different plant types and gardening preferences.
Water Propagation Techniques
Water propagation offers the simplest entry point for beginners wanting to watch root development unfold before their eyes. We place our 4 to 6 inch cuttings in clean water containers, ensuring the bottom nodes remain submerged while leaves stay above the waterline. Many houseplants like pothos, coleus, and begonias thrive with this method, often showing visible roots within 7 to 14 days.
But, water rooted systems tend to produce weaker root structures compared to soil grown alternatives. Roots that develop in water differ structurally from those formed in growing medium, which can affect how successfully we transplant our new plants later. We recommend changing the water every few days to prevent bacterial growth and maintain oxygen levels essential for healthy root formation.
Soil-Based Rooting Systems
Soil based rooting systems consistently produce the most robust root networks for long term plant success. We use soil-less potting media containing peat moss, perlite, vermiculite, or sand to create optimal drainage and aeration conditions. These materials prevent the waterlogged environments that often cause cutting rot while maintaining adequate moisture levels.
Cuttings rooted in these systems develop stronger, more fibrous root structures that transition seamlessly to normal growing conditions. We maintain consistent moisture without oversaturation, checking the medium daily and misting when the surface feels dry. Adding rooting hormone to our cutting ends accelerates root development, especially for challenging species like citrus that naturally resist propagation efforts.
Alternative Growing Mediums
Alternative mediums expand our propagation toolkit beyond traditional water and soil options. Moist sawdust stored at cool temperatures around 40°F works exceptionally well for hardwood cuttings that need extended dormancy periods before active rooting begins. We store these cuttings for several weeks in the sawdust medium, allowing callus formation that precedes root development.
Coconut coir, moss, and even paper towel methods serve exact propagation needs depending on plant species and available resources. We’ve found that combining these alternative approaches with appropriate humidity control and rooting hormones enhances our overall success rates across diverse plant varieties.

Monitoring and Caring for Your Developing Cuttings

Once we’ve placed our cuttings in their ideal rooting environment, our focus shifts to providing consistent care that nurtures healthy root development.
Watering Schedules and Moisture Control
Maintaining consistent moisture without waterlogging requires careful attention to our rooting medium’s condition. We recommend using pre-moistened, well-draining materials like soil-less potting mix, perlite, vermiculite, sand, or sphagnum moss to prevent root rot while supporting healthy development.
Daily monitoring helps us determine when our cuttings need water. We check the medium’s surface each day and water gently when it begins to dry, ensuring we never allow complete dehydration or oversaturation.
Humidity retention becomes easier when we cover our cuttings with clear plastic bags or place them under bell jars. This technique reduces water loss from leaves and stems while creating the moist environment roots need to form.
Gentle watering techniques prevent disturbing developing roots. We use a spray bottle or watering can with a fine rose attachment to deliver moisture without creating soil displacement around delicate cutting bases.
Signs of Successful Root Development
New root growth typically appears near the base of our cuttings, especially around nodes where leaves attach to stems. We look for small, white root tips emerging from these areas as the first sign of successful propagation.
Resistance when tugging gently indicates our cutting has developed anchoring roots. We test this carefully by giving the cutting a very light pull – if it feels firmly attached to the medium, roots are establishing themselves.
Fresh leaf or stem growth from cutting tips or nodes signals that roots are supporting the plant’s nutritional needs. This new growth appears bright green and healthy, showing our cutting is transitioning from dependent to independent.
Rooting timelines vary significantly by plant species and cutting type. Most cuttings develop roots within 2-8 weeks, though we can accelerate this process using rooting hormones, particularly for slow-rooting plants like citrus.
Troubleshooting Common Problems
Rot and fungal infections occur when we maintain overly wet conditions around our cuttings. We combat this by improving drainage in our rooting medium and reducing watering frequency while ensuring adequate air circulation.
Failure to root often results from using old or damaged cutting material, incorrect cutting sizes, or inadequate environmental conditions. We ensure our cuttings measure 4-6 inches in length and come from healthy parent plants with proper humidity and warmth.
Weak, lanky growth develops when we use cuttings that are too large or taken from inappropriate stem maturity. We select softwood, semi-ripe, or hardwood cuttings based on the exact species and current growing season.
Pest and disease issues require regular inspection and prompt removal of affected material. We examine our cuttings weekly for signs of insects, discoloration, or unusual growth patterns that might indicate problems requiring immediate attention.
Transplanting Successfully Rooted Cuttings

Once we’ve successfully nurtured our cuttings through the rooting phase, the next crucial step involves moving them to their permanent homes where they’ll continue to thrive.
When to Move Cuttings to Permanent Containers
Timing becomes critical when deciding to transplant our rooted cuttings. We need to look for healthy white roots that measure approximately 1-2 inches long, which typically develop several weeks after initial rooting begins. Different plant types require varying amounts of time to establish sufficient root systems for transplanting.
Herbaceous plants generally develop transplant-ready roots during spring or summer when they’re actively growing. Woody plant cuttings require more patience, as their rooting process extends from late summer through autumn. Species variation plays a important role in determining the exact timeline for each cutting type.
Visual inspection helps us confirm readiness for transplanting. Strong, visible root development indicates our cuttings have established the foundation needed for successful container life. We shouldn’t rush this process, as premature transplanting can shock developing plants and reduce survival rates.
Soil Preparation and Potting Techniques
Preparing the right growing medium sets our transplanted cuttings up for long-term success. We should create a soil-less potting mixture using materials like perlite, vermiculite, sand, or sphagnum moss that provides excellent drainage and aeration. Heavy garden soils retain too much moisture and can cause devastating root rot in our newly transplanted cuttings.
Pre-moistening our potting medium before use maintains appropriate moisture levels without creating waterlogged conditions. Container selection requires drainage holes to prevent water accumulation that damages sensitive root systems. Sharp tools help us remove cuttings from their rooting medium without damaging delicate root structures.
Gentle handling preserves the integrity of root balls during the transplanting process. We need to keep root systems intact to minimize transplant shock that can set back plant development. Proper firming of the potting medium around our cuttings provides stability without compacting the soil and restricting root growth.
Hardening Off New Plants
Gradual acclimatization prepares our transplanted cuttings for outdoor life through a process called hardening off. We begin this 1-2 week transition by placing plants in shaded, protected locations away from harsh environmental conditions. Progressive exposure to increasing amounts of sunlight, wind, and temperature variations strengthens our new plants.
Starting locations should offer protection from direct sunlight and strong winds while allowing some environmental exposure. Daily movement to slightly more challenging conditions builds plant resilience without overwhelming their developing systems. Each day brings slightly more direct sunlight and less shelter from natural elements.
Final positioning in full outdoor conditions marks the completion of our hardening off process. This careful transition reduces transplant shock and improves survival rates when we plant our cuttings in their permanent outdoor locations. Strengthened plants adapt more successfully to their new environments and establish robust growth patterns.

Conclusion
Propagating plants from cuttings opens up a industry of possibilities for expanding your garden without very costly. We’ve covered everything from selecting the right cutting materials to creating optimal growing conditions and successfully transplanting your new plants.
The journey from cutting to thriving plant requires patience and attention to detail but the rewards are immense. You’ll develop a deeper understanding of plant biology while building confidence in your gardening abilities.
Remember that each plant species has its own preferences and timing. Start with beginner-friendly varieties to build your skills before tackling more challenging specimens.
With these techniques in your gardening toolkit you’re ready to multiply your favorite plants and share the joy of gardening with others. Your cutting collection will soon become a source of pride and endless green possibilities.
Frequently Asked Questions
What are plant cuttings and how do they work?
Plant cuttings are pieces taken from a healthy parent plant that are encouraged to develop their own root system. The cutting uses stored energy and nutrients to grow new roots, eventually becoming an independent plant identical to its parent. This natural propagation process works because many plants have the ability to regenerate from stem, leaf, or root sections.
What types of cuttings can I take from plants?
There are five main types of cuttings: softwood (new spring growth), hardwood (dormant woody stems), semi-hardwood (partially mature stems), leaf cuttings (individual leaves), and root cuttings (sections of roots). Each type works best for different plants and seasons, with softwood cuttings being most common for houseplants and herbaceous perennials.
Which plants are easiest for beginners to propagate from cuttings?
Beginner-friendly plants include pothos, coleus, mint, basil, geraniums, and rubber plants. These species have high success rates (80-95%) and root quickly, usually within 2-4 weeks. They’re forgiving of mistakes and often root successfully in just water, making them perfect for learning basic propagation techniques.
What’s the best rooting medium for plant cuttings?
Water propagation is easiest for beginners as you can see root development, but soil-based mediums create stronger root systems. A well-draining potting mix or alternatives like coconut coir, perlite, or moist sawdust work well. The key is maintaining consistent moisture while preventing waterlogged conditions that cause rot.
How long does it take for cuttings to develop roots?
Rooting time varies by plant type and conditions. Fast-rooting plants like pothos and willow show roots in 1-2 weeks, while most common houseplants take 2-4 weeks. Woody plants and slower species may need 6-8 weeks or longer. Warm temperatures, high humidity, and proper light accelerate the process.
What environmental conditions do cuttings need to root successfully?
Cuttings need four key conditions: warm temperatures (65-75°F), high humidity (80-90%), bright indirect light, and good air circulation. These conditions stimulate root formation while preventing dehydration and disease. A covered propagation tray or humidity dome helps maintain these optimal conditions for most cuttings.
When should I transplant rooted cuttings to permanent pots?
Transplant when roots are healthy, white, and 1-2 inches long, typically after 3-6 weeks. Look for new leaf growth as another indicator of strong root development. Use a well-draining potting mix and handle gently to avoid damaging delicate new roots during the transition process.
What is hardening off and why is it important?
Hardening off is gradually acclimatizing new plants to outdoor conditions over 1-2 weeks. Start with short periods in shade, slowly increasing sun exposure and outdoor time. This process reduces transplant shock and improves survival rates by helping plants adapt to temperature fluctuations, wind, and direct sunlight gradually.
What are common problems when propagating cuttings?
Common issues include root rot from overwatering, failure to root due to poor conditions, and pest problems like fungus gnats. Prevention involves using sterile tools, maintaining proper moisture levels, ensuring good drainage, and providing optimal temperature and humidity. Remove any rotting material immediately to prevent spread.
Do I need rooting hormone for successful propagation?
While not always necessary, rooting hormone significantly improves success rates, especially for difficult-to-root plants. It speeds up root development and increases the percentage of cuttings that successfully root. Natural alternatives like willow water or honey can also provide rooting benefits for organic gardeners.