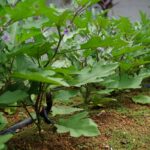
Keep your shamrock healthy by giving it bright indirect light to prevent it from getting leggy and stretching out. Use soil that drains well, and water only when the top inch feels dry to the touch.
Your shamrock needs cool nights between 50–65°F to set flowers. You’ll also notice that a 1–3 month dormancy period, where leaves turn yellow, means the plant is actually getting ready to bloom. This rest phase is totally normal and necessary.
During the growing season, feed your plant every 2–3 weeks. Remove any dead leaves right away since they can attract pests. Every couple of years, move your shamrock to a bigger pot once you see roots circling the bottom.
Different shamrock varieties have their own specific preferences, which is why some do well in your care while others struggle. Check what type you have so you can adjust conditions to match what it actually needs.
Light Requirements for Healthy Shamrock Growth

Where you place your shamrock plant in your home matters a lot. These indoor varieties of Oxalis need good light to develop into compact plants with flowers instead of tall, thin stalks that show up when there isn’t enough light.
Your best approach is to give your shamrock bright indirect light. Position it where it gets filtered sunlight throughout the day. Morning sun actually helps strengthen the plant’s growth, but afternoon sun can burn the delicate leaves. Pay attention to this timing difference.
If your shamrock starts looking leggy and stretched out, that’s a sign it’s not getting enough light or warmth. When your plant goes dormant during certain seasons, you can dial back the light intensity a bit. Your shamrock’s needs change with the seasons, so adjust accordingly.
Pick the Right Soil to Prevent Root Rot
You’ll want to use a well-draining potting mix—something like a general houseplant blend or a custom combination of peat, perlite, and potting soil. This foundation keeps excess water from pooling around your shamrock’s roots and causing root rot, which turns leaves yellow and mushy.
The real work happens after you choose your initial soil. You need pots with adequate drainage holes and should avoid soil that stays soggy, especially during cooler months when your plant needs less water. Every couple of years, repot your shamrock with fresh, aerated soil. This refreshes the growing medium and prevents compaction that gradually suffocates roots and messes with both moisture control and nutrient availability.
Well-Draining Soil Composition
Why does soil matter so much for shamrocks? You’re cultivating a plant that won’t tolerate waterlogged conditions, so your potting mix becomes the foundation of success. A well-draining soil composition—blending peat, perlite, and potting soil—creates the airy structure shamrocks need.
Here’s what’s actually happening: the perlite particles create air pockets that prevent water from pooling around roots, while peat provides moderate moisture retention without becoming soggy. Your pot needs drainage holes too, which work alongside quality soil to channel excess water away swiftly. Heavy soils might seem stable, but they actually suffocate roots and invite fungal problems.
When you’re shopping for potting mix, look for one specifically formulated for drainage. This deliberate choice keeps your shamrock from struggling with overwatering issues that plague so many indoor growers.
Preventing Root Rot Issues
Root rot, that silent killer of otherwise healthy shamrocks, stems almost entirely from one culprit: soil that holds too much moisture around the roots. You’ll prevent this devastating condition by selecting a well-draining potting mix. Combine peat, perlite, and potting soil in proportions that allow water to move through rather than pool.
Your shamrock plant demands a pot with drainage holes—non-negotiable infrastructure that lets excess water escape before it settles around the root system. The goal isn’t keeping soil perpetually wet but maintaining that moderate moisture sweet spot where your shamrock can function well.
During cooler months or dormant periods, you’ll reduce watering frequency since your plant requires less moisture at these times. When roots eventually outgrow their container, refresh the soil entirely with that same well-draining mix to restore your plant’s foundation for healthy growth.
Repotting With Proper Mix
Selecting the right soil mix is your first step once you’ve decided to repot your shamrock. A well-draining medium does something that careful watering alone can’t—it lets water move through the soil instead of pooling around the roots. For your shamrock plant, mix together peat, perlite, and potting soil in amounts that prioritize drainage while still keeping some moisture in the soil.
When you’re ready to repot, pick a container only slightly larger than the old one. Too much extra soil creates waterlogging problems and encourages root decay. Plant each tuber in its own pot with fresh, well-draining soil. This keeps the tubers from competing with each other and reduces the chance of rot.
The combination of good soil composition and the right pot size matters. You’re not just doing a necessary chore—you’re making choices that actually support your plant’s health.
Watering Without Overwatering: Find the Balance
Understanding your shamrock’s soil moisture is the main way to prevent root rot. Before watering, check the top inch of soil—if it’s dry, it’s time to water. Your goal is to keep the soil consistently moist without letting it become waterlogged.
The drainage hole in your pot matters more than you might think. It’s your first line of defense against water sitting in the soil too long and suffocating the roots. After watering, always empty any water that collects in the saucer below. Standing water creates the perfect conditions for fungi and decay to develop.
Your watering schedule needs to shift with the seasons. During cooler months or when your shamrock goes dormant, water less frequently and let the soil dry out a bit more between waterings. This seasonal adjustment prevents the yellowing leaves and wilting stems that come from overwatering.
Understanding Soil Moisture Levels
How do you know when your shamrock is actually thirsty rather than just looking droopy? You need to develop a feel for what your plant needs, and you’ll get better at this through watching it closely and trying different approaches. Since your shamrock stores moisture in its tubers, you don’t want soil that’s constantly wet. Instead, aim for that moderate spot where the top inch of soil dries out between waterings.
To check how moist your soil is, stick your finger about an inch deep into it. If it feels dry, water thoroughly until water comes out of the drainage holes, then stop. That’s it.
| Moisture Indicator | What It Means | Your Action |
|---|---|---|
| Dry top inch | Plant needs water | Water thoroughly |
| Moist throughout | Adequate hydration | Hold off watering |
| Soggy, compacted soil | Overwatering occurring | Reduce frequency |
| Yellow leaves | Root stress developing | Improve drainage |
| Wilting despite moisture | Possible root rot | Repot with fresh soil |
The key is not overthinking this. Your shamrock will show you what it needs if you pay attention. When leaves start turning yellow or the soil feels mushy, you’ve watered too much—cut back on how often you water and make sure your pot has good drainage. If you notice wilting even when the soil is moist, root rot might be setting in, and you’ll need to repot the plant in fresh, dry soil to save it.
Preventing Root Rot Problems
Shamrocks can seem paradoxical—they’re pretty tough plants overall, but root rot takes them down fast. The issue comes down to one thing: they need moisture without waterlogging. You’re looking for that sweet spot between dry and soggy.
Your soil matters most here. Use a peat-perlite-potting soil blend because it lets water drain through instead of pooling at the roots. Make sure your pot has plenty of drainage holes, since standing water suffocates roots within days. When you water, keep it shallow and focus on the top layers rather than soaking the whole pot.
The timing comes down to checking your soil regularly. Water when the top inch feels dry to your touch, but adjust based on the season—shamrocks need less water when they’re dormant and more during active growth. Watch for yellowing leaves, which means you’re watering too much. If you see that happening, cut back right away to let the roots recover. This balance between proper drainage and careful watering is what saves your shamrock from rot.
Why Cooler Nights Trigger Better Blooming

If you’ve ever wondered why your shamrock plant suddenly bursts into flower during certain seasons, the answer lies in something straightforward: temperature fluctuation. Specifically, the drop that happens when evening arrives makes the real difference.
Cool nights—ideally between 50–65°F—signal your shamrock to start flowering. This is more reliable than any other single factor you can control. When you pair these cool nights with daytime temperatures kept below 75°F, you create a temperature differential that redirects your plant’s energy away from vegetative growth toward flower production. The result is denser, more abundant blooms that last longer than what you’d get without this temperature shift.
Essentially, this cool-night environment tells your plant that conditions favor reproduction. When you maintain this temperature pattern consistently, you’re not just encouraging flowers to appear. You’re also extending how long they stick around, giving you that sustained display that makes shamrock plants worth the effort to cultivate.
The Best Fertilizer Schedule for Spring and Summer

When you’re fertilizing your shamrock during spring and summer, a balanced liquid fertilizer applied every few weeks works well while the plant is actively growing new leaves and flowers. The important part—something I learned from early mistakes—is diluting the fertilizer to about half the strength listed on the bottle. Your shamrock has sensitive roots, so this dilution prevents fertilizer burn while still getting the nutrients where they need to go.
Pay attention to your plant’s growth patterns, though. Once you notice growth slowing down or leaves dropping, that’s your signal to stop feeding altogether. Your shamrock has entered dormancy at that point and doesn’t need the extra nutrients.
Balanced Liquid Fertilizer Application
When you’re keeping your shamrock plant healthy during its active growing months, a balanced liquid fertilizer applied every few weeks is your most reliable tool. The real skill isn’t just sticking to a schedule—it’s understanding how dilution, timing, and application method work together to avoid nutrient burn.
Start by diluting your fertilizer to half-strength and follow the label directions exactly. Shamrock plants have delicate foliage that can’t handle full-strength solutions. When you’re ready to apply, make sure the soil is moist but not waterlogged, then direct the solution toward emerging leaves and potential blooms. This restrained approach keeps your plant healthy without the risk of overfeeding.
Growing Season Feeding Frequency
How often you feed your shamrock plant during its active growing months—spring and summer—makes a real difference in how well it grows and blooms. When you’re intentional about when and how much you fertilize, you get better results than when you guess or feed randomly.
| Feeding Frequency | Plant Response |
|---|---|
| Every 2 weeks | Optimal growth, full foliage |
| Every 3 weeks | Steady, moderate growth |
| Weekly | Risk of nutrient burn |
| Monthly | Insufficient nutrients |
| As needed | Inconsistent results |
Here’s what works: dilute your fertilizer to the strength listed on the label and never go stronger. Feed every two to three weeks depending on how vigorous your shamrock looks and what you observe about its growth. Your plant does better with steady, regular feeding than with heavy doses. This approach keeps both the foliage and blooms looking good while protecting against the damage that comes from over-fertilizing.
How Shamrock Leaves Close at Night (and Why)

Your shamrock plant has a pretty neat trick you might catch if you pay attention. Those three leaflets fold up as the sun sets, then open back up when morning arrives. This happens because of your plant’s internal clock and how it responds to light—not because it’s making a choice.
Scientists call this leaf-folding nyctinasty, which is basically the technical name for how plants sleep. Shamrocks, which are a type of Oxalis plant, developed this movement over time as a way to protect themselves. When your home gets cooler at night and the lights dim, the leaves fold more tightly. This tight folding does two things: it cuts down on water loss and shields the delicate leaf surfaces from getting damaged.
If you see your shamrock doing this, it’s not struggling or unhappy. It’s just following its natural instincts. You can actually use this behavior as a clue that your plant conditions are pretty good—the folding means your shamrock recognizes the shift between day and night like it’s supposed to.
Remove Dead Foliage to Keep Plants Tidy
Eventually, you’ll notice that your shamrock’s leaves—despite all your careful attention to watering and light—will begin to yellow, wilt, or brown at the edges. When this happens, regular maintenance becomes essential to keeping your plant both attractive and healthy.
Pruning dead foliage isn’t just about making your shamrock look better. It’s also preventive care that protects your plant from disease and pest infestations. Dead leaves create spaces where problems can develop, so removing them early stops issues before they spread.
Pruning dead foliage prevents disease and pest problems by removing spaces where issues can develop and spread.
When you’re ready to prune, use clean, sharp scissors to make precise cuts at the stem base. This matters because dull blades can damage the plant tissue and create openings for disease. Remove any leaves that are wilting or browning right away rather than waiting to see if they recover on their own.
One thing to keep in mind: avoid removing healthy leaves during active growth periods. Your shamrock needs those leaves to produce energy through photosynthesis, so you’re actually helping the plant recover faster by leaving them alone. After you finish pruning, monitor your soil moisture closely. Your plant will need consistent watering as it directs energy toward new growth and healing.
This straightforward practice, maintained consistently, prevents the buildup of dead foliage that creates problems down the line.
When and How to Repot Root-Bound Shamrocks
Your shamrock needs repotting when you notice roots coming out of the drainage holes, slower growth even with proper care, and soil that dries much faster than usual. These signs tell you it’s time to move your plant into a container that’s only slightly larger than its current pot and fill it with fresh, well-draining potting mix.
When you pick a new pot, make sure it has drainage holes and isn’t too much bigger than the old one. Extra soil around your plant holds onto moisture, which increases the risk of root rot—something worth avoiding. I’ve dealt with this problem myself, and it’s easier to prevent than to fix.
You have another option beyond just repotting. If your shamrock’s bulbs are crowded together, you can divide them or separate a few to start new plants. This approach lets you refresh your original plant and expand your shamrock collection without spending extra money.
Signs Of Root-Bound Plants
How do you know when your shamrock has outgrown its container? Several clear signs tell you it’s time to repot into fresh soil and a larger pot.
Watch for these indicators:
Roots poking out of the drainage holes are your first clue that the root system needs more room. You might also notice your plant’s leaves looking pale or growth slowing down, even though you’re providing the right light and watering consistently. When you water your shamrock, does the water just run straight through without soaking in. That happens when roots pack so densely they block water absorption.
Finally, gently tug your plant from the pot. If you see a tight, circular root ball pressed against the pot’s sides, or roots coiling tightly around themselves, repotting is overdue. When roots slip out easily during handling, that’s another clear signal.
A root-bound plant won’t recover on its own, so addressing this situation quickly matters. Getting your shamrock into a roomier container with fresh soil restores normal growth and gets your plant back on track.
Choosing The Right Container
When you’re ready to move your shamrock to a larger pot, pick one that’s only an inch or two bigger than the current root ball. This size gives your roots space to grow without leaving you with too much extra soil that stays soggy and causes rot.
Make sure your pot has drainage holes—these are your best defense against waterlogging and root problems. Pair a pot with good drainage with a potting mix designed to drain well. Together, these two things give your shamrock what it needs to adjust to its new home and stay at the right moisture level between waterings.
This balanced approach keeps you from making two common mistakes: cramming your plant into a space that’s too tight or giving it way too much room.
Division And Bulb Propagation
Every couple of years, when your shamrock’s roots start circling the pot in that telltale root-bound pattern, it’s time to repot. This maintenance task also gives you a perfect chance to propagate new plants through division.
During repotting, you’ll separate the bulbs or clumps so that each new section has roots attached. Here’s what to do:
- Gently loosen the root mass, being careful not to damage the roots unnecessarily
- Divide the plant into sections, making sure each piece has an established root system
- Plant each division in its own pot with light, well-draining potting mix
- Water thoroughly after planting to settle the soil
After that, return your new plants to bright indirect light and keep the soil moderately moist. Division is a straightforward way to expand your collection while taking care of routine plant maintenance.
Multiply Your Shamrocks by Dividing Tubers

As your shamrock plant gets bigger and its roots start cramping together, division is a practical way to multiply your plants. During repotting, you can gently separate the tubers and create several new plants from one mature one.
Here’s what you need to do: Carefully tease apart the root clumps so each section has healthy roots and at least one growing bud. This gives your new plants the best shot at survival. Place each divided section just below the soil surface in well-draining soil, then water lightly.
Timing makes a real difference here. Divide your shamrocks during the growing season when they’re actively pushing out new growth. This speeds up how quickly they establish themselves in their new pots.
After you’ve divided them, put your new plants in bright, indirect light and keep the soil moderately moist. These conditions help your divided sections develop strong growth and get established as independent plants.
Summer Dormancy: What to Expect and How to Respond

Once you’ve successfully divided and repotted your shamrocks, you’ll likely encounter another phase of their growth cycle that catches many gardeners off guard: summer dormancy, a natural rest period your plants need to function well long-term.
When leaf dieback appears, you’re witnessing the beginning of this necessary phase. Here’s how to respond:
Stop watering and fertilizing immediately when dieback occurs. Your shamrocks are signaling they need a break from regular care, and continuing to water will only cause problems like root rot.
Move your plants to a cool, dark space for 2–3 months. Higher indoor temperatures can actually trigger dormancy, so if your home runs warm, find a cooler corner—a basement, closet, or unheated room works well. Your plants will naturally shed their leaves during this time, and that’s exactly what should happen.
Reintroduce your plants to sunlight and resume regular watering once dormancy ends. You’ll know it’s time when you see new growth emerging from the soil. This signals that your shamrocks are ready to get back to their normal routine.
This resting period isn’t a setback in your care routine. It’s actually your shamrocks preparing for a strong growth phase afterward. By respecting this cycle, you’re setting yourself up for better results in the seasons ahead.
Reviving Your Shamrock After Its Rest Period

How you handle those first weeks after dormancy will largely determine whether your shamrock bounces back strong or struggles through recovery. This is when paying close attention actually makes a difference. After your plant’s 2–3 month cool, dark rest, you’ll move it to a cooler, brighter location while keeping the soil slightly drier to encourage new growth to emerge.
| Phase | Action | Timeline |
|---|---|---|
| Transition | Move to bright, cool spot | Week 1 |
| Reactivation | Resume watering gradually | Weeks 2–3 |
| Growth | Light feeding begins | Week 3+ |
Once you see new leaves appearing, gradually return to regular watering and light feeding. Keep an eye on the foliage—yellowing leaves mean you were overwatering during the dormancy setup phase. When daytime temperatures consistently stay at or below 75°F, your shamrock should start producing flowers, which signals that you’ve successfully brought it out of dormancy.
Yellow Leaves and Wilting: What They Mean
Yellow Leaves and Wilting: What They Mean
Even after successfully bringing your shamrock out of dormancy, you’ll probably deal with yellow leaves or wilting at some point. These problems can seem like they contradict each other since they sometimes come from completely different causes. Figuring out what your plant is actually telling you makes a real difference in getting it back on track.
Yellowing leaves from overwatering****
Soft, mushy tissue paired with yellow leaves means you’re giving your shamrock too much water. When soil stays constantly wet, root rot develops and the plant can’t recover on its own.
Wilting problems
You might see wilting happen in two different situations. If your soil is moist but the leaves are still drooping, that’s actually overwatering stress—the roots can’t function properly when they’re sitting in soggy conditions. On the other hand, wilting with dry soil means your plant needs water right away and more humidity around it.
How to prevent these issues
Let the top inch of soil dry out between waterings, make sure your pot has drainage holes, and adjust how often you water depending on the season. During active growth, your shamrock needs more frequent watering than it does during dormancy.
Non-Blooming Shamrocks? Why Rest Periods Are Essential

Why aren’t your shamrocks flowering, despite your careful attention to watering and light? The answer often lies in a missing rest period, which these plants require to bloom successfully.
During dormancy, a 1–3 month phase, you’ll reduce watering and fertilizer significantly while keeping your shamrock in a cool, dark location. Your plant may shed leaves during this time—a natural response, not a cause for concern. Many gardeners interrupt this rest period through excessive watering or warmth, which prevents flowering from happening at all.
Once your shamrock completes its rest period, new foliage emerges and signals readiness for reintroduction to sunlight and regular watering schedules. This deliberate cycle, though requiring patience, directly supports the flowering you’ve been seeking.
Pests That Attack Shamrock Plants and How to Stop Them

Pests That Attack Shamrock Plants and How to Stop Them
Shamrock plants generally don’t get hit with the same heavy pest problems that bother other houseplants, but you shouldn’t let your guard down. Spider mites and similar small pests can still move in if the conditions suit them. The good news is that prevention comes down to understanding what makes your plants vulnerable in the first place.
Keep an eye out for yellowing or wilting leaves, since these signs usually point to either overwatering or a pest issue. The key is maintaining the right moisture level—too much water creates the fungal mold and rot that attract pests in the first place. At the same time, give your shamrock plenty of bright light. Strong light conditions keep your plant healthier overall and make it less attractive to pests.
If you do spot problems, move the affected plant away from your other plants right away. Treat the infested shamrock with insecticidal soap or horticultural oil, making sure to follow the label instructions exactly. These products work well when you use them correctly, and catching the problem early makes treatment much more effective.
Common Shamrock Varieties and Their Unique Needs

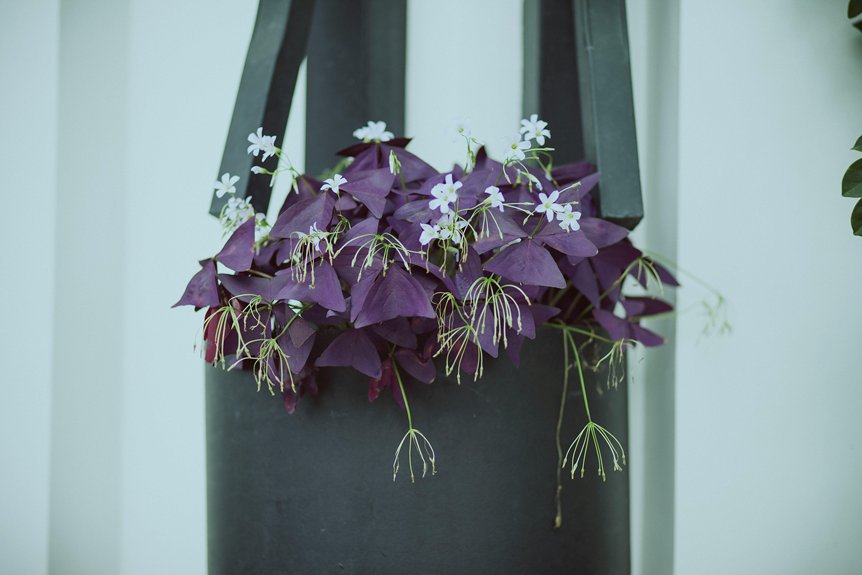
Once you’ve got the basics down—watering right and handling pests—knowing your shamrock’s specific variety really matters. True Oxalis indoor shamrocks come in different types with different looks. You’ll see flowers in white, lavender, pink, or yellow, and the foliage varies too. Each variety handles light and temperature changes in its own way.
Your shamrock will likely go dormant during summer when it gets hot. You’ll notice the leaves turn yellow, which is normal. When this happens, cut back on watering. Different varieties enter dormancy at different times, so pay attention to your plant’s signals and adjust your care based on what you see.
Most shamrock varieties have shallow root systems that actually prefer being a bit crowded in their pots. Resist the urge to move your plant to a larger container too often, since the roots do better in slightly tight conditions.